
All apps · 0 apps

steam-headless-secondary
Docker app from Josh.5's Repository
Overview
Headless Steam Service (Secondary)
This container relies on an existing working SteamHeadless running.
- Run a second (or third or fourth) instance of steam on the Steam Headless desktop.
- All the same features as Steam Headless accessed through an existing Steam Headless container
Each instance of this container should be run on a "Custom: br0" network and should be configured with a unique "Fixed IP address".
RUNNING MULTIPLE INSTANCES:Only one instance of Steam Headless can play a game at any time. If you start a second Remote Play link, it wil hijack the virtual monitor, and all input devices from the first one.
STORAGE PATHS:Everything that you wish to save in this container should be stored in the home directory or a docker container mount that you have specified. All files that are store outside your home directory are not persistent and will be wiped if there is an update of the container or you change something in the template.
GAMES LIBRARY:It is recommended that you mount your games library to /mnt/games/GameLibrary/SteamLibrary and configure Steam to add that path.
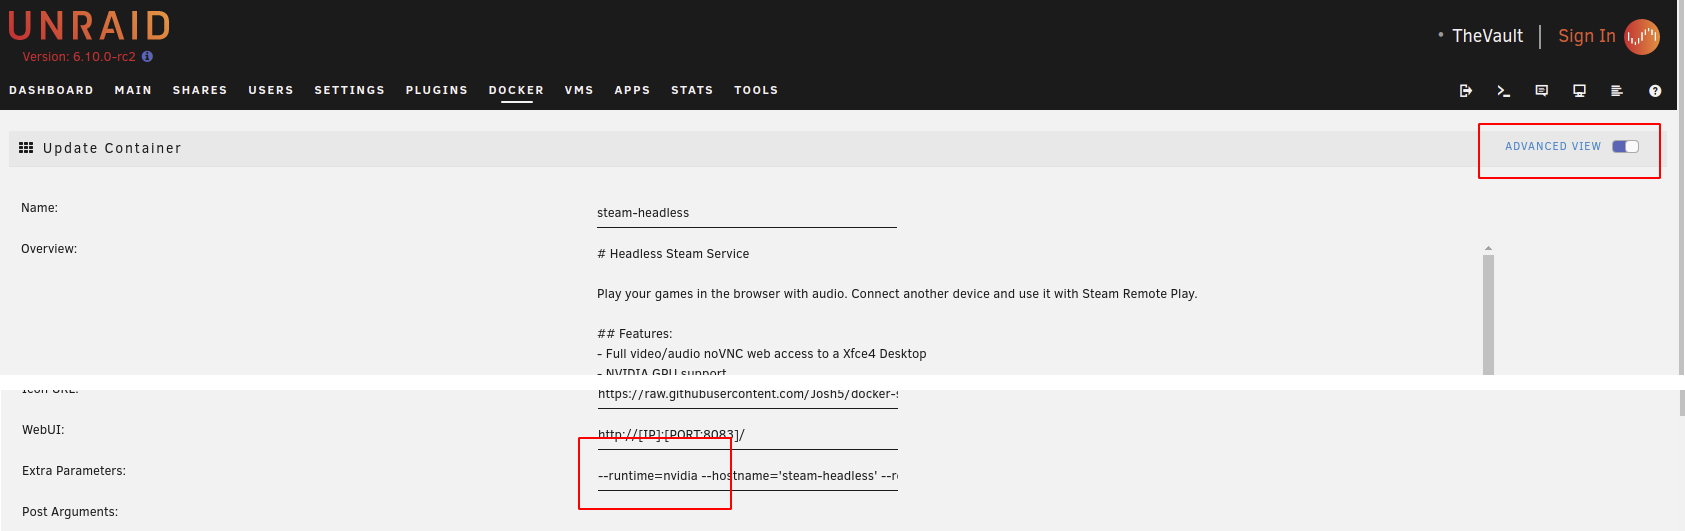
To enable NVIDIA GPU support, ensure that you have installed the Nvidia-Driver plugin and add the "--runtime='nvidia'" parameter added to "Extra Parameters:"
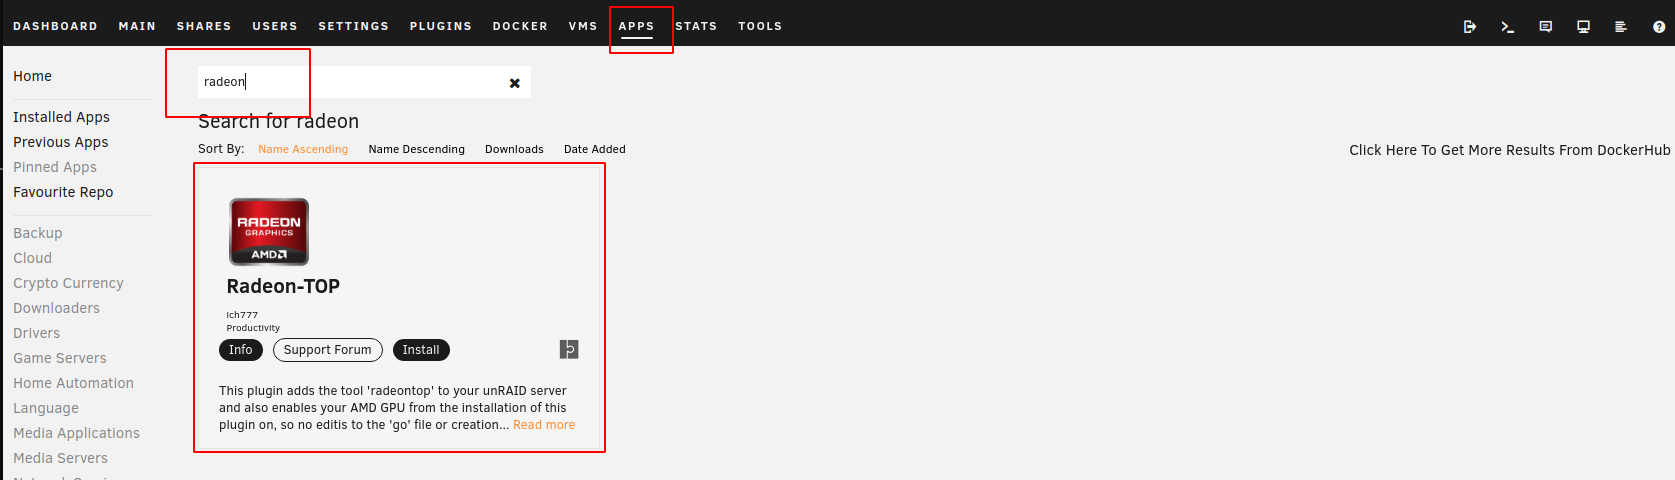
AMD GPU:To enable AMD GPU support, ensure that you have installed the Radeon-TOP plugin.
AMD OR INTEL HW ACCELERATED VIDEO ENCODING:To enable support for VAAPI HW Accelerated Video Encoding, add the "--device='/dev/dri'" parameter added to "Extra Parameters:"
Readme
View on GitHubUnraid
Follow these instructions to install Steam Headless on Unraid
CONTAINER TEMPLATE:
- Navigate to "APPS" tab.
- Search for "steam-headless"
- Select either Install or Actions > Install from the search result.
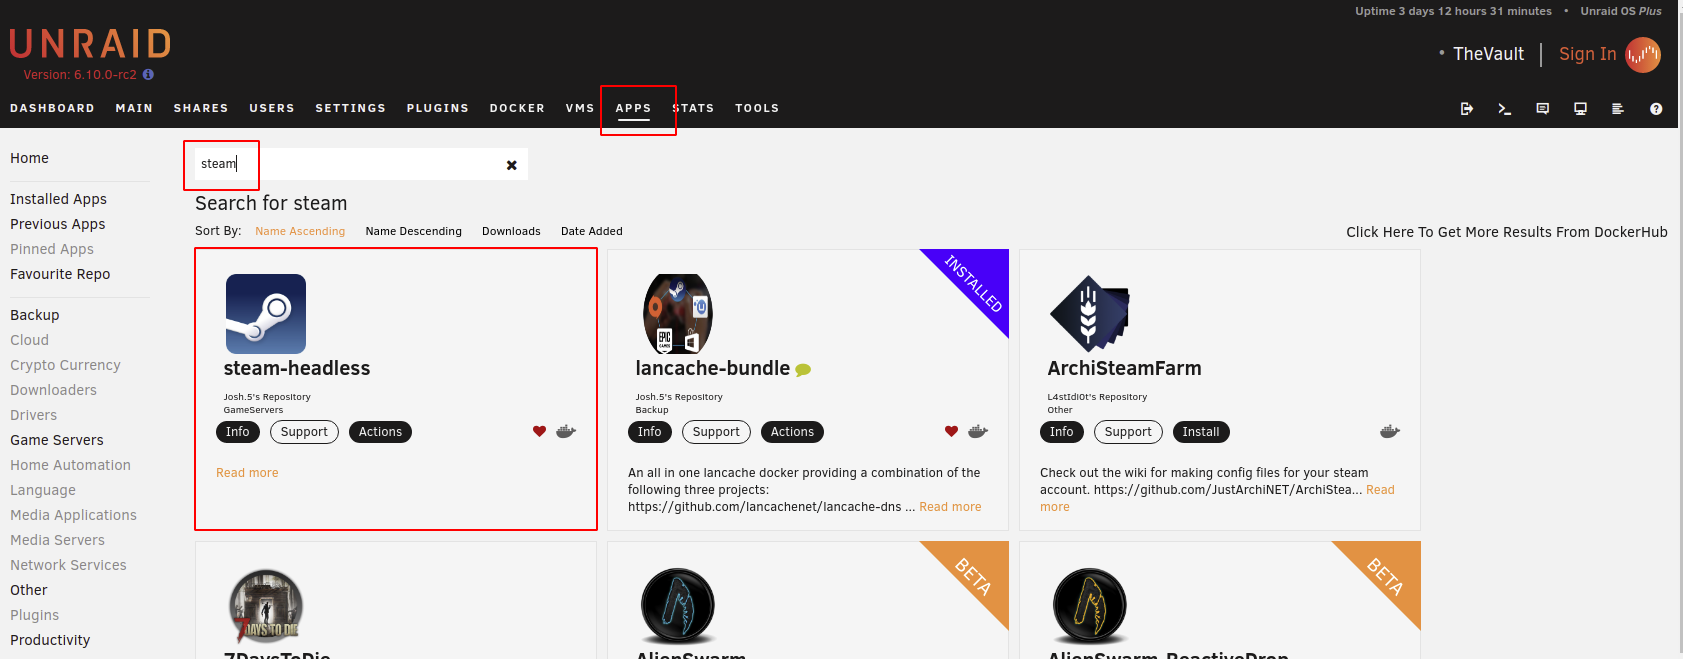
- Configure the template as required.
GPU CONFIGURATION:
This container can use your dedicated GPU. In order for it to do this you need to have either the Nvidia-Driver or Radeon-Top plugin installed.
NVIDIA
- Install the Nvidia-Driver Plugin by ich777. This will maintain an up-to-date NVIDIA driver installation on your Unraid server.
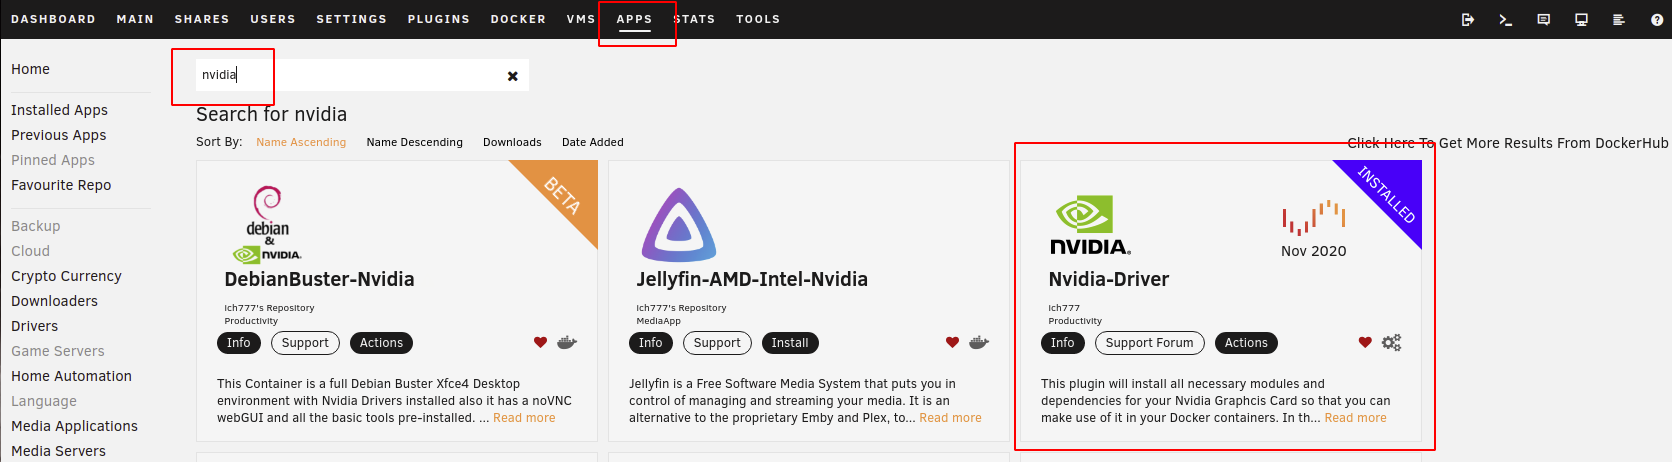
- Toggle the steam-headless Docker Container template editor to "Advanced View".
- In the "Extra Parameters" field, ensure that you have the "--runtime=nvidia" parameter added.
- (Optional - This step is only necessary if you only multiple NVIDIA GPUs. If you have a single GPU, then leaving this as "all" is fine.) Expand the Show more settings... section near the bottom of the template. In the Nvidia GPU UUID: (NVIDIA_VISIBLE_DEVICES) variable, copy your GPU UUID (can be found in the Unraid Nvidia Plugin. See that forum thread for details).
AMD
- Install the Radeon-Top Plugin by ich777.
- Profit
ADDING CONTROLLER SUPPORT:
Unraid's Linux kernel by default does not have the modules required to support controller input. Steam requires these modules to be able to create the virtual "Steam Input Gamepad Emulation" device that it can then map buttons to.
ich777 has kindly offered to build and maintain the required modules for the Unraid kernel as he already has a CI/CD pipeline in place and a small number of other kernel modules that he is maintaining for other projects. So a big thanks to him for that!
Note
This may no longer be required with Unraid v6.11 release (TBD). The required uinput module should be added to the kernel for that release.
Install the uinput plugin from the Apps tab.
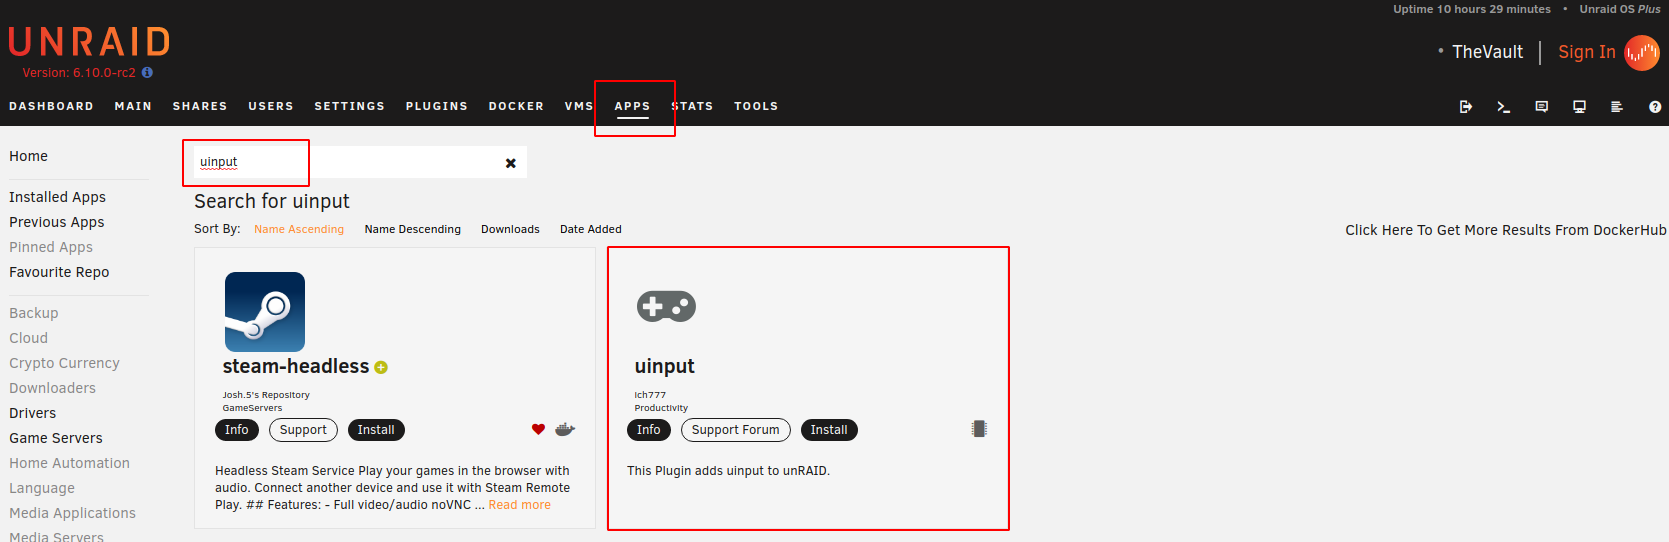
The container will not be able to receive kernel events from the host unless the Network Type: is set to "host". Ensure that you container is configured this way.

Warning
Be aware that, by default, this container requires at least 8083 available for the WebUI to work. It will also require any ports that Steam requires for Steam Remote Play.
You can override the default ports used by the container with these variables:
- PORT_NOVNC_WEB (Default: 8083)
- WEB_UI_MODE (Default: 'vnc' - Set to 'none' to disable the WebUI)
No server restart is required, however. Ensure that the steam-headless Docker container is recreated after installing the uinput plugin for it to be able to detect the newly added module.
Install steam-headless-secondary on Unraid in a few clicks.
Find steam-headless-secondary in Community Apps on your Unraid server, review the template, and click Install. Unraid handles the Docker app or plugin setup from the published template.
Requirements
Steam Headless
Categories
Download Statistics
Total Downloads Over Time
Related apps
Explore more like this
Explore allDetails
josh5/steam-headless:latestRuntime arguments
- Network
br0- Shell
bash- Privileged
- false
- Extra Params
--hostname='SteamHeadlessSecondary' --add-host='SteamHeadlessSecondary:127.0.0.1' --restart='unless-stopped' --shm-size='2G' -v '/tmp/.X11-unix/':'/tmp/.X11-unix/':'rw' -v '/tmp/pulse/':'/tmp/pulse/':'rw' -v '/dev/input/':'/dev/input/':'ro' -v '/run/udev/data/':'/run/udev/data/':'ro' --ulimit='nofile=1024:524288' --device='/dev/fuse' --device='/dev/uinput' --device-cgroup-rule='c 13:* rmw' --cap-add='NET_ADMIN' --cap-add='SYS_ADMIN' --cap-add='SYS_NICE' --security-opt='seccomp=unconfined'
Template configuration
Default user home directory. All application software and configuration will be saved into this directory. Any files saved outside of this path will be cleared if the container image this templated is updated.
- Target
- /home/default
- Default
- /mnt/user/appdata/steam-headless-secondary
- Value
- /mnt/user/appdata/steam-headless-secondary
Option path to your games. This path will need to also be configured in Steam after the first boot.
- Target
- /mnt/games
- Default
- /mnt/user/Games
- Value
- /mnt/user/Games
The password for this container. Note: This password will also be used for the root user. However, the default user has sudo access.
- Target
- USER_PASSWORD
- Default
- password
- Value
- password
Enter your local timezone. You can find a full list of supported timezones in: '/usr/share/zoneinfo' (eg: 'Etc/UTC' or 'Australia/Melbourne',...)
- Target
- TZ
- Default
- Pacific/Auckland
- Value
- Pacific/Auckland
Enter your prefered locales. You can find a full list of supported languages in: '/usr/share/i18n/SUPPORTED' (eg: 'en_US.UTF-8 UTF8' or 'de_DE.UTF-8 UTF-8',...)
- Target
- USER_LOCALES
- Default
- en_US.UTF-8 UTF-8
- Value
- en_US.UTF-8 UTF-8
For users with multiple GPUs, add the ID found under the
- Target
- NVIDIA_VISIBLE_DEVICES
- Default
- all
- Value
- all
- Target
- NVIDIA_DRIVER_CAPABILITIES
- Default
- all
- Value
- all
Set the X display. To use the host X server, set this to :0 (or whatever your host is currently running in /tmp/.X11-unix/X*)
- Target
- DISPLAY
- Default
- :55
- Value
- :55
Options: ['primary', 'framebuffer', 'secondary'].
- Target
- MODE
- Default
- secondary
- Value
- secondary