
All apps · 0 apps

shelly-manager
Docker app from jfmlima's Repository
Overview
Readme
View on GitHubShelly Manager
Local management for Shelly IoT devices without cloud connectivity.


Manage Shelly devices on your local network without connecting them to the Shelly Cloud. Scan for devices, update firmware, manage configurations, and monitor status - all locally.
Features
- Gen1 (legacy HTTP) and Gen2 (RPC) device support with automatic detection
- Device discovery using mDNS and Network Scanning
- Firmware update management (stable/beta channels)
- Firmware updates for devices with no internet access, served from the manager over the LAN
- Device configuration management with bulk export/apply
- Per-device configuration backup and restore with encrypted snapshots
- Scheduled backups with retention (keep last N, drop older than N days)
- Bulk operations across multiple devices
- Status monitoring
- Component action discovery and execution
- Dynamic device capability detection
- Component-specific controls (switches, covers, lights, etc.)
- Credential management for password-protected devices (Gen1 Basic Auth, Gen2 Digest Auth)
- Device provisioning via Access Point
Available as:
- Web interface
- Command line tool
- REST API
Roadmap
- Ensure RED compatibility - Ensure compliance with EU RED requirements for Shelly devices
- Bulk action scheduling - Schedule bulk operations to run at specific times or intervals
Screenshots
Dashboard Overview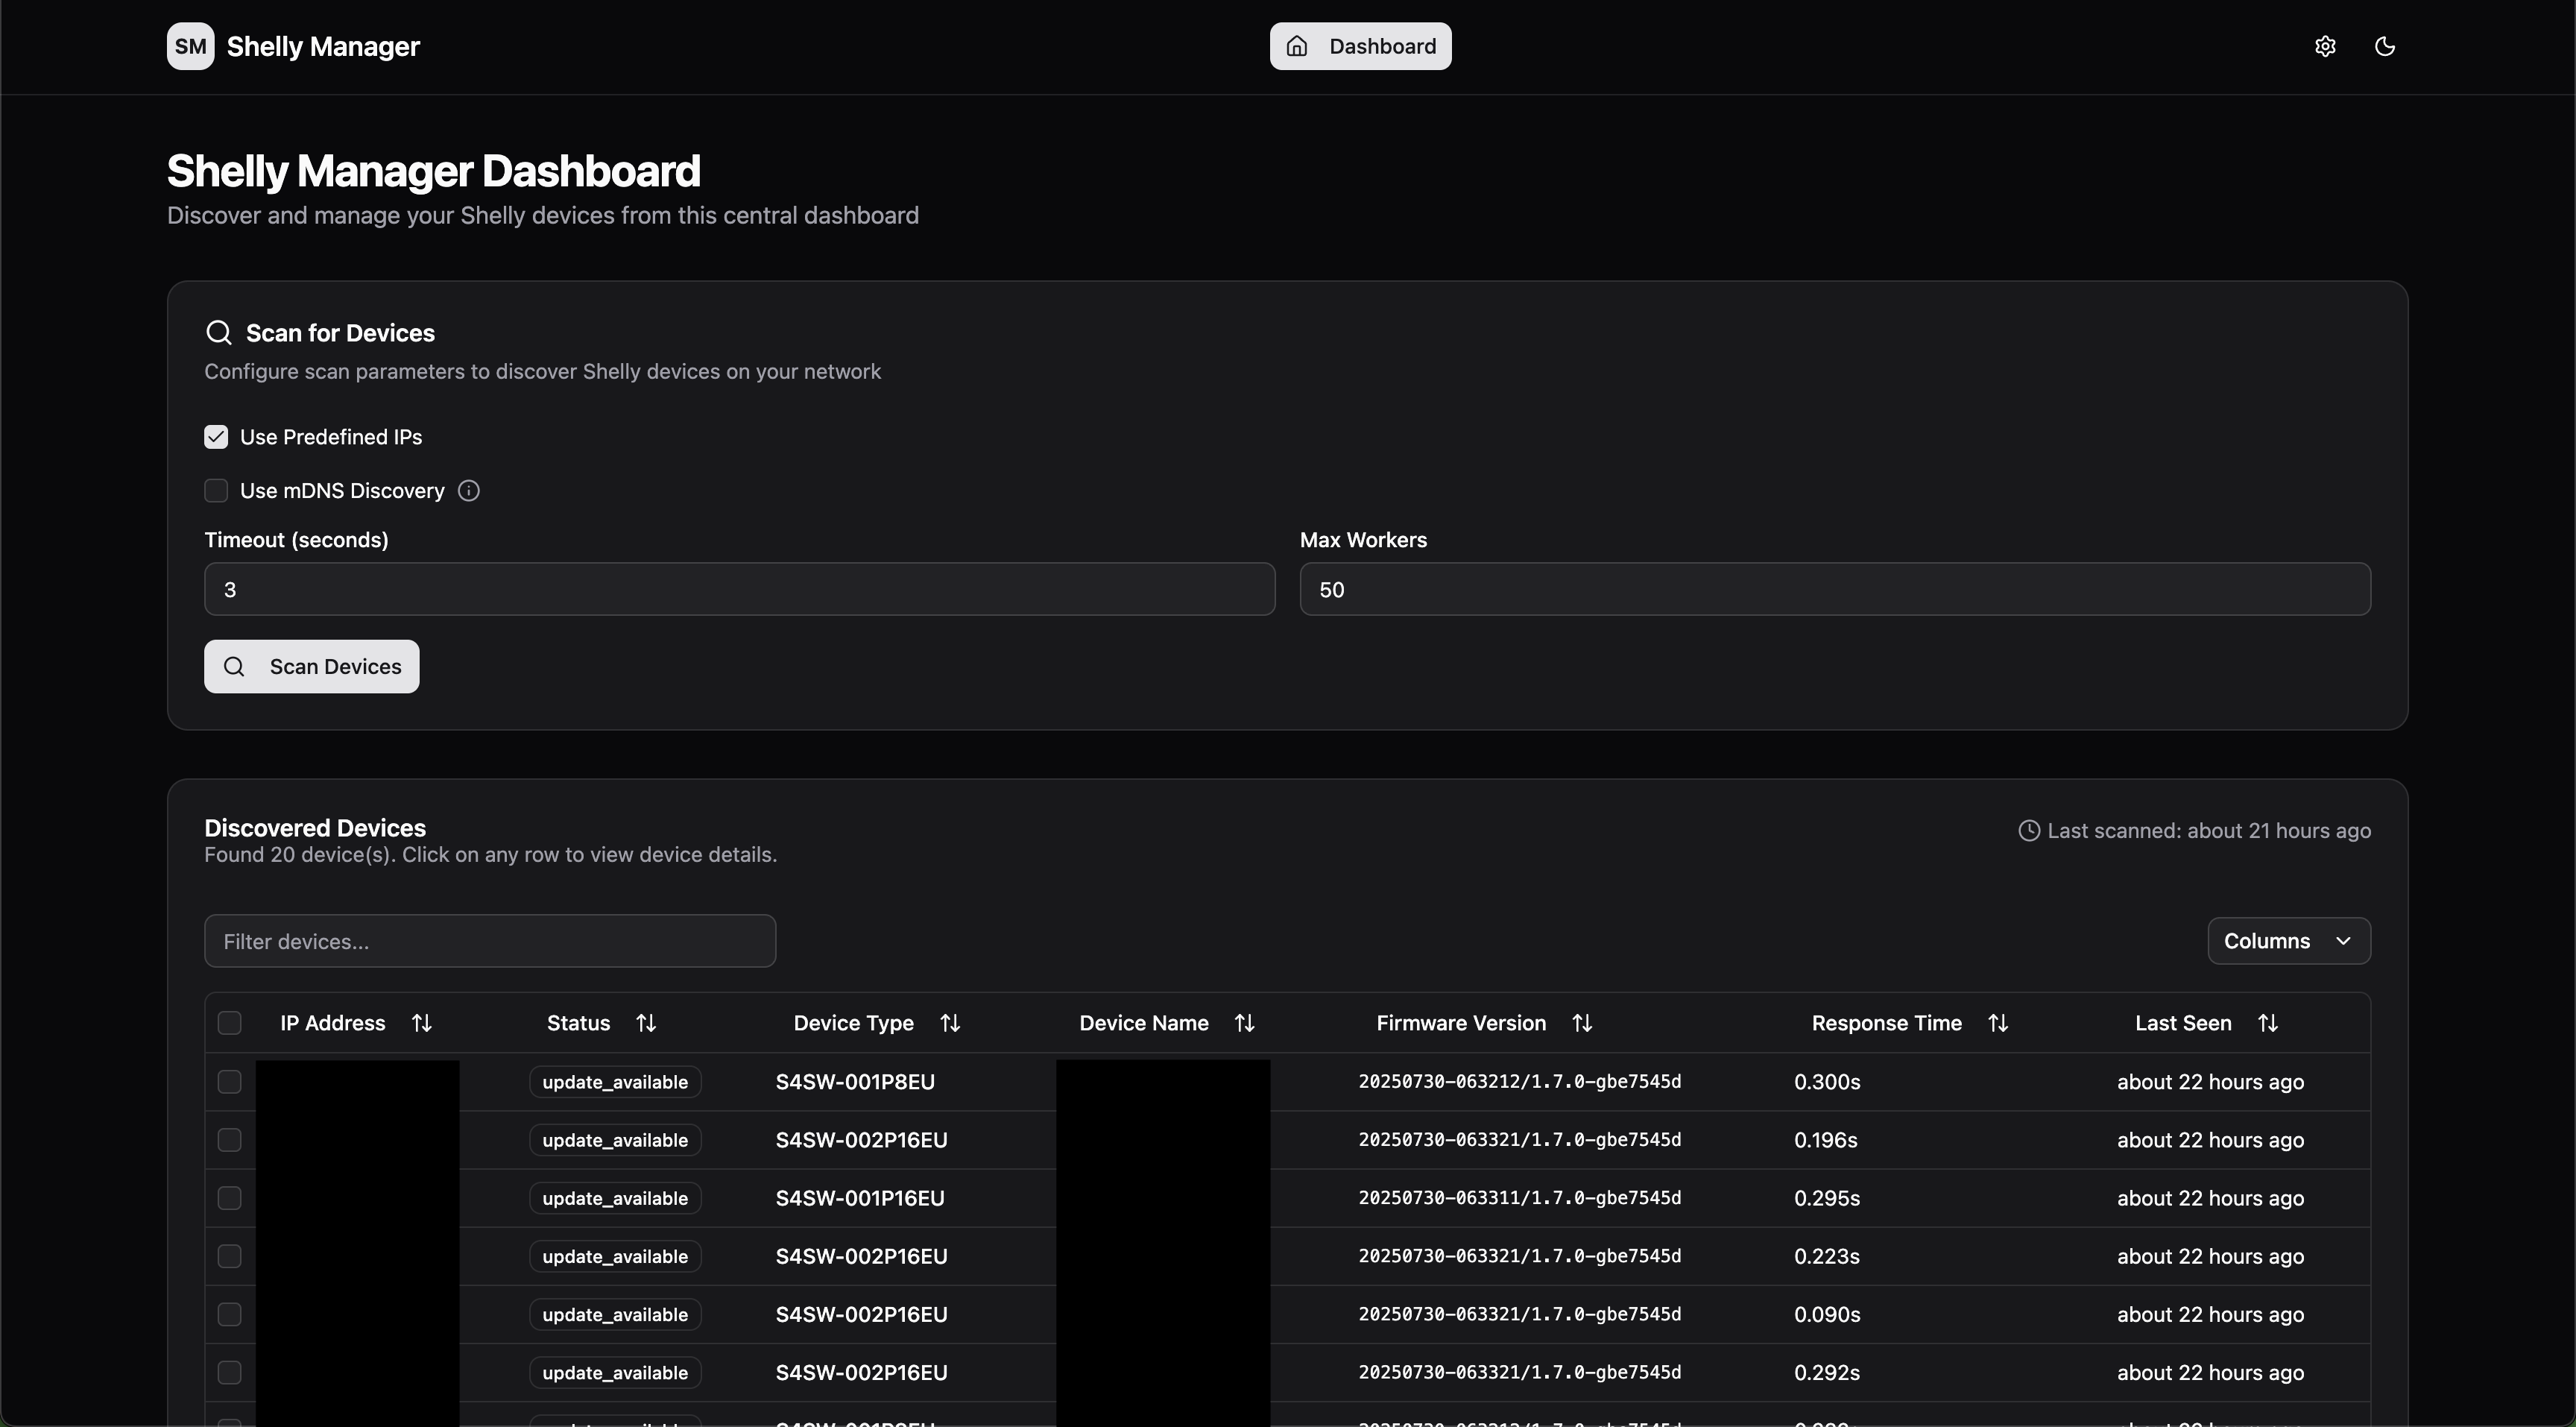 Device discovery and management with real-time status monitoring
|
Settings & Configuration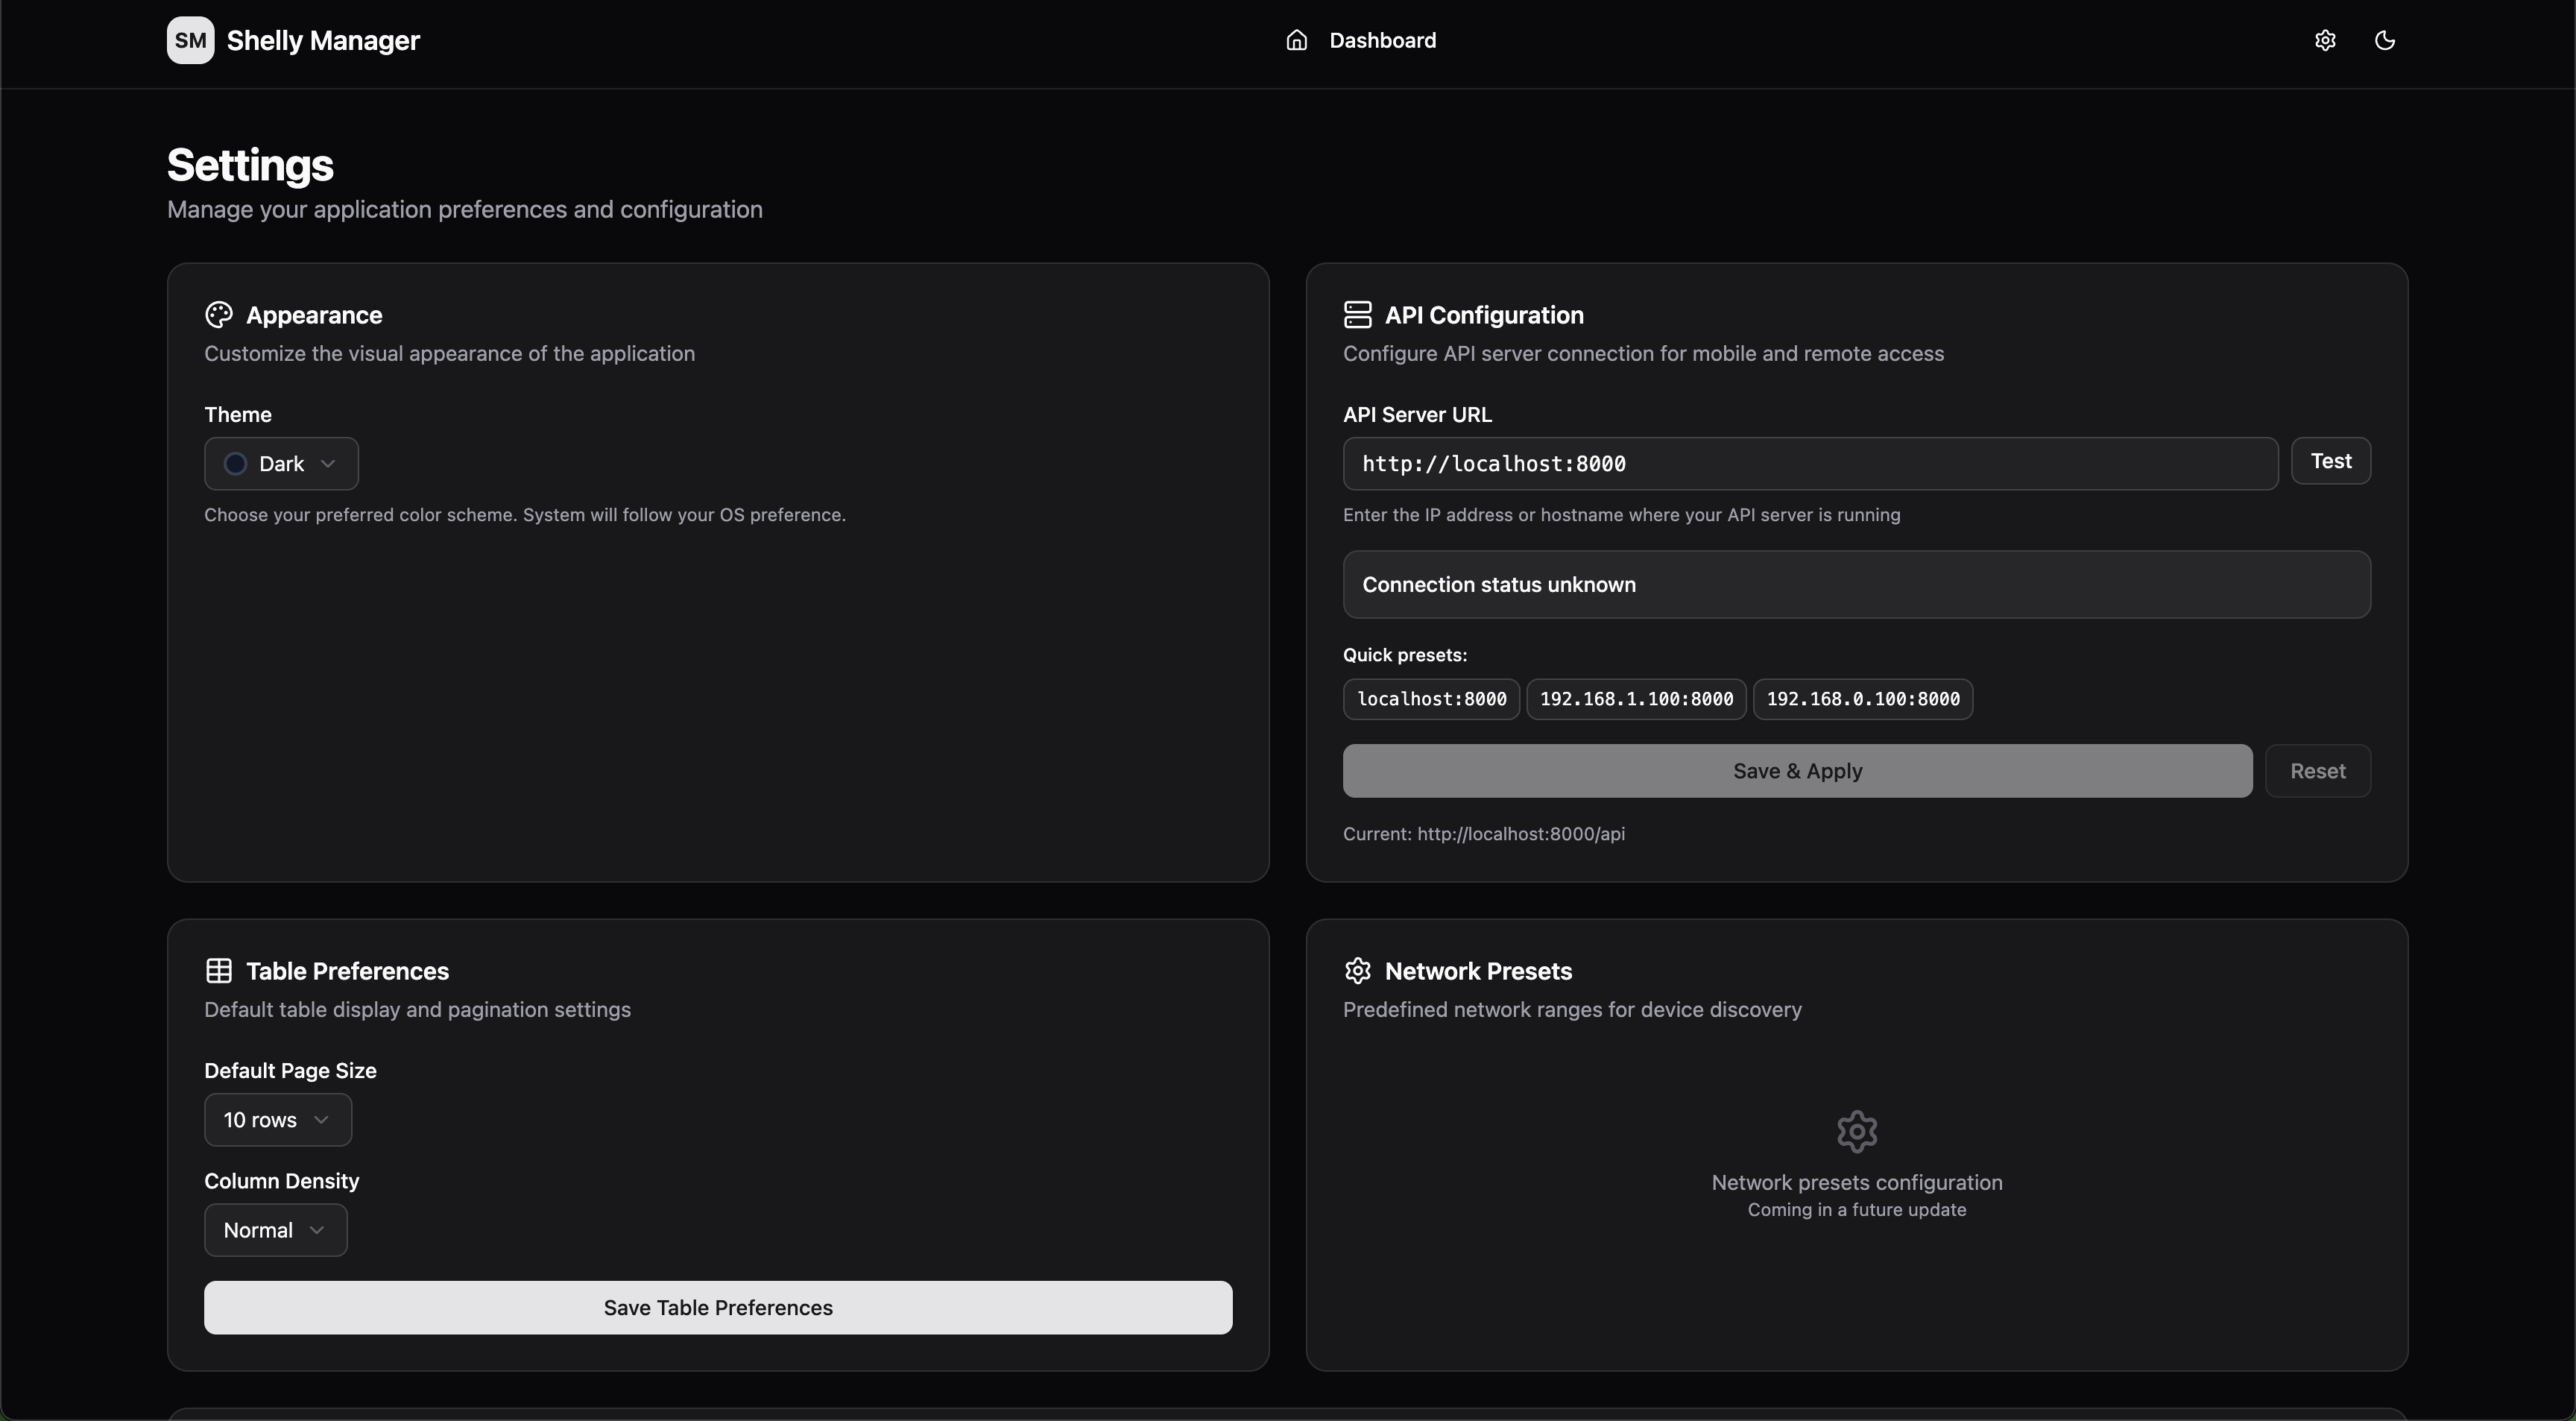 API configuration for mobile access and application preferences
|
Device Management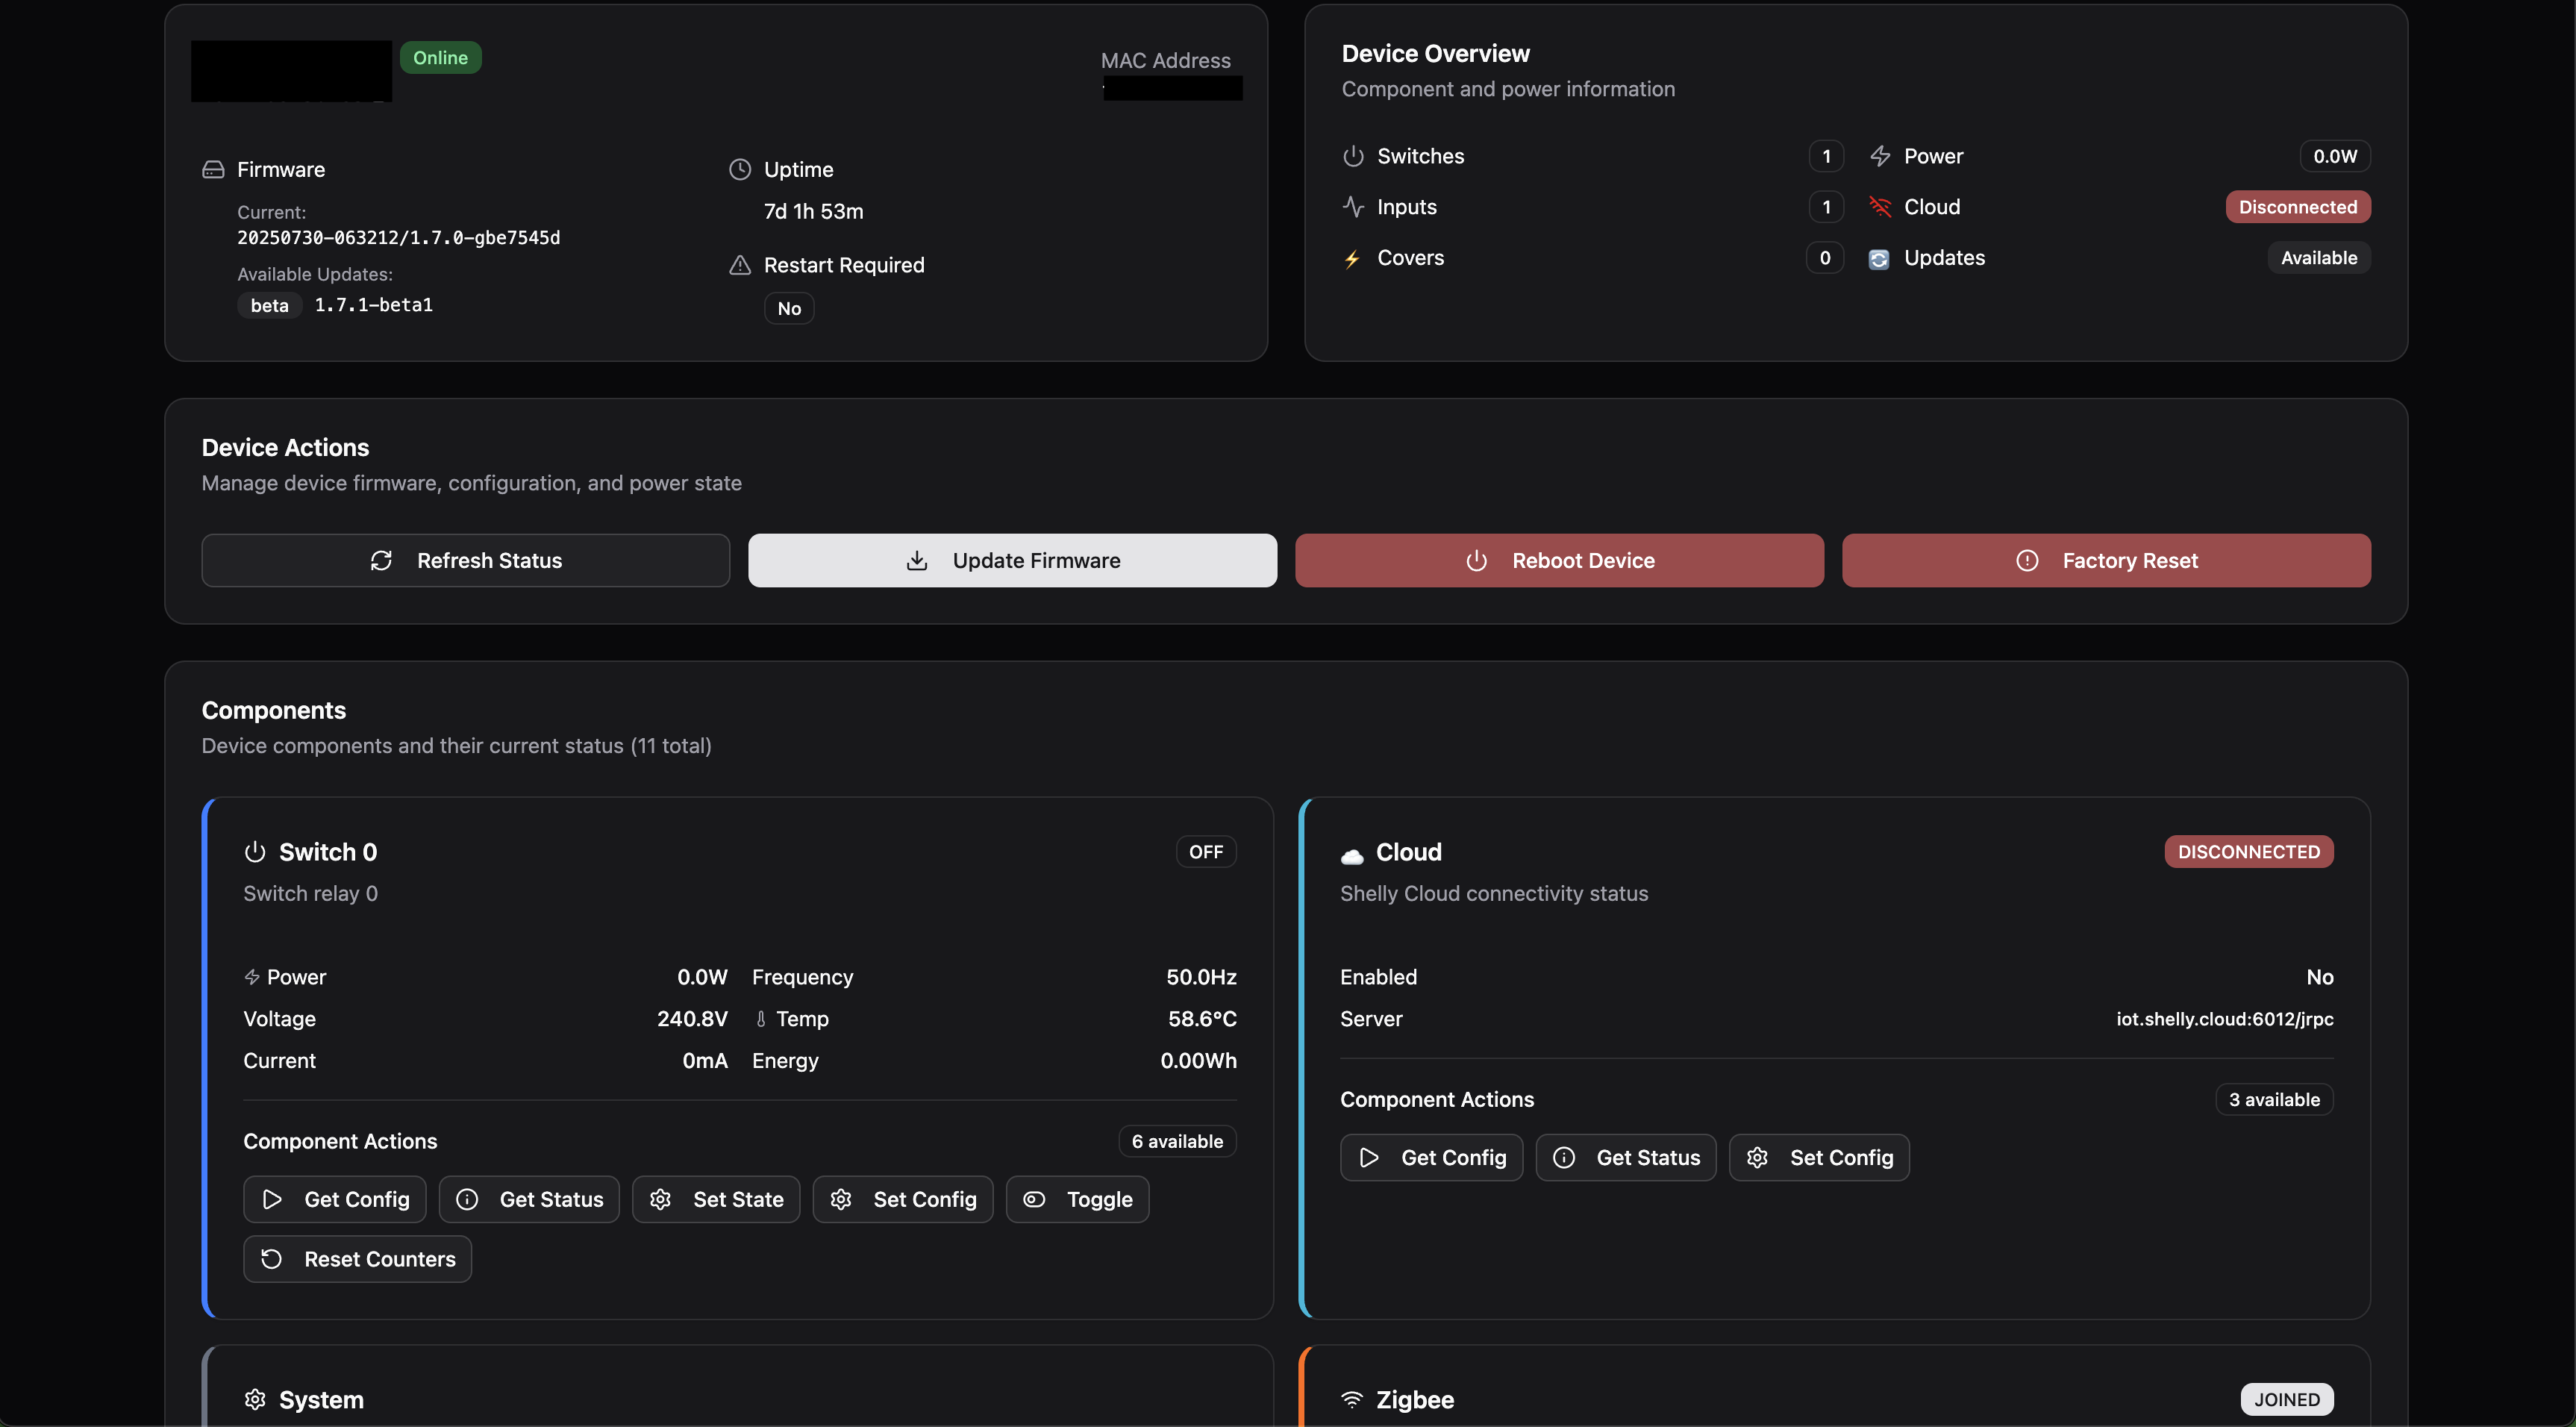 Individual device control with component actions and status
|
Device Action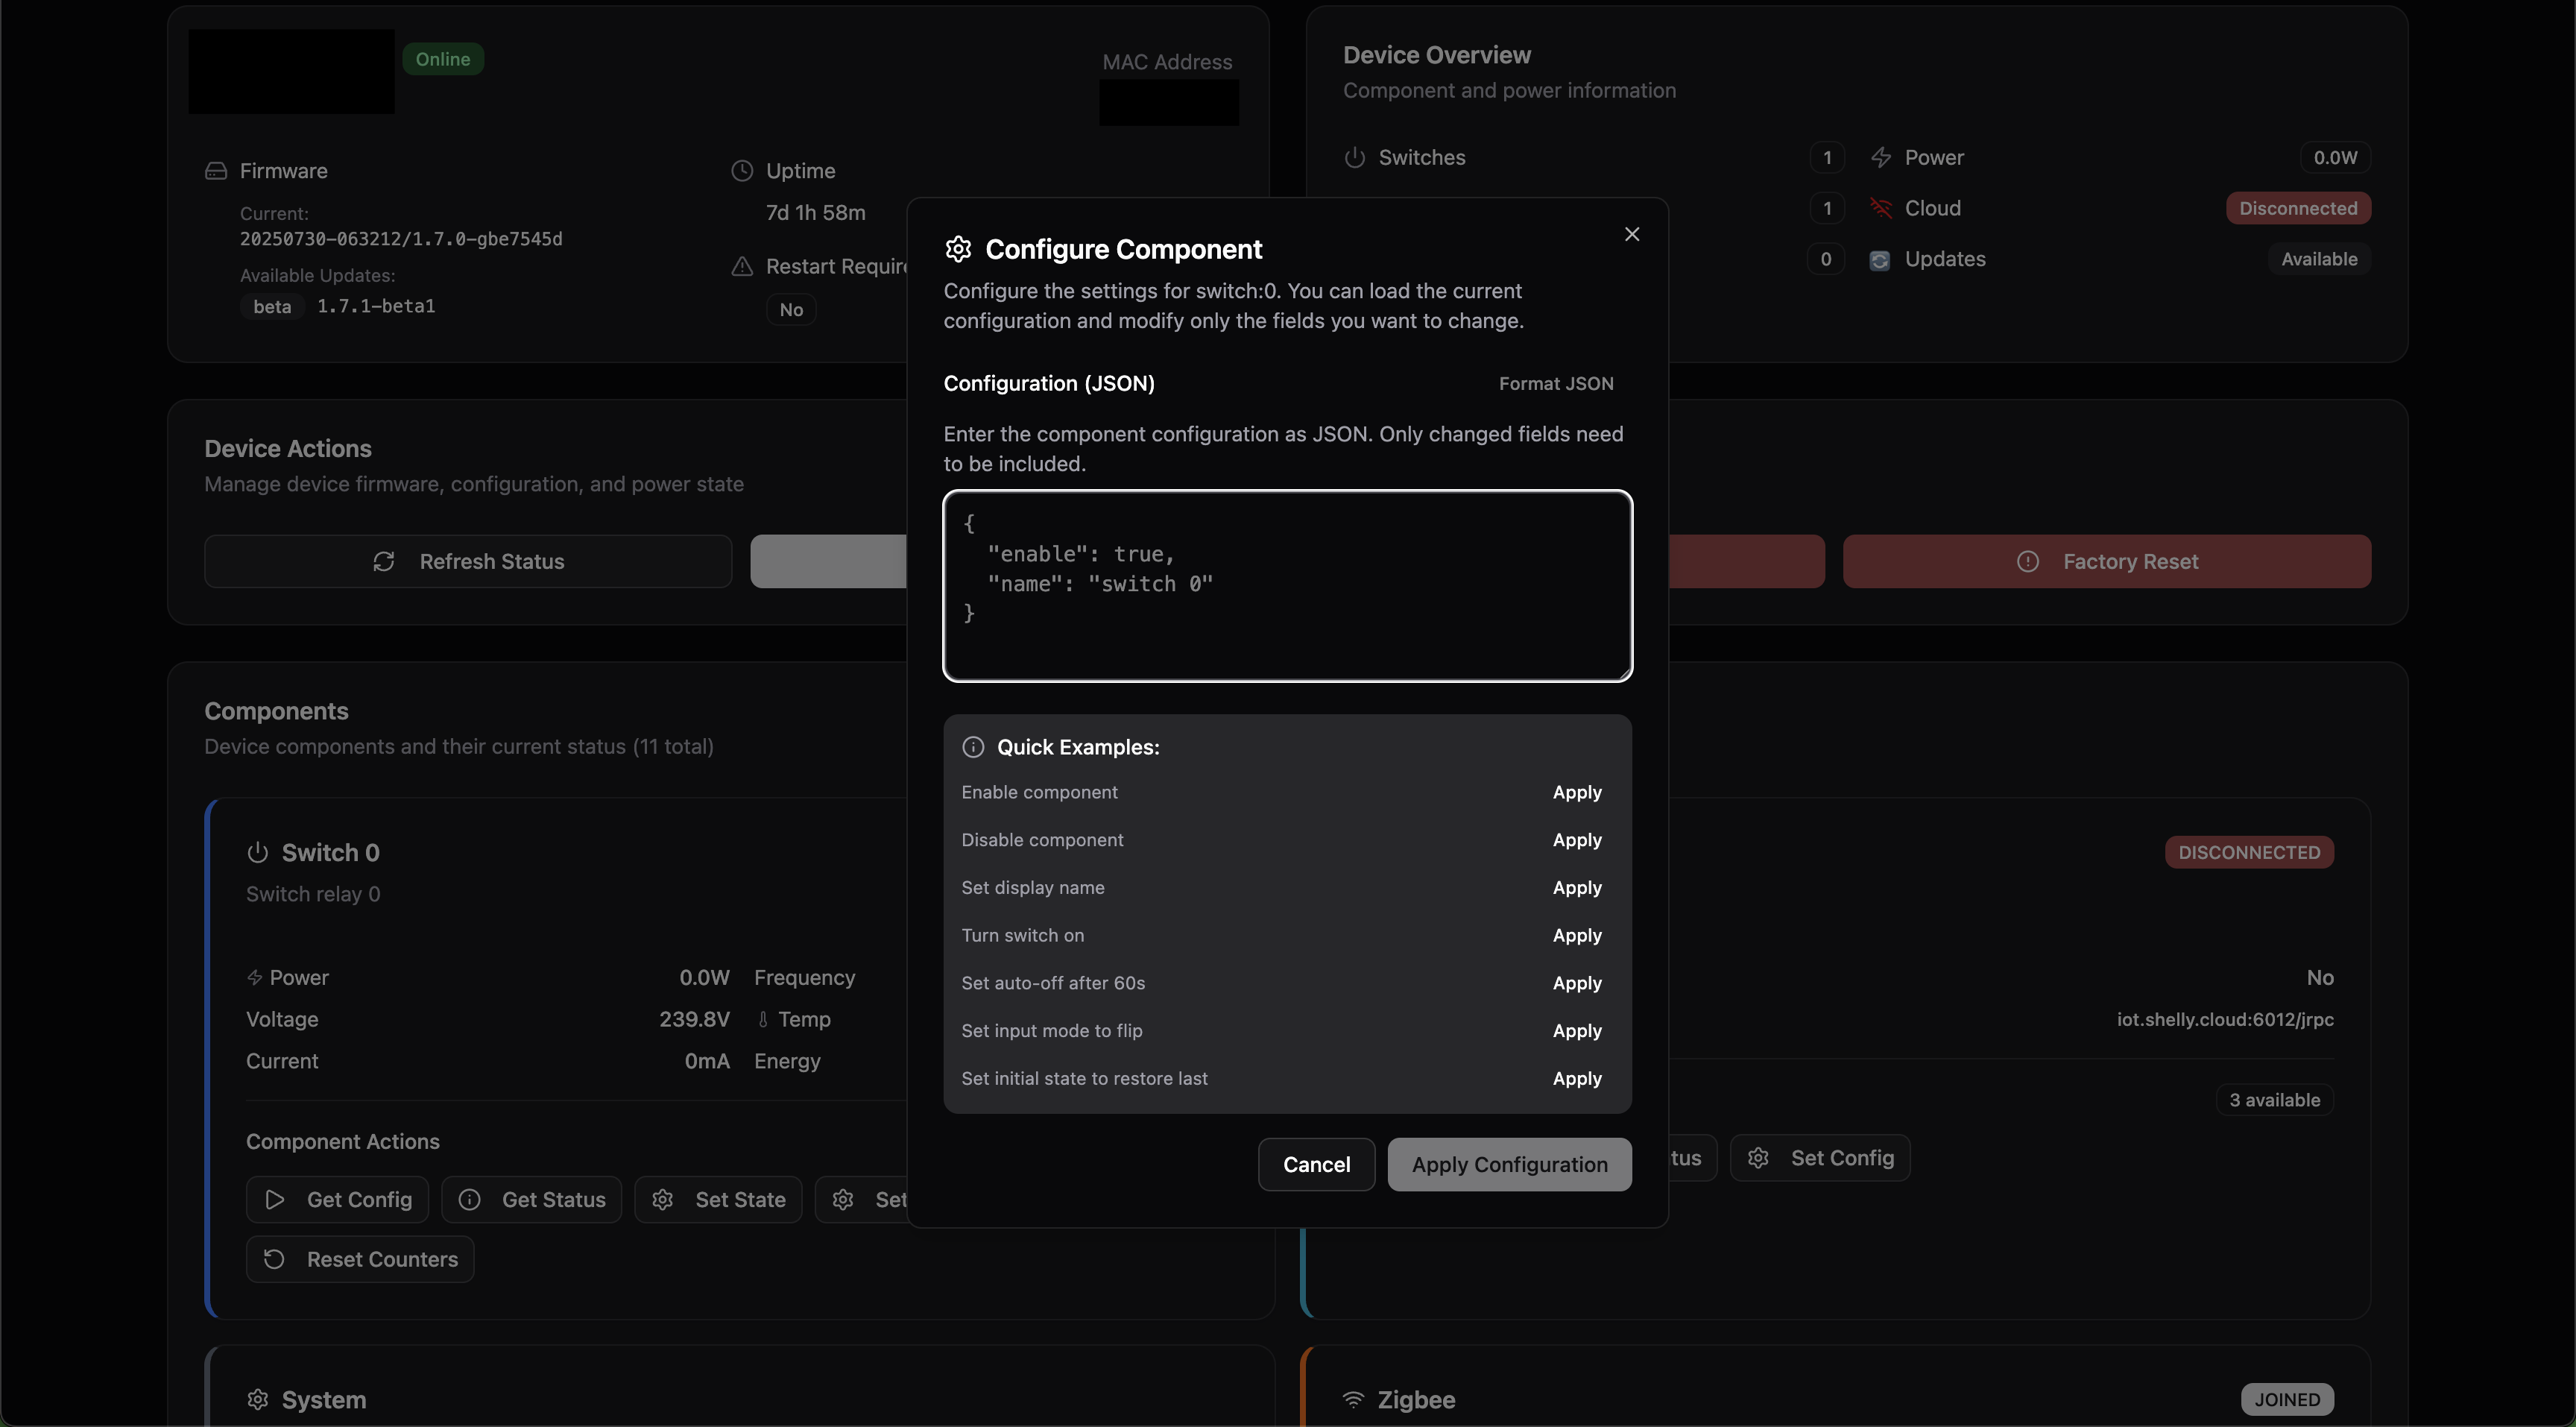 Component actions and configurations
|
Bulk Operations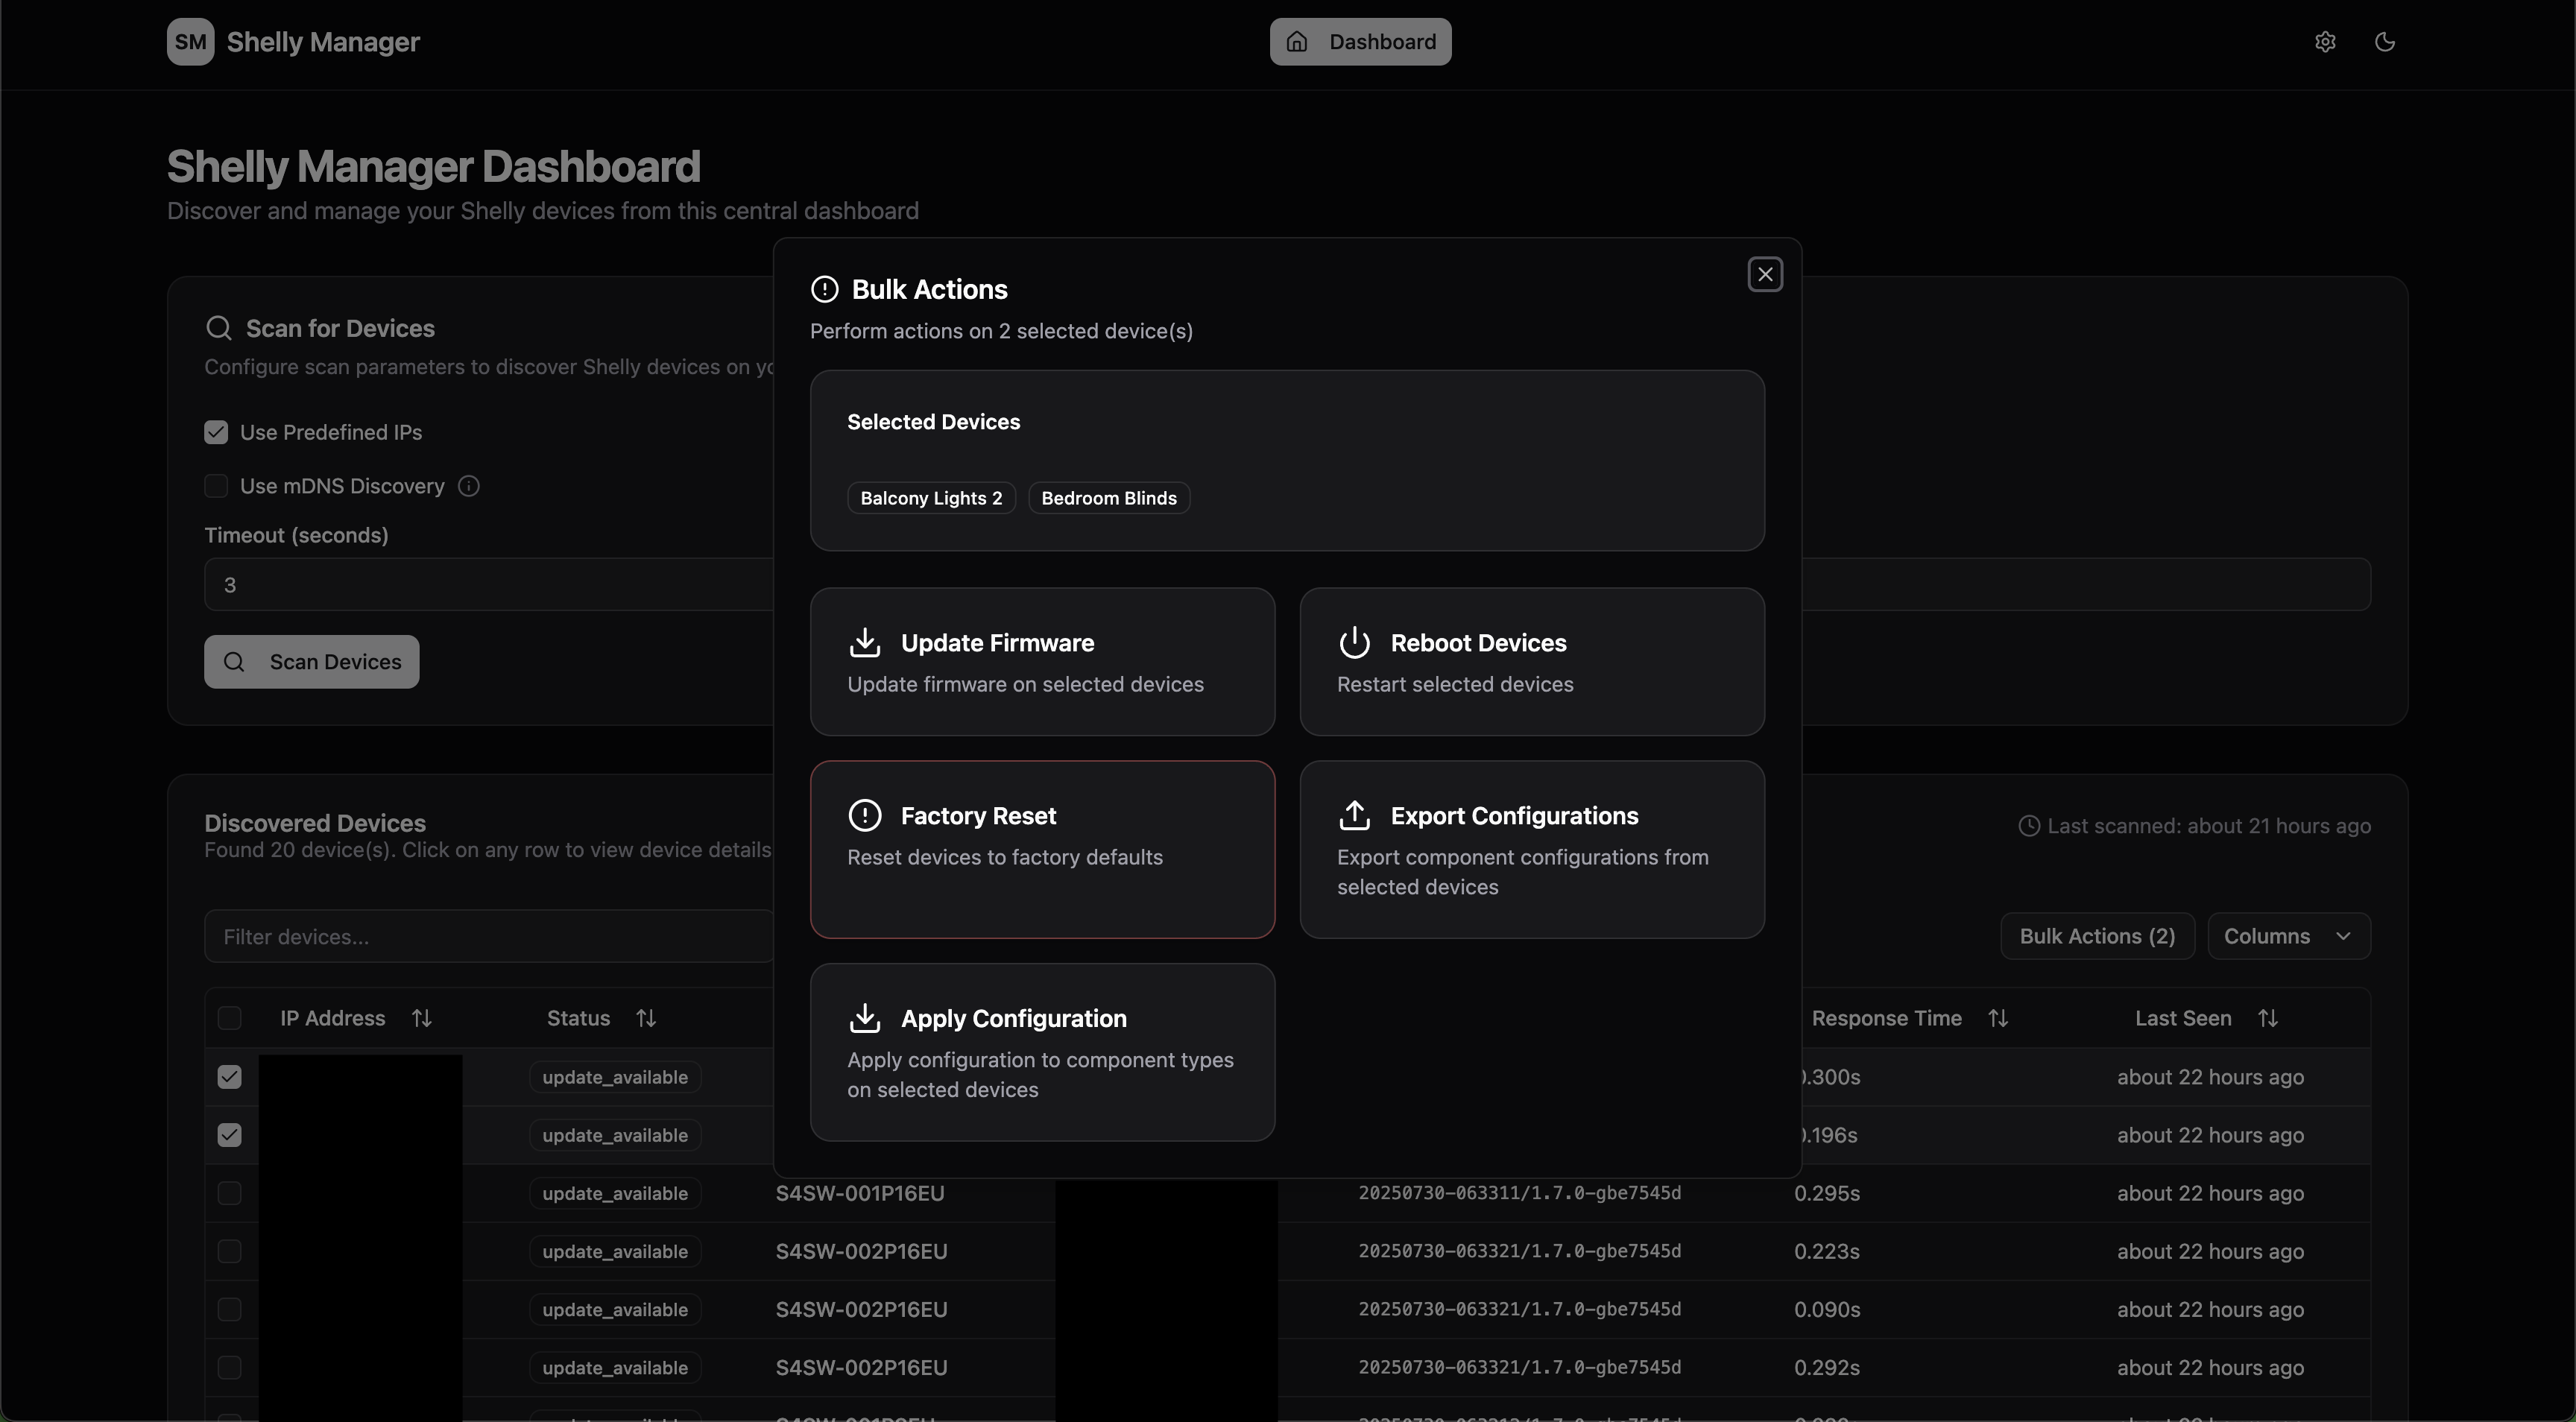 Perform operations on multiple devices simultaneously
|
Bulk Configuration Apply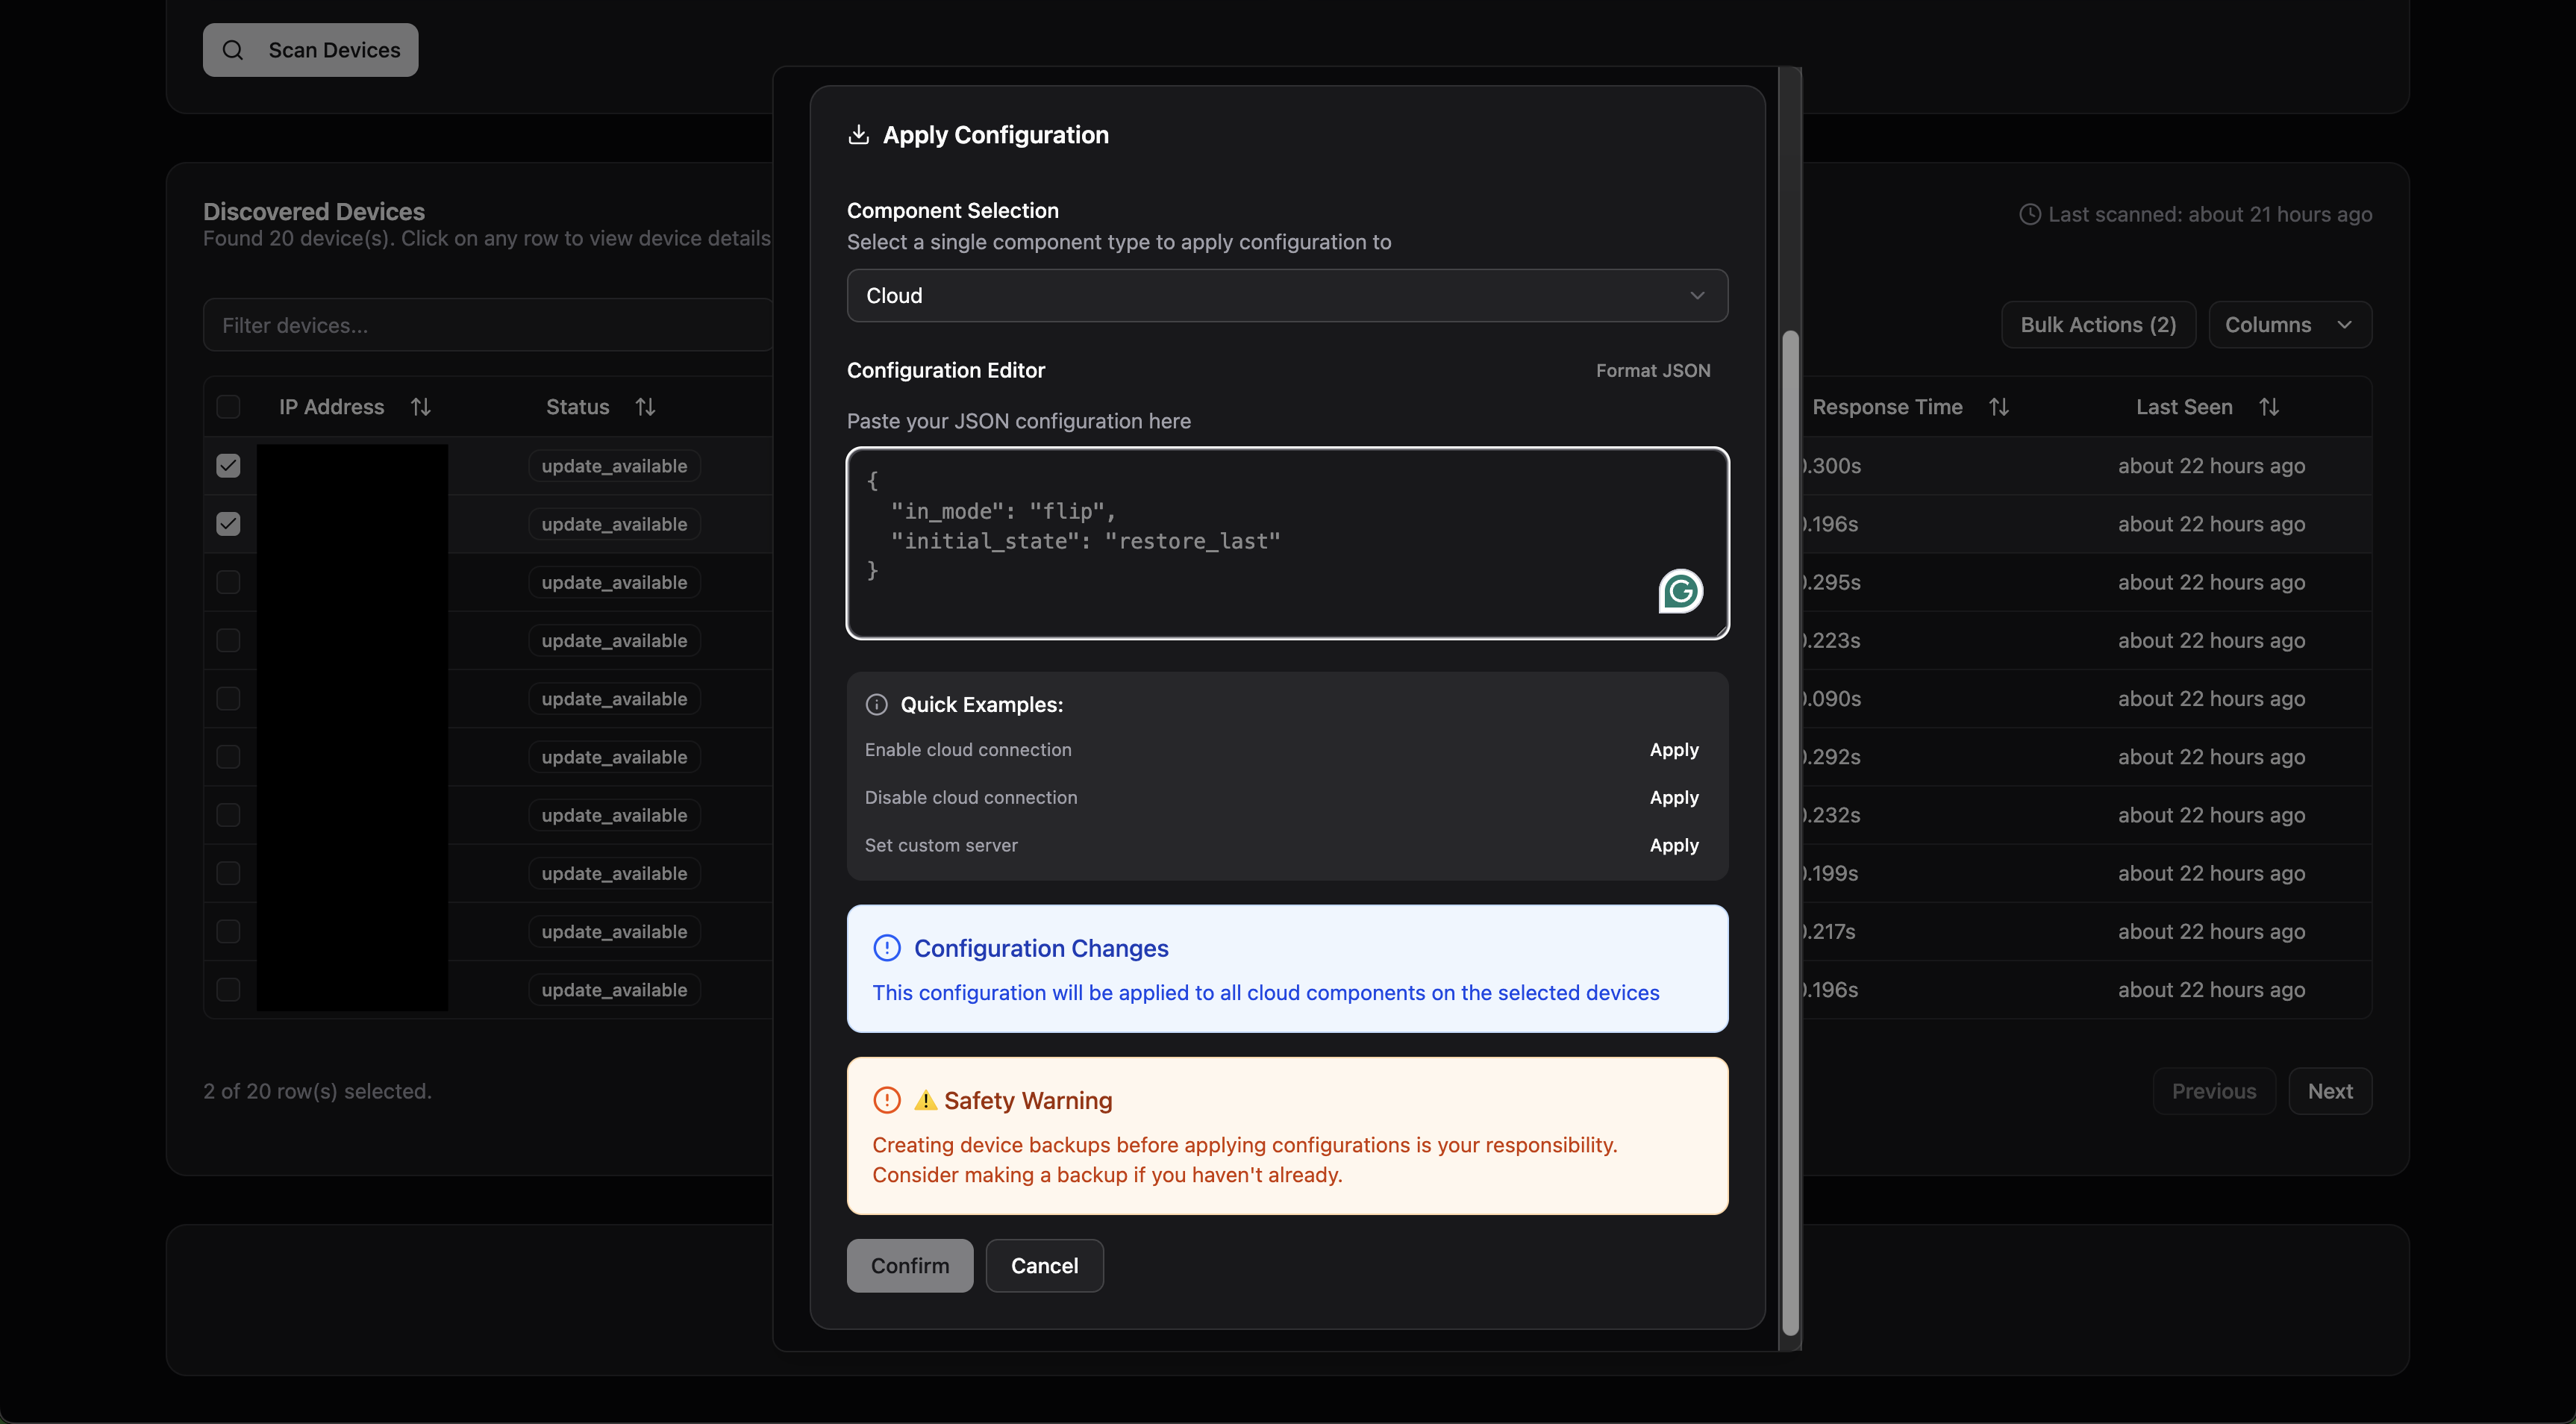 Apply configurations in bulk to multiple devices
|
Quick Start
Docker
ℹ️ mDNS Discovery in Docker requires host networking so the container can listen for multicast traffic. Add
network_mode: "host"to the API container (and run on a Linux host) if you want to discover via mDNS while running in Docker. Without host networking, only the IP range scan will work.
Web UI + API Stack:
services:
  shelly-manager-api:
    image: ghcr.io/jfmlima/shelly-manager-api:latest
    #network_mode: "host" # optional, but if you mDNS please uncomment it
    ports:
      - "8000:8000"
    environment:
      - HOST=0.0.0.0
      - PORT=8000
      - SHELLY_SECRET_KEY=your-generated-key
      # Scheduled backups run in-process on the API; keep it to one replica.
      # Defaults shown; set SHELLY_BACKUP_SCHEDULER_ENABLED=false to disable.
      - SHELLY_BACKUP_SCHEDULER_ENABLED=true
      - SHELLY_BACKUP_POLL_INTERVAL_SECONDS=60
    volumes:
      - shelly-manager-data:/data

  shelly-manager-web:
    image: ghcr.io/jfmlima/shelly-manager-web:latest
    ports:
      - "8080:8080"
    environment:
      - VITE_BASE_API_URL=http://localhost:8000
    depends_on:
      - shelly-manager-api

volumes:
  shelly-manager-data:
With Traefik:
services:
  shelly-manager-api:
    container_name: shelly-manager-api
    image: ghcr.io/jfmlima/shelly-manager-api:latest
    environment:
      - HOST=0.0.0.0
      - PORT=8000
      - SHELLY_SECRET_KEY=your-generated-key
      # Scheduled backups run in-process on the API; keep it to one replica.
      # Defaults shown; set SHELLY_BACKUP_SCHEDULER_ENABLED=false to disable.
      - SHELLY_BACKUP_SCHEDULER_ENABLED=true
      - SHELLY_BACKUP_POLL_INTERVAL_SECONDS=60
    volumes:
      - shelly-manager-data:/data
    labels:
      - "traefik.enable=true"
      - "traefik.http.routers.shelly-manager-api.rule=Host(`shelly-manager-api.your.domain`)"
      - "traefik.http.routers.shelly-manager-api.service=shelly-manager-api"
      - "traefik.http.routers.shelly-manager-api.entrypoints=web"
      - "traefik.http.services.shelly-manager-api.loadbalancer.server.port=8000"

  shelly-manager-web:
    container_name: shelly-manager-web
    image: ghcr.io/jfmlima/shelly-manager-web:latest
    environment:
      - VITE_BASE_API_URL=http://shelly-manager-api.your.domain
    depends_on:
      - shelly-manager-api
    labels:
      - "traefik.enable=true"
      - "traefik.http.routers.shelly-manager-web.rule=Host(`shelly-manager.your.domain`)"
      - "traefik.http.routers.shelly-manager-web.service=shelly-manager-web"
      - "traefik.http.routers.shelly-manager-web.entrypoints=web"
      - "traefik.http.services.shelly-manager-web.loadbalancer.server.port=8080"

volumes:
  shelly-manager-data:
Home Assistant Add-on
You can install Shelly Manager as a Home Assistant add-on for seamless integration with your Home Assistant instance:

Or manually:
Add the repository to your Home Assistant:
https://github.com/jfmlima/home-assistant-addonsNavigate to Settings → Add-ons → Add-on Store in your Home Assistant
Click the three dots menu (⋮) and select "Repositories"
Add the repository URL above
Install the Shelly Manager add-on from the available add-ons list
The add-on provides the same functionality as the Docker deployment but is fully integrated with your Home Assistant environment.
CLI Only:
# Interactive device scanning
docker run --rm -it \
  -e SHELLY_SECRET_KEY="your-generated-key" \
  ghcr.io/jfmlima/shelly-manager-cli:latest \
  scan --target 192.168.1.0/24

# Check device status
docker run --rm -it \
  -e SHELLY_SECRET_KEY="your-generated-key" \
  ghcr.io/jfmlima/shelly-manager-cli:latest \
  device status 192.168.1.100

# Bulk firmware updates
docker run --rm -it \
  -e SHELLY_SECRET_KEY="your-generated-key" \
  ghcr.io/jfmlima/shelly-manager-cli:latest \
  bulk update --target 192.168.1.0/24
API Only:
docker run -p 8000:8000 \
  -e SHELLY_SECRET_KEY="your-generated-key" \
  -v shelly-manager-data:/data \
  ghcr.io/jfmlima/shelly-manager-api:latest
The -v is what keeps your data. The image writes everything it stores to /data, and without a volume there that directory belongs to the container and goes away with it. A named volume like the one above picks up the right ownership from the image; if you bind mount a host directory instead, run chown 10001:10001 on it first, because the API runs as that user and cannot write to a root owned directory.
Configuration
Shelly Manager is zero-configuration by default. All scan and management parameters are provided at runtime via the Web UI, CLI flags, API parameters or ENV variables. This ensures flexibility and removes the need for managing static configuration files.
For persistent storage of discovered devices in the Web UI, the application leverages browser localStorage. For API-based integrations, the client is responsible for maintaining device lists.
Server-side state lives in /data. Device credentials, configuration backups, backup schedules and provisioning profiles are kept in a SQLite database at /data/data.db, and downloaded firmware bundles under /data/firmware. The API and CLI images set SHELLY_DATA_DIR=/data and SHELLY_FIRMWARE_DIR=/data/firmware; mount a volume at /data and everything survives a restart, or point the two variables somewhere else if you prefer another path. Outside a container both default to ./data, relative to the working directory. The Unraid image and the Home Assistant add-on set their own paths and handle this for you.
Earlier images wrote to /app/data instead. If you carried that over with a mount of your own, such as -v ./data:/app/data, your database will look reset after this upgrade: it is still at the old path, and moving data.db and firmware/ into the new volume brings it back.
Scheduled backups run on the API server itself. When SHELLY_BACKUP_SCHEDULER_ENABLED is true (the default), an in-process poller captures backups for any due schedules every SHELLY_BACKUP_POLL_INTERVAL_SECONDS (default 60). Because the timer lives in-process, run the API as a single worker (the default); see the API README for the full setting reference.
Local firmware updates let a device that cannot reach the internet still be updated. Ask for one with "source": "local" on the update endpoint (single-device or bulk), or --source local from the CLI: the manager downloads the official firmware from Shelly once, keeps it, and tells the device to fetch it from the manager instead. The same copy serves every device running that model, so only the manager needs internet access.
Set SHELLY_FIRMWARE_ADVERTISED_BASE_URL to a URL your devices can reach, for example http://192.168.1.50:8000. There is no default and a local update fails immediately without it, because the manager cannot work out its own device-facing address. The devices fetch that URL unauthenticated, so it has to be reachable from the device network.
Architecture
├── packages/
│   ├── core/              # 🏛️ Business Logic & Domain Models
│   ├── api/               # 🌐 HTTP REST API (Litestar)
│   ├── cli/               # 💻 Command Line Interface (Click)
│   └── web/               # 🖥️ Modern Web UI (React + TypeScript)
└── docker-compose.yml     # Development environment
Package Overview
| Package | Purpose | Documentation |
|---|---|---|
| 🏛️ Core | Pure business logic, domain models, and use cases | Core README |
| 🌐 API | HTTP REST API for web applications and integrations | API README |
| 💻 CLI | Modern command-line interface with rich output | CLI README |
| 🖥️ Web | Responsive web UI for device management | Web README |
API Overview
The REST API provides complete device management capabilities:
# Health and status
GET  /api/health                                              # Service health check
GET  /api/metadata/component-types                            # Component types the config endpoints accept
GET  /api/devices/scan                                        # Discover devices on network
GET  /api/devices/{ip}/status                                 # Get device status

# Device operations
POST /api/devices/{ip}/update                                 # Update device firmware
POST /api/devices/{ip}/reboot                                 # Reboot device
POST /api/devices/bulk                                        # Bulk operations (update/reboot/factory_reset)
POST /api/devices/bulk/config/export                          # Export device configurations
POST /api/devices/bulk/config/apply                           # Apply configurations to devices

# Configuration backups (per-device snapshots, stored encrypted)
GET    /api/backups                                           # List stored backups
POST   /api/backups                                           # Capture a device backup
GET    /api/backups/{id}                                      # Get a backup (with full snapshot)
POST   /api/backups/{id}/restore                              # Restore a backup to a device
DELETE /api/backups/{id}                                      # Delete a backup

GET    /api/backup-schedules                                  # List backup schedules
POST   /api/backup-schedules                                  # Create a schedule
GET    /api/backup-schedules/{id}                             # Get a schedule
PUT    /api/backup-schedules/{id}                             # Update a schedule
DELETE /api/backup-schedules/{id}                             # Delete a schedule
POST   /api/backup-schedules/{id}/enable                      # Enable a schedule
POST   /api/backup-schedules/{id}/disable                     # Disable a schedule
POST   /api/backup-schedules/{id}/run                         # Run a schedule now

# Firmware cache (bundles the manager downloads once and serves to devices)
GET    /api/firmware                                          # List cached firmware bundles
DELETE /api/firmware/{id}                                     # Delete a cached bundle
GET    /api/firmware/{id}/download                            # Serve a bundle; devices fetch this over LAN, unauthenticated

# Component actions
GET  /api/devices/{ip}/components/actions                     # Discover available actions
POST /api/devices/{ip}/components/{key}/actions/{action}      # Execute component action

# Credentials
GET    /api/credentials                                       # List stored credentials
POST   /api/credentials                                       # Set device credentials
DELETE /api/credentials/{mac}                                  # Delete device credentials

# Provisioning
GET    /api/provisioning/profiles                             # List provisioning profiles
POST   /api/provisioning/profiles                             # Create provisioning profile
GET    /api/provisioning/profiles/{id}                        # Get profile details
PUT    /api/provisioning/profiles/{id}                        # Update profile
DELETE /api/provisioning/profiles/{id}                        # Delete profile
POST   /api/provisioning/profiles/{id}/set-default            # Set default profile
POST   /api/provisioning/detect                               # Detect device at AP IP
POST   /api/provisioning/provision                            # Provision device via AP
POST   /api/provisioning/verify                               # Verify provisioned device
API Documentation: Start the API server and visit http://localhost:8000/docs for interactive OpenAPI documentation
CLI Overview
The CLI provides powerful automation capabilities:
# Device discovery
shelly-manager scan --target 192.168.1.0/24
shelly-manager scan --use-mdns

# Device operations
shelly-manager device status 192.168.1.100
shelly-manager device reboot 192.168.1.100
shelly-manager device actions list 192.168.1.100

# Firmware updates
shelly-manager device update -t 192.168.1.100
shelly-manager device update -t 192.168.1.100 --channel beta

# ...or serve the firmware from this host, for a device with no internet access
shelly-manager device update -t 192.168.1.100 --source local

# Bulk operations
shelly-manager bulk reboot --target 192.168.1.100-110
shelly-manager bulk update --target 10.0.0.0/24
shelly-manager bulk config export --target 192.168.1.0/24
shelly-manager bulk config apply --target 192.168.1.0/24

# Configuration backups (per-device, stored encrypted)
shelly-manager backup create --target 192.168.1.100
shelly-manager backup list
shelly-manager backup restore 1 --target 192.168.1.100

# Scheduled backups with retention
shelly-manager backup schedule create --name nightly --every daily --target 192.168.1.100 --keep-last 7
shelly-manager backup schedule list
shelly-manager backup schedule run 1

# Export
shelly-manager export devices --target 192.168.1.0/24

# Provisioning
shelly-manager provision detect
shelly-manager provision run
shelly-manager provision profiles list
CLI Documentation: See CLI README for complete command reference.
Web UI Overview
The web interface provides an intuitive management experience:
- Device Discovery: Network scanning with visual results and advanced settings
- Bulk Operations: Select multiple devices for batch operations
- Real-time Status: Live device status monitoring
- Configuration Management: Device configuration editing with bulk export/apply
- Credentials Management: Set device-specific or global fallback credentials
- Device Provisioning: Set up new devices via Access Point
- Settings: API URL configuration, connection testing, theme selection (light/dark/system)
Web Documentation: See Web README for setup and features.
Requirements
- Docker (recommended) or Python 3.11+
- Network access to Shelly devices on your local network
- SHELLY_SECRET_KEY: Fernet encryption key for credential storage (see Security & Credentials)
Security & Credentials
Shelly Manager supports password-protected Shelly Gen1 (HTTP Basic Auth) and Gen2 devices (HTTP Digest Auth). To enable this feature, you must provide an encryption key.
1. Generate an Encryption Key
The application requires a valid Fernet key in the SHELLY_SECRET_KEY environment variable.
# Generate a key
openssl rand -base64 32 | tr '+/' '-_'
2. Set the Environment Variable
Linux / macOS
export SHELLY_SECRET_KEY="your-generated-key"
Docker
docker run -e SHELLY_SECRET_KEY="your-generated-key" ...
docker-compose.yml
environment:
  - SHELLY_SECRET_KEY=your-generated-key
3. Manage Credentials
Use the CLI to manage device credentials. Data is stored encrypted locally.
# Set credentials for a specific device
shelly-manager credentials set AABBCCDDEEFF mypassword --username admin

# Set a global fallback password (used if device-specific not found)
shelly-manager credentials set-global myfallbackpass

# List stored credentials (safe, no passwords shown)
shelly-manager credentials list

# Delete credentials
shelly-manager credentials delete AABBCCDDEEFF
The same SHELLY_SECRET_KEY also encrypts device configuration backup snapshots at rest. Backups are stored in the local database ({data_dir}/data.db); if the key is rotated, existing encrypted snapshots can no longer be decrypted.
Optional Authentication
By default, Shelly Manager has no login of its own — anyone who can reach the API or Web UI has full access. Set SHELLY_AUTH_TOKEN to require a shared auth token for both.
export SHELLY_AUTH_TOKEN="$(openssl rand -base64 32)"
Use a long, high-entropy value. The token-verification endpoint has no rate limiting, so a short or guessable token can be brute-forced.
When set, every API request must include Authorization: Bearer <token>, except /api/health, /api/auth/config, and the API reference at /docs (and /docs/openapi.json), which stay public. The Web UI shows a login page asking for the token before it will load. Leave it unset to keep the zero-configuration default. Unlike SHELLY_SECRET_KEY, this is optional and unrelated to credential encryption.
Development
For local development and contributing to Shelly Manager:
# Clone and setup development environment
git clone https://github.com/jfmlima/shelly-manager.git
cd shelly-manager

# Start development stack
docker compose up -d

# Or install locally with uv
uv sync --extra dev
Development Guide: See DEVELOPMENT.md for detailed setup instructions, testing, and contribution guidelines.
🤝 Contributing
We welcome contributions! Here's how to get started:
- Fork the repository
- Clone your fork locally
- Create a feature branch (
git checkout -b feature/amazing-feature) - Make your changes following our development guidelines
- Add tests for new functionality
- Submit a pull request
Development Principles
- Clean Architecture: Keep domain logic in the core package
- Type Safety: Use comprehensive type hints throughout
- Testing: Write tests for all new functionality
- Documentation: Update relevant documentation for changes
Getting Help
- 📖 Documentation: Check package-specific READMEs
- 🐛 Bug Reports: Open an issue with reproduction steps
- 💡 Feature Requests: Describe your use case in an issue
- 💬 Questions: Start a discussion for general questions
License
MIT License - see LICENSE file.
Disclaimer
USE AT YOUR OWN RISK: This software is provided "as is" without warranty of any kind. The developers of Shelly Manager are not responsible for any damage, malfunction, or loss of data that may occur to your Shelly devices, network infrastructure, or any other equipment as a result of using this software.
Understand that firmware updates and device modifications carry inherent risks.
By using this software, you acknowledge that you do so at your own risk and that the developers disclaim all liability for any damages or losses that may result from its use.
Categories
Related apps
Explore more like this
Explore allDetails
ghcr.io/jfmlima/shelly-manager:latestRuntime arguments
- Web UI
http://[IP]:[PORT:8080]/- Network
bridge- Privileged
- false
- Extra Params
--restart unless-stopped
Template configuration
Web interface and API port
- Target
- 8080
- Default
- 8080
Path for persistent data (database and cached firmware)
- Target
- /config
- Default
- /mnt/user/appdata/shelly-manager
Encryption key for stored credentials. Generate with: python3 -c 'from cryptography.fernet import Fernet; print(Fernet.generate_key().decode())'
- Target
- SHELLY_SECRET_KEY
Logging verbosity (debug, info, warning, error)
- Target
- LOG_LEVEL
- Default
- info
User ID for file permissions
- Default
- 1000
Group ID for file permissions
- Default
- 1000
Internal port for the web UI and nginx reverse proxy (change if 8080 conflicts in host network mode)
- Target
- PORT
- Default
- 8080
Internal port for the API server (change if 8000 conflicts in host network mode)
- Target
- API_PORT
- Default
- 8000
Override the API base URL (e.g., behind a reverse proxy). Leave empty to auto-detect from browser URL.
- Target
- VITE_BASE_API_URL
Address your Shelly devices can reach this container on, e.g. http://192.168.1.50:8080, using the WebUI port. Needed only to update a device that has no internet access: the manager downloads the firmware once and the device fetches it from here. Devices fetch it unauthenticated. Leave empty if all your devices can reach the internet.
- Target
- SHELLY_FIRMWARE_ADVERTISED_BASE_URL