
All apps · 0 apps

printspy
Docker app from ccmpbll's Repository
Overview
Readme
View on GitHub PrintSpy




A self-hosted dashboard for monitoring multiple 3D printers — OctoPrint and PrusaLink — from a single web interface.
This was built for my own personal use and the way I want to interact with my printers, as well as an ongoing experiment in agentic coding.
Still Under Development — expect rough edges, breaking changes, and evolving APIs. Feedback and contributions welcome.
What it does
Each printer gets a row in the dashboard: webcam/snapshot, progress/ETA, temps, and smart plug power state/control. Updates push live via SSE. Everything's configured through the settings page — no config files, no restart needed.
Screenshots
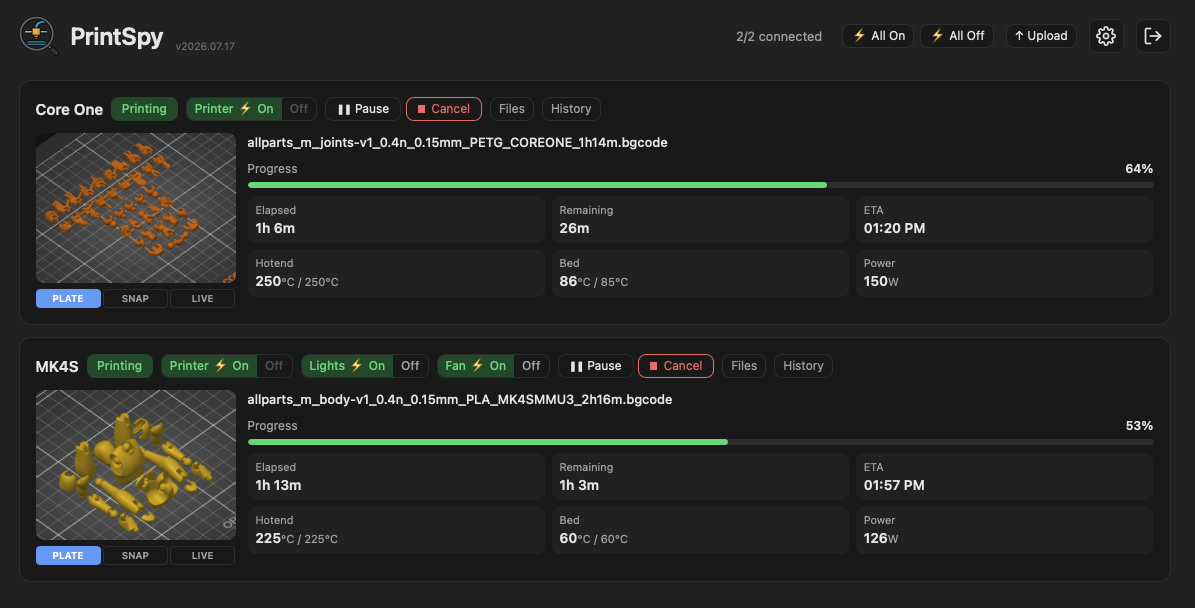
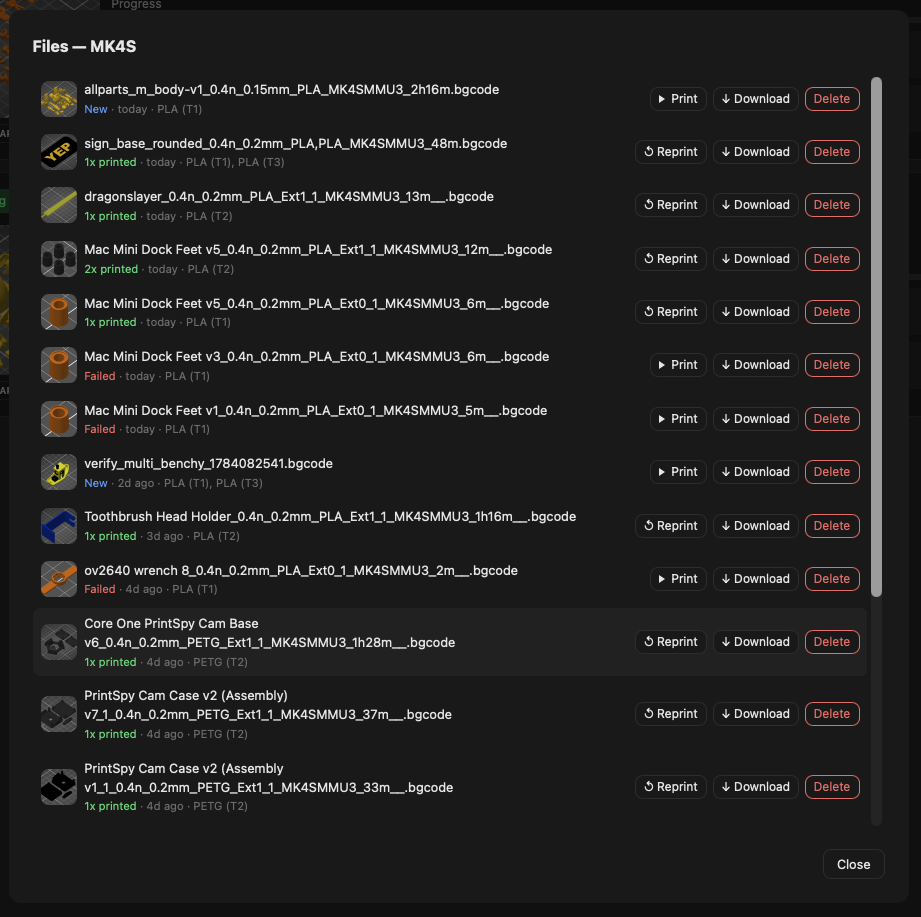
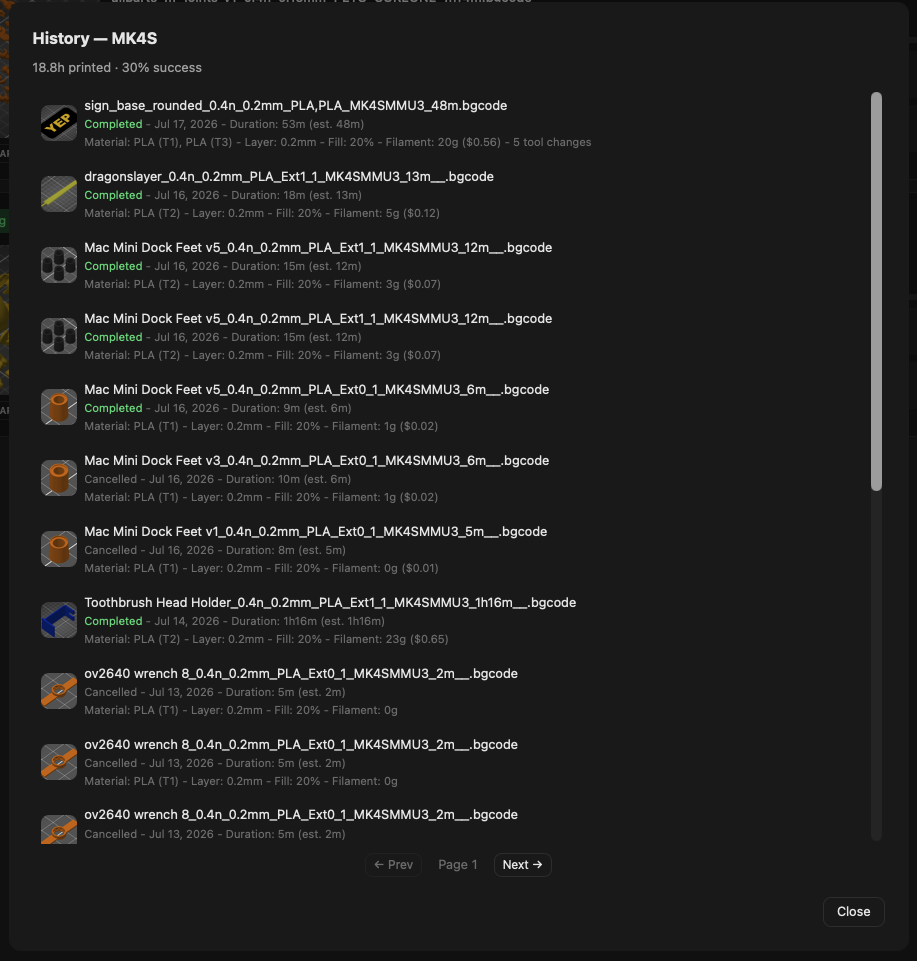
File Manager & Print History
Supported platforms
- OctoPrint — supported, but not tested against OctoPrint v2
- PrusaLink — supported, but only tested on MK4S and Core One
Plugin architecture — new platforms should be straightforward to add.
Features
Core (both platforms)
- Real-time dashboard updates via SSE, no manual refresh
- Print control — pause, resume, cancel
- File Manager per printer — browse every file on its storage, one-click reprint, download, or delete, thumbnail and material/tool previews for every file (native on OctoPrint, cached from the file's own metadata on PrusaLink)
- Print history per printer, with configurable retention (days, 0 = keep forever) and real thumbnails per entry
- Pushover notifications — print started/checkpoints/complete/failed/error, each independently configurable: priority, sound, image source (camera/thumbnail/none), and custom title/message templates
- Smart plug power control via a directly-configured Tasmota device, independent of any platform plugin, assignable to any printer — HTTP-direct (default) or MQTT (push-based, opt-in per plug)
- Auto-off after idle timeout and thermal runaway protection (second layer on top of firmware protection) for printers with an assigned smart plug
- Camera feed via printspy-cam (ESP32-CAM firmware), assignable to any printer — snapshot/live/plate-thumbnail toggle buttons under each card's image, with an optional global setting to hide the whole section for a printer while it's unreachable
- Multi-user login with per-account passwords, no roles/tiers
- Config backup/restore as YAML
- Printer reordering, optional free-text "model" field, dark mode, responsive layout
OctoPrint
- Auto-detects camera stack (MJPEG or camera-streamer), printer name, and installed plugins
- Native smart plug power control + energy monitoring, auto-detected via the Tasmota or PSU Control plugin
- Layer progress display (needs the DisplayLayerProgress plugin)
- Live webcam streaming, with a snapshot/live toggle
PrusaLink
- Snapshot only — no live stream from the printer's own camera (assign a printspy-cam for a live feed)
- No native power control over the API — use a directly-configured smart plug instead
- Keepalive ping — works around printers whose wifi drops off after sitting idle
- File upload from the dashboard, with an optional "print immediately"
- Slicer print-host target — point PrusaSlicer/OrcaSlicer's "Send to printer" (PrusaLink mode) at PrintSpy, pinned to one specific printer; "Upload" relays automatically once the printer's online, "Upload and Print" also powers it on first if it's off — no manual step either way
- Print history enriched with real per-print metadata — material, filament used/cost, layer height, duration vs. estimate, and per-tool breakdown for multi-material prints — parsed directly from the file's own slicer metadata, since none of this is exposed over PrusaLink's API
Quick start
docker run -d \
  --name printspy \
  -p 8080:8080 \
  -v printspy-data:/data \
  ccmpbll/printspy:latest
Open http://<docker host IP>:8080 — first run prompts you to create a login. Once in, click the settings gear and add your first printer. You'll need the printer's URL and OctoPrint API key or Prusalink user/pass.
Docker Compose
services:
  printspy:
    image: ccmpbll/printspy:latest
    ports:
      - "8080:8080"
    volumes:
      - printspy-data:/data
    restart: unless-stopped

volumes:
  printspy-data:
Configuration
All printer management is done through the web UI — open the settings page to add, edit, reorder, and remove printers. No config files needed.
Login
First run redirects to a setup page to create the first account. Add or remove additional users from Settings → Users. No roles or permission tiers — every account has full access.
Smart plugs
OctoPrint printers with the Tasmota or PSU Control plugin installed get power control automatically — nothing to configure. For everything else (PrusaLink or an OctoPrint printer without the plugin), add a Tasmota device directly under Settings → Smart Plugs and assign it to a printer. Plugs are managed independently of printers, so deleting a printer unassigns its plug instead of deleting it.
Each plug can use either connection mode:
- Direct HTTP (default) — polled over the network on each printer's own poll interval, no extra setup
- MQTT — push-based via a broker instead of polling; configure the broker under Settings → MQTT Broker (host:port, optional TLS/username/password), then set the plug's mode to MQTT and enter its Tasmota topic
Both modes can be mixed freely across plugs.
Cameras
Any printer type can get a webcam feed by assigning a printspy-cam device under Settings → Cameras — useful for PrusaLink, which has no webcam support of its own. Assigning a camera overrides whatever webcam a printer's own plugin would otherwise show. Cameras are managed independently of printers, so deleting a printer unassigns its camera instead of deleting it.
Slicer print targets
Create a target under Settings → Slicer print targets, pinned to one printer. In PrusaSlicer or OrcaSlicer, add a physical printer using the PrusaLink host type and set:
- Host: the URL shown on the target,
http://<printspy-host>:<port>/ingest/<label>(the target's label or numeric id both work) - API key / password: the target's own API key, sent by the slicer as the
X-Api-Keyheader. It is separate from your login and from the status API key, and this endpoint does not use the login session.
"Upload" stages the file and relays it to the printer as soon as it is online; "Upload and Print" also powers the printer on first if needed and then starts the print. A wrong key returns 401 and an unknown label or id returns 404. Staged files are kept under PRINTSPY_DATA_DIR/ingest/ until they have been relayed.
Environment variables
| Variable | Default | Description |
|---|---|---|
PRINTSPY_PORT |
8080 |
HTTP server port |
PRINTSPY_DATA_DIR |
/data |
Data directory: the SQLite database (printspy.db) plus ingest/<job id>/ staging folders for slicer uploads that haven't been relayed to a printer yet. Mount it on persistent storage with room for a few uploaded print files. |
Getting your OctoPrint API key
- Open your OctoPrint web interface
- Go to Settings (wrench icon) → API
- Copy the Global API Key, or create a new one under Application Keys
Tech stack
- Go backend — single binary, low resource usage
- SQLite — no external database needed
- Vanilla HTML/CSS/JS frontend — no build step, no framework
- Docker — amd64 container
Building from source
# Requires Go 1.26+ and CGO (for SQLite)
make build

# Or with Docker
make docker
Contributing
PrintSpy is in early development. If you'd like to contribute:
- Open an issue to discuss before submitting large changes
- Bug reports with
docker logsoutput are especially helpful - Plugin implementations for Moonraker/Klipper are welcome
License
AGPL-3.0 — see LICENSE for details.
Categories
Download Statistics
Related apps
Explore more like this
Explore allDetails
ccmpbll/printspy:latestRuntime arguments
- Web UI
http://[IP]:[PORT:8080]- Network
bridge- Shell
sh- Privileged
- false
Template configuration
HTTP web interface port
- Target
- 8080
- Default
- 8080
- Value
- 8080
Path to store PrintSpy database and configuration
- Target
- /data
- Default
- /mnt/user/appdata/printspy
- Value
- /mnt/user/appdata/printspy