

NodeCast-TV-Plus
Docker app from grtgbln's Repository
Overview
Readme
View on GitHub






NodeCast TV Plus
NodeCast TV Plus is a modern, self-hosted IPTV player for Live TV, programme guides, movies, and series. It is an independent, enhanced fork of NodeCast TV.
NodeCast TV Plus is a player only. It does not include, sell, or provide television channels or other media. Use it only with sources you are legally entitled to access.
Highlights
- Live TV with categories, favorites, fast channel changes, an interactive TV guide, progressive catalogue loading, and complete server-side search designed for very large providers.
- Movies and series with posters, metadata, seasons, episodes, favorites, watch progress, and total duration when available.
- Xtream Codes, M3U playlists, and separate XMLTV/EPG sources.
- Smart direct play, remuxing, and FFmpeg transcoding for browser compatibility.
- In-player quality limits, audio-track selection, preferred subtitle languages, and automatic subtitle modes.
- Consistent subtitle rendering with customizable size, colors, background opacity, edge style, and vertical position, including a live appearance preview.
- NVIDIA NVENC, AMD AMF, Intel Quick Sync, and VAAPI hardware acceleration where supported by the host.
- Local accounts with administrator/viewer roles, account-specific preferences, TOTP two-factor authentication, recovery codes, and password safeguards.
- Standards-based OIDC single sign-on with optional SSO-only mode.
- Per-source visibility controls, configurable navigation, and light/dark/system themes.
- Multi-architecture Docker images for
linux/amd64andlinux/arm64.
Interface
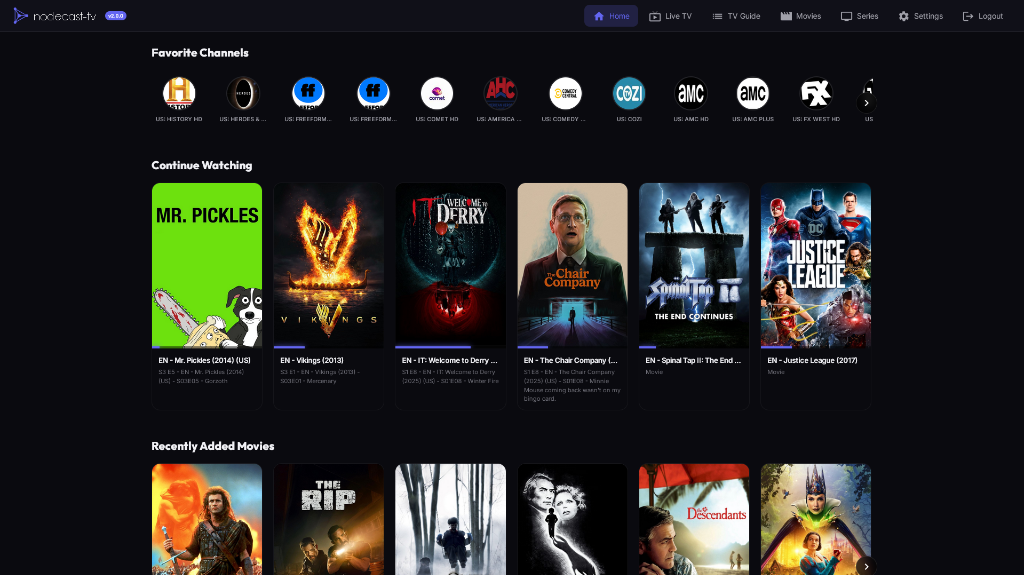
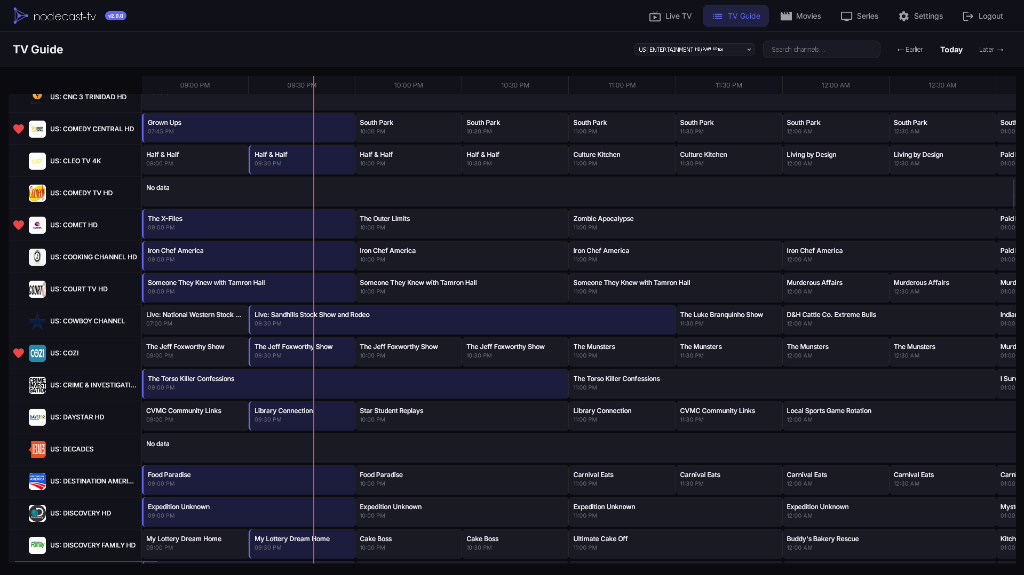
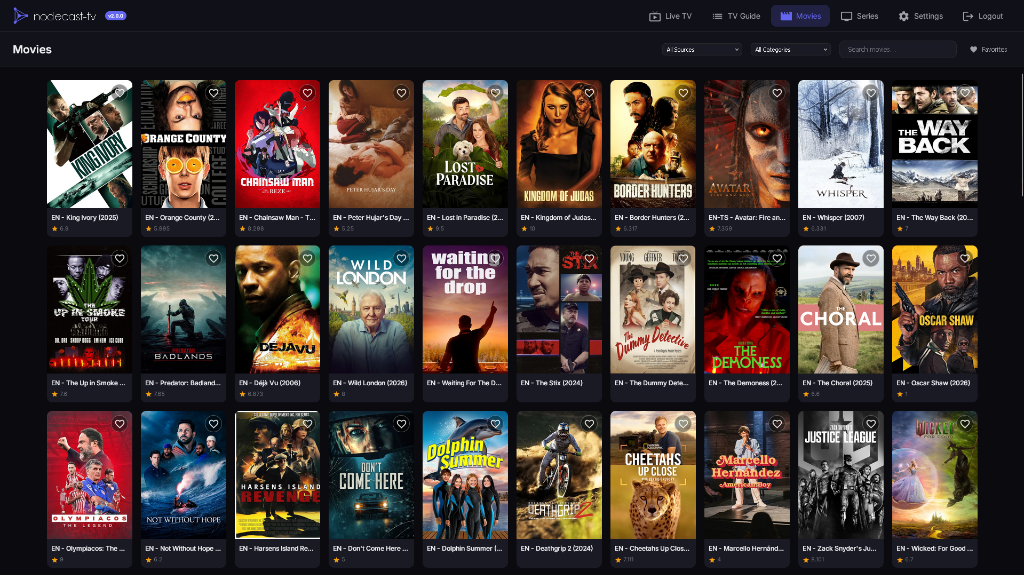
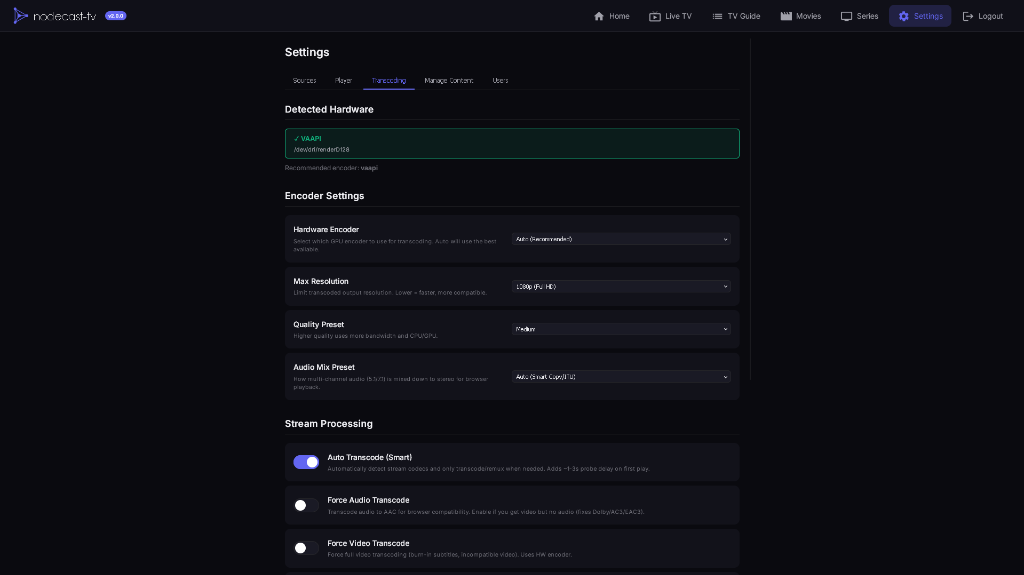
These screenshots were inherited from upstream NodeCast TV. Some will be replaced as the NodeCast TV Plus interface and themes evolve.
Quick start with Docker Compose
Requirements
- Docker Engine
- Docker Compose v2 (
docker compose)
1. Create compose.yml
The file below is an example deployment:
services:
  nodecast-tv-plus:
    image: mikaelkw/nodecast-tv-plus:latest
    container_name: nodecast-tv-plus
    restart: unless-stopped
    ports:
      - "3000:3000"
    env_file:
      - .env
    volumes:
      - nodecast-tv-plus-data:/app/data
    security_opt:
      - no-new-privileges:true

volumes:
  nodecast-tv-plus-data:
    name: nodecast-tv-plus-data
This example reads its environment variables from .env. An environment file is not strictly required—variables can instead be configured directly through Docker or another container platform—but it is recommended because it keeps security secrets separate from compose.yml.
The example uses Docker Hub. The equivalent GitHub Container Registry image is ghcr.io/mikaelkw/nodecast-tv-plus:latest.
latest follows the newest stable release. For controlled upgrades, replace it with an exact version tag from the Releases page.
2. Generate the security secrets
Generate three different random values:
openssl rand -hex 48
openssl rand -hex 48
openssl rand -hex 48
Create .env and paste a different generated value after each security variable:
NODE_ENV=production
JWT_SECRET=replace-with-the-first-generated-value
SESSION_SECRET=replace-with-the-second-generated-value
TOTP_ENCRYPTION_KEY=replace-with-the-third-generated-value
TZ=YOUR_REGION/YOUR_CITY
NODE_ENV=production makes the container refuse to start if JWT_SECRET or SESSION_SECRET is missing or weak. This prevents a production installation from silently using temporary development secrets.
TZ is optional. Replace YOUR_REGION/YOUR_CITY with the appropriate IANA time zone, such as America/New_York, or remove the line if the default UTC time zone is suitable.
Restrict the file so that only its owner can read or modify it:
chmod 600 .env
These values protect logins, sessions, and local-account two-factor authentication. Preserve the same values across container upgrades and restores. Changing TOTP_ENCRYPTION_KEY makes existing TOTP enrollments unusable.
Generate the complete .env file automatically with Docker
If OpenSSL is unavailable, this command creates .env with three independent random secrets:
docker run --rm node:20-alpine node -e "const c=require('crypto'); console.log('NODE_ENV=production'); for (const n of ['JWT_SECRET','SESSION_SECRET','TOTP_ENCRYPTION_KEY']) console.log(n+'='+c.randomBytes(48).toString('hex'))" > .env
chmod 600 .env
Add an optional TZ line afterward if required.
3. Start NodeCast TV Plus
docker compose up -d
Open http://YOUR-SERVER-IP:3000 and create the initial administrator account. Usernames retain their chosen capitalization for display but are case-insensitive when signing in. If an upstream installation migrated to this fork already contains names that differ only by capitalization, those accounts continue to require their exact spelling until an administrator renames them uniquely.
Check the container:
docker compose ps
When ready, the container reports healthy. The lightweight /api/health endpoint also reports application readiness without contacting IPTV providers or exposing configuration.
Docker run alternative
The same installation can be started without Compose:
docker run -d \
  --name nodecast-tv-plus \
  --restart unless-stopped \
  --env-file .env \
  --security-opt no-new-privileges:true \
  -p 3000:3000 \
  -v nodecast-tv-plus-data:/app/data \
  mikaelkw/nodecast-tv-plus:latest
Use docker ps to check the container and docker logs nodecast-tv-plus to view its logs.
Updating
Back up the persistent data volume and .env file before upgrading. Then pull and recreate the container:
When using latest, run:
docker compose pull
docker compose up -d
When using an exact version tag, first change the image value in compose.yml to the intended new version, then run the same commands.
The /app/data volume contains users, sources, settings, favorites, and watch history. Recreating the container is safe when this volume and .env are preserved.
To roll back, restore the pre-upgrade data backup and use the previous image tag. Downgrading a data volume already modified by a newer release is not guaranteed.
Updating a container created with Docker run
Pull the intended image, stop and remove the old container, then repeat the Docker Run command from the installation section:
docker pull mikaelkw/nodecast-tv-plus:latest
docker stop nodecast-tv-plus
docker rm nodecast-tv-plus
The named nodecast-tv-plus-data volume and .env file are not removed by these commands. Reusing both preserves the installation.
Configuration
Settings that are not listed below are normally managed inside the application.
Security variables
| Variable | Required | Purpose |
|---|---|---|
JWT_SECRET |
Yes | Protects authentication tokens. Use a unique random value of at least 32 characters. |
SESSION_SECRET |
Yes | Protects login sessions. It must be different from JWT_SECRET. |
TOTP_ENCRYPTION_KEY |
For local-account MFA | Encrypts authenticator-app secrets. Preserve it across upgrades and restores. |
The quick-start command generates all three values securely.
Common optional variables
| Variable | Default | Purpose |
|---|---|---|
NODE_ENV |
Not set | Set to production to make startup fail when JWT_SECRET or SESSION_SECRET is missing or weak instead of using temporary development secrets. Recommended as an additional production safeguard. |
APP_ORIGIN |
Automatic | Public origin, such as https://tv.example.com, when automatic reverse-proxy detection is unsuitable. |
AUTH_COOKIE_SECURE |
Automatic | Force secure cookies with true, or disable them with false. Normally leave unset. |
TRUST_PROXY |
loopback, linklocal, uniquelocal |
Express trust proxy setting: which proxy hops may set X-Forwarded-* headers. |
TZ |
Etc/UTC |
Container time zone using an IANA name such as Europe/Oslo. |
NODECAST_BASE_PATH |
Empty | Public subpath when hosting below a path, for example /nodecast. |
NODECAST_INSTANCE_ID |
Automatic | Distinguishes cloned installations that share a hostname. Ordinary installations do not need this. |
ALLOW_LOCAL_MEDIA_URLS |
false |
Allows loopback sources such as http://127.0.0.1. Private LAN addresses do not require it. |
TRANSCODE_START_TIMEOUT_SECONDS |
15 |
Seconds to wait per transcode startup attempt. Accepts 1 to 300. |
Add optional values on new lines in .env, then apply them with:
docker compose up -d
Each installation stores a stable identifier in /app/data. This keeps separate NodeCast TV Plus containers on different ports of the same hostname signed in independently. When cloning an existing data volume, set a different stable NODECAST_INSTANCE_ID for each clone.
OIDC single sign-on
Add these values to .env:
OIDC_ISSUER_URL=https://identity.example.com/application/o/nodecast/
OIDC_CLIENT_ID=your-client-id
OIDC_CLIENT_SECRET=your-client-secret
OIDC_CALLBACK_URL=https://tv.example.com/api/auth/oidc/callback
NodeCast TV Plus uses the provider's standard OIDC discovery document. Authentik, Keycloak, and other standards-compliant providers do not need provider-specific endpoint configuration.
OIDC URLs must use HTTPS except when testing through localhost.
New SSO accounts receive the Viewer role. An administrator can promote them under Settings > Users.
To use SSO-only sign-in:
DISABLE_LOCAL_AUTH=true
OIDC_AUTO_REDIRECT=true
Before disabling local sign-in:
- Complete the initial local administrator setup.
- Confirm that an SSO account can sign in.
- Promote the intended SSO account to Administrator.
- Back up
/app/dataand.env. - Enable SSO-only mode, restart, and verify administrator access.
If local sign-in remains enabled, login.html?local=1 bypasses automatic SSO redirect for that visit.
For unusual providers without discovery, OIDC_AUTH_URL, OIDC_TOKEN_URL, and OIDC_USERINFO_URL can override the individual endpoints.
Reverse proxy and subpath notes
Forward the original host and protocol, allow streaming responses, and disable proxy buffering. For HTTPS deployments, enabling Force Backend Proxy under Settings > Transcoding can resolve mixed-content or provider CORS restrictions.
The backend trusts X-Forwarded-* headers from loopback and private-network proxies. When TLS terminates further upstream — for example, a CDN or tunnel that connects to the container over plain HTTP from a public address — the backend may still treat requests as HTTP. Typical symptoms are Cross-site request blocked during local sign-in and http:// stream URLs on an https:// page, which browsers block as mixed content.
- Route through at least one proxy hop on a private address that forwards the original scheme (
X-Forwarded-Proto: https), or - Pin the public origin in
.env:
APP_ORIGIN=https://tv.example.com
APP_ORIGIN fixes the same-origin check for local sign-in. HLS playlists rewritten by the backend proxy use root-relative URLs, so stream requests inherit the page scheme and work over HTTP and HTTPS alike. For advanced topologies, TRUST_PROXY overrides which proxy hops are trusted: false disables header trust, a number from 0 to 10 sets the maximum proxy hop count, and a comma-separated subnet list names trusted hops explicitly. The value true is rejected and falls back to the default private-network list.
When publishing at a subpath such as https://tv.example.com/nodecast/:
NODECAST_BASE_PATH=/nodecast
The reverse proxy must strip that prefix before forwarding requests. Preserve the trailing slash. When using SSO, register and configure the complete callback URL:
OIDC_CALLBACK_URL=https://tv.example.com/nodecast/api/auth/oidc/callback
Add content
- Open Settings > Sources.
- Add an Xtream Codes connection, M3U playlist, or separate EPG source.
- Wait for the initial synchronization to finish.
- Browse the available content under Live TV, TV Guide, Movies, or Series.
Source settings can control whether content appears in Live TV, Movies, or Series. The Manage Content tab controls individual groups and channels.
Playback and transcoding
Keep Auto Transcode (Smart) enabled unless troubleshooting a specific provider. NodeCast TV Plus probes each stream and chooses direct playback, remuxing, audio conversion, or full transcoding as needed.
During playback:
- Auto uses the normal best-effort quality behavior.
- A resolution limit can be selected without leaving the player.
- Available audio and subtitle tracks can be changed for movies and episodes.
- A provider may prevent a requested quality limit; playback then returns to the original stream with a clear notice.
Common adjustments under Settings > Transcoding:
| Problem | Adjustment |
|---|---|
| Browser reports CORS or mixed-content errors | Enable Force Backend Proxy. |
| Video plays without audio | Enable Force Audio Transcode. |
| Browser cannot decode the video | Enable Force Video Transcode. |
| Provider startup is unusually slow | Increase TRANSCODE_START_TIMEOUT_SECONDS in .env. |
| Constant buffering | Lower the maximum resolution or quality preset, check available CPU/GPU and network capacity, and compare HLS with MPEG-TS output when the Xtream provider offers both. |
HLS is preferred. Raw MPEG-TS streams are automatically remuxed when required. RTMP and RTSP cannot be played directly by web browsers.
Personal subtitle preferences
Open Settings > Preferences to choose a preferred subtitle language and automatic mode for Movies and Series: No subtitles, Default, Forced only, or Always preferred. Select a language to enable Always preferred; tracks can still be changed manually during playback.
Subtitle appearance controls include text size and color, background color and opacity, edge style, and vertical position, with a live preview. These settings apply only to the signed-in account, including viewer accounts; they do not change global server settings.
The HTML subtitle overlay uses these controls during ordinary playback and web fullscreen. iPhone/iPad native fullscreen and other browser-controlled playback surfaces use native subtitle rendering, which may not honor the same appearance settings.
Browser codec support and stream types
Browser codec support depends on the browser, operating system, device hardware, and installed media components. NodeCast TV Plus probes streams and converts unsupported media when smart transcoding is enabled.
| Codec | Typical browser behavior |
|---|---|
| H.264 / AVC video | Broad native support and normally played directly. |
| H.265 / HEVC video | Native support varies; otherwise video is transcoded. |
| AV1 video | Native support varies by browser and hardware; otherwise video is transcoded. |
| AAC audio | Broad native support and normally played directly. |
| AC3 / EAC3 audio | Support varies; audio is converted to AAC when required. |
On Windows, Microsoft provides the HEVC Video Extensions for applications and browsers that use the system's HEVC support. Native playback still depends on the browser, Windows version, hardware, and media format.
WebKit documents AV1 support in Safari on devices with AV1 hardware decoding. On other Apple devices, smart transcoding provides the compatibility fallback.
Supported input and delivery types:
| Stream type | Support |
|---|---|
HLS (.m3u8) |
Preferred for Live TV and adaptive streaming. |
MPEG-TS (.ts) |
Supported through automatic or forced remuxing/transcoding. |
| Progressive VOD files | Supported when the provider exposes a browser-compatible or processable media URL. |
| RTMP / RTSP | Not played directly because web browsers do not support these protocols natively. |
Transcoding settings reference
All stream-processing options are under Settings > Transcoding.
| Setting | Options | Purpose |
|---|---|---|
| Hardware Encoder | Auto, NVENC, AMF, QSV, VAAPI, Software | Selects GPU or software encoding. Auto uses the best detected option. |
| Max Resolution | 4K, 1080p, 720p, 480p | Best-effort upper limit for transcoded output. Lower values reduce processing and bandwidth. |
| Quality Preset | High, Medium, Low | Balances picture quality against CPU/GPU work and bandwidth. |
| Audio Mix Preset | Auto, ITU, Night Mode, Cinematic, Passthrough | Controls how multi-channel audio is converted for browser playback. |
Audio mix presets:
| Preset | Behavior |
|---|---|
| Auto (Smart) | Copies compatible stereo AAC and uses a balanced downmix for multi-channel audio. |
| ITU-R BS.775 | Standard balanced surround-to-stereo downmix. |
| Night Mode | Emphasizes dialogue and reduces loud bass or effects. |
| Cinematic | Preserves a wider, more spacious presentation. |
| Passthrough | Avoids audio processing when the browser and source are already compatible. |
Stream-processing controls:
| Setting | Purpose |
|---|---|
| Auto Transcode (Smart) | Probes each stream and chooses direct playback, remuxing, audio conversion, or full transcoding. Recommended for most installations. |
| Force Audio Transcode | Converts audio to AAC while preserving compatible video. Useful when video works but audio does not. |
| Force Video Transcode | Converts both video and audio for sources a browser cannot decode. |
| Force Remux | Forces a container conversion without re-encoding compatible audio/video tracks. |
| Stream Output Format | Chooses the HLS or MPEG-TS format requested from an Xtream provider. |
| Force Backend Proxy | Sends provider media through NodeCast TV Plus to handle CORS, mixed-content, or provider-access restrictions. |
Hardware acceleration
Hardware acceleration requires compatible host drivers and access to the GPU from the container.
For Intel Quick Sync or VAAPI devices, add this to the service in compose.yml:
    devices:
      - /dev/dri:/dev/dri
For NVIDIA NVENC, install the NVIDIA Container Toolkit and add:
    deploy:
      resources:
        reservations:
          devices:
            - driver: nvidia
              count: 1
              capabilities: [gpu, utility, video, compute]
Recreate the container, then check Settings > Transcoding for detected hardware. Availability depends on the host, drivers, container runtime, and codecs involved.
IPTV middleware, TVHeadend, and Acestream
IPTV middleware
Middleware such as Dispatcharr, Threadfin, xTeVe, or m3u-editor may expose streams without browser-compatible CORS headers or as raw MPEG-TS.
Recommended starting point:
- Keep Auto Transcode (Smart) enabled.
- Enable Force Backend Proxy if the browser reports CORS, HTTPS mixed-content, or provider-access errors.
- Prefer HLS output from the middleware when it is available.
TVHeadend
The simplest option is to enable Force Backend Proxy under Settings > Transcoding.
Alternatively, configure the NodeCast TV Plus origin in TVHeadend's CORS settings. Include the complete protocol, hostname, and port, for example http://192.168.1.100:3000.
If authentication fails, confirm that the M3U URL and TVHeadend authentication mode are compatible. Different TVHeadend stream profiles may also produce different browser results.
Acestream and other P2P gateways
HLS output is recommended:
http://gateway:6878/ace/manifest.m3u8?id=STREAM_ID
Raw MPEG-TS output can also be processed, but requires backend remuxing and may place more load on the server:
http://gateway:6878/ace/getstream?id=STREAM_ID
Stream availability and legality depend on the configured source. NodeCast TV Plus does not provide Acestream IDs or media.
Two-factor authentication
Local accounts can enable authenticator-app TOTP from the username menu under Account security. Sign-in accepts a current six-digit code or one of the single-use recovery codes created during enrollment.
Keep both /app/data and TOTP_ENCRYPTION_KEY in the deployment backup. Recovery codes are only shown during enrollment or regeneration.
SSO accounts use the identity provider's authentication and MFA policy.
Migrating from upstream NodeCast TV
Downgrading from NodeCast TV Plus back to upstream NodeCast TV after Plus has opened the data volume is not supported. Returning to upstream requires restoring the complete backup created before migration.
The current release verifies upgrades from the last formal upstream release (v2.1.1), upstream internal version 2.1.4, and the previous stable NodeCast TV Plus release. The automated release gate checks that accounts, source configuration, settings, favorites, history, hidden content, and authentication data survive the upgrade.
Before migrating:
- Stop the old container.
- Back up the complete storage currently mounted at
/app/data. - Create
compose.ymland.envas described above. - Mount the existing upstream storage at
/app/datainstead of creating an empty volume. - Start NodeCast TV Plus and verify login, sources, favorites, history, and playback before removing the backup.
Migration support is version-specific. Future upstream or Plus versions are not assumed compatible until they pass the release gate. Configuration stored outside /app/data, including reverse-proxy, OIDC, device mappings, and custom integrations, must be migrated separately.
See the changelog and release notes for version-specific upgrade information.
Troubleshooting
Diagnostics and support snapshots
Administrators can open Settings > Diagnostics to review recent playback and synchronization events, correlate related events by trace ID, and prepare a bounded support snapshot. Nothing is uploaded automatically; review the preview before downloading or sharing it.
See Diagnostics and support snapshots for event explanations, retention limits, and safe-sharing guidance.
Container does not become healthy
docker compose ps
docker compose logs --tail=200 nodecast-tv-plus
Confirm that JWT_SECRET and SESSION_SECRET are supplied through .env, the environment section of compose.yml, or the container platform, and that port 3000 is not already in use. TOTP_ENCRYPTION_KEY is additionally required when local accounts use authenticator-app MFA.
Provider or playback problem
Test another known-working channel first, then review Settings > Transcoding. Provider outages, expired credentials, unsupported codecs, CORS restrictions, and insufficient transcoding resources can look similar in the player.
When reporting a problem, redact provider URLs, credentials, query tokens, and cookies from logs and screenshots.
Preserve data before experimenting
Do not remove or replace the /app/data volume while troubleshooting. Make a backup before changing image versions or migration settings.
Development and contributing
The normal Docker installation above uses a published image and does not build source code locally.
Source development requires Node.js 18 or newer; Node.js 20 is recommended.
For development:
git clone https://github.com/MikaelKW/nodecast-tv-plus.git
cd nodecast-tv-plus
npm ci
npm run dev
The repository's docker-compose.yml is intended for contributors who need to build an image from their current source checkout. This is what “local build” means; ordinary installations do not need docker compose up -d --build.
Useful checks:
npm test                 # syntax, security, and server smoke tests
npm run test:e2e         # isolated browser, M3U, EPG, API, and playback tests
npm run test:e2e:mobile  # iPhone/WebKit layout and scrolling regression tests
npm run test:e2e:subpath # login, API, navigation, and logout below /nodecast/
npm run test:migration   # upgrades pinned upstream Docker baselines into the local image
Code changes normally target develop and pass automated and hands-on testing before promotion to testing and main.
Security
Do not report suspected security vulnerabilities through the public issue tracker. Review the security policy, then use GitHub's private vulnerability reporting form so the report can be investigated before technical details are disclosed.
Project links
- Releases
- Changelog
- Roadmap
- Report a bug
- Request a feature
- Report a security vulnerability
- Security policy
- Open issues
- Pull requests
License
NodeCast TV Plus is distributed under the GNU General Public License v3.0 only.
Media gallery
1 / 4Download Statistics
Related apps
Explore more like this
Explore allDetails
ghcr.io/mikaelkw/nodecast-tv-plus:latestRuntime arguments
- Web UI
http://[IP]:[PORT:3000]/- Network
bridge- Privileged
- false
Template configuration
Container Port: 3000
- Target
- 3000
- Default
- 3000
- Value
- 3000
JWT secret, at least 32 random characters
- Target
- JWT_SECRET
Session secret, at least 32 random characters
- Target
- SESSION_SECRET
Path to the app data folder
- Target
- /app/data
- Default
- /mnt/user/appdata/nodecast_tv_plus/data
- Value
- /mnt/user/appdata/nodecast_tv_plus/data