
All apps · 0 apps

Log-to-LLM-Sentinel
Docker app from Asch3's Repository
Overview
Readme
View on GitHub🛡️ Log to LLM Sentinel
Your intelligent log guardian powered by Local AI.
Log to LLM Sentinel is a modern, lightweight, and powerful log monitoring tool. Unlike traditional tools that just search for text, Sentinel uses Ollama (Local LLM) to understand why an error happened and tells you exactly what you need to know.
[!WARNING] Disclaimer: This application was originally designed to meet the creator's personal self-hosting needs. Security has not been independently audited, as the intended use case is strictly local/private network. Use this software at your own risk. Contributions to improve security, testing, and robustness are highly welcome!
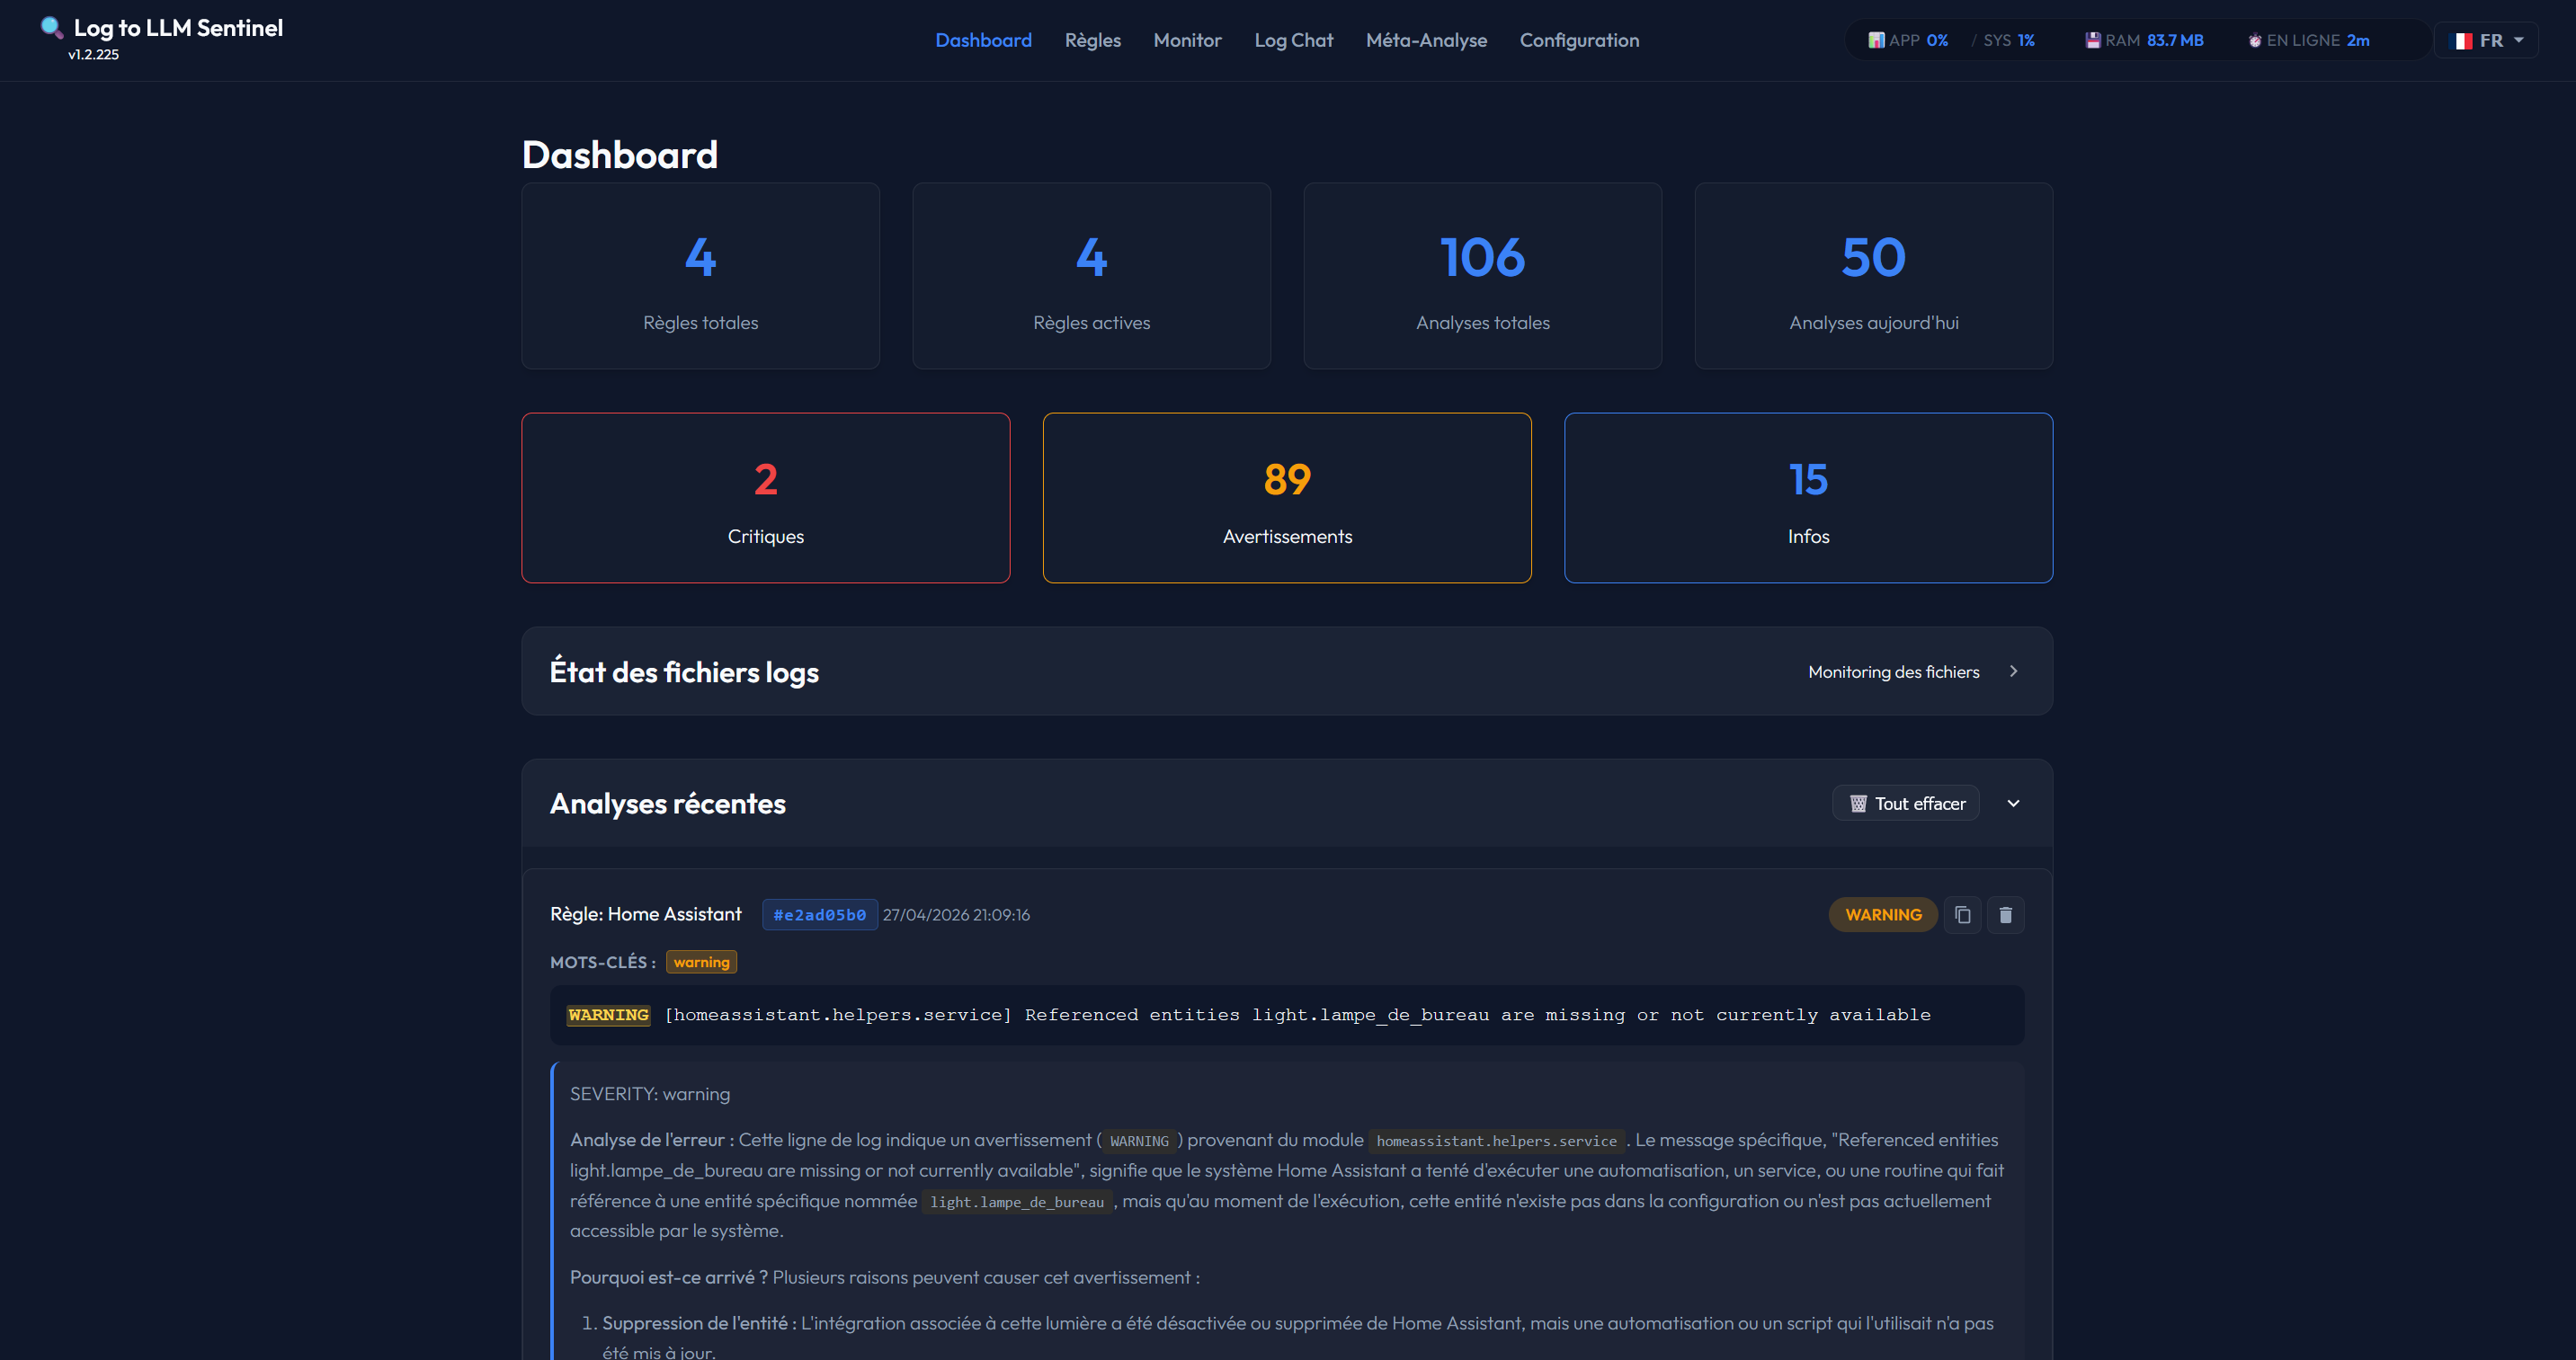
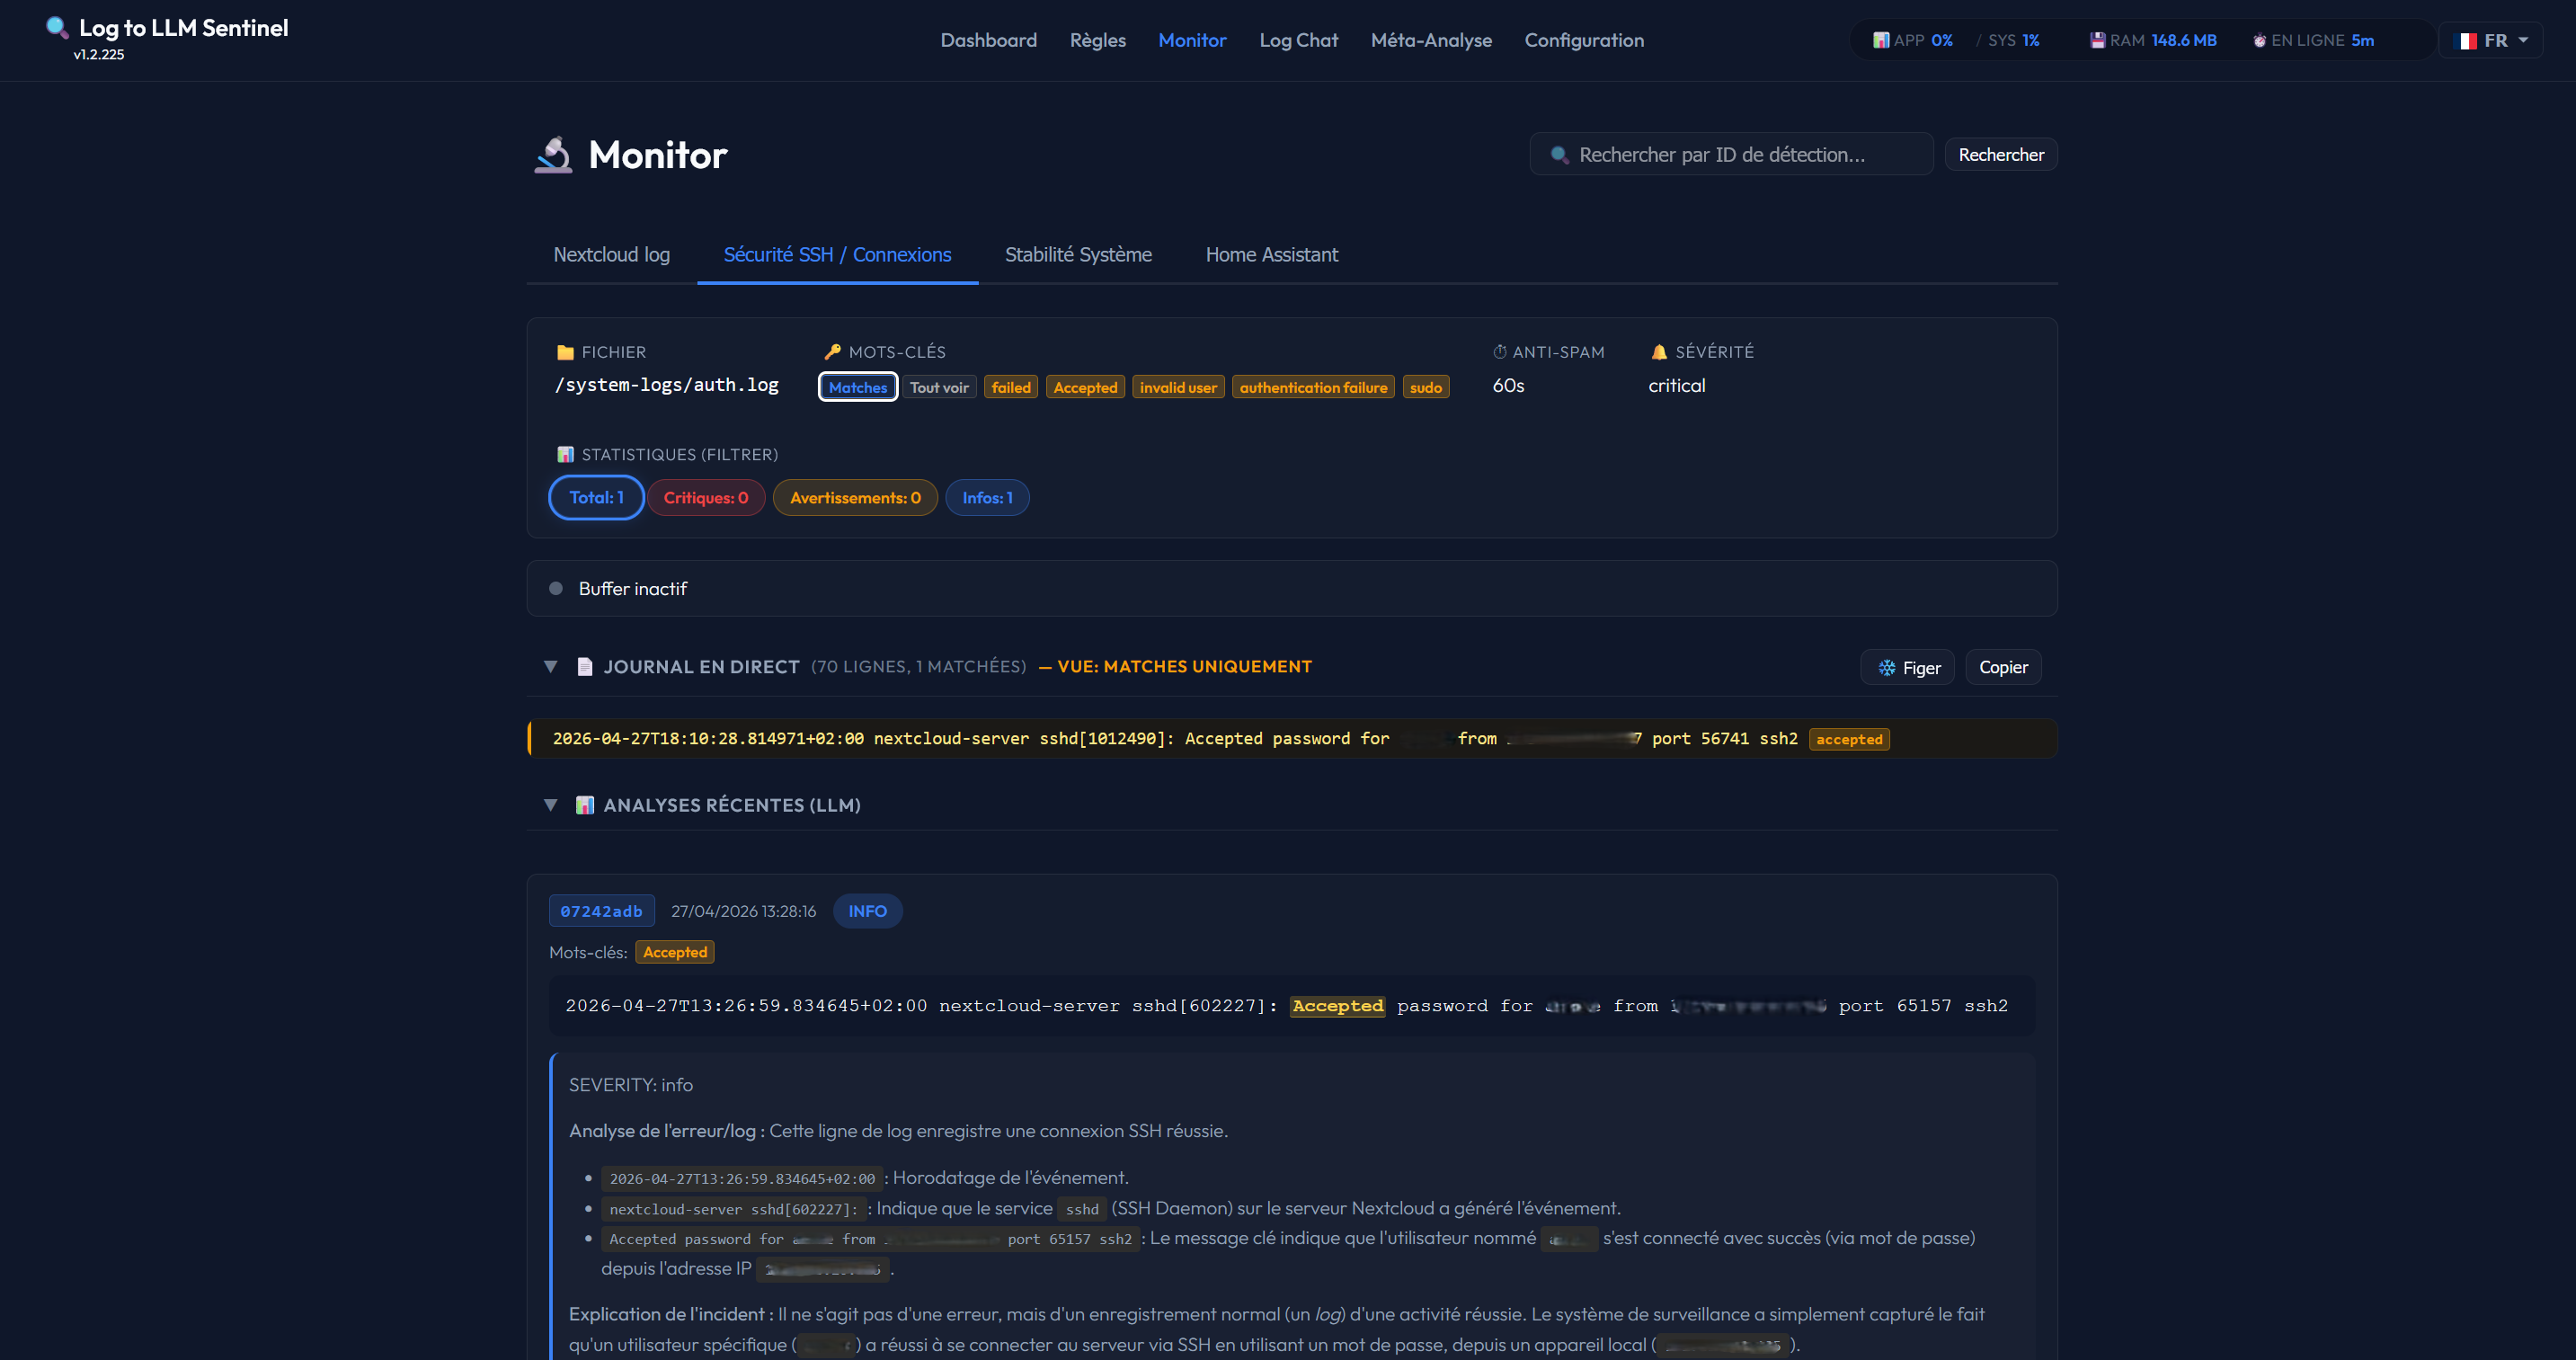
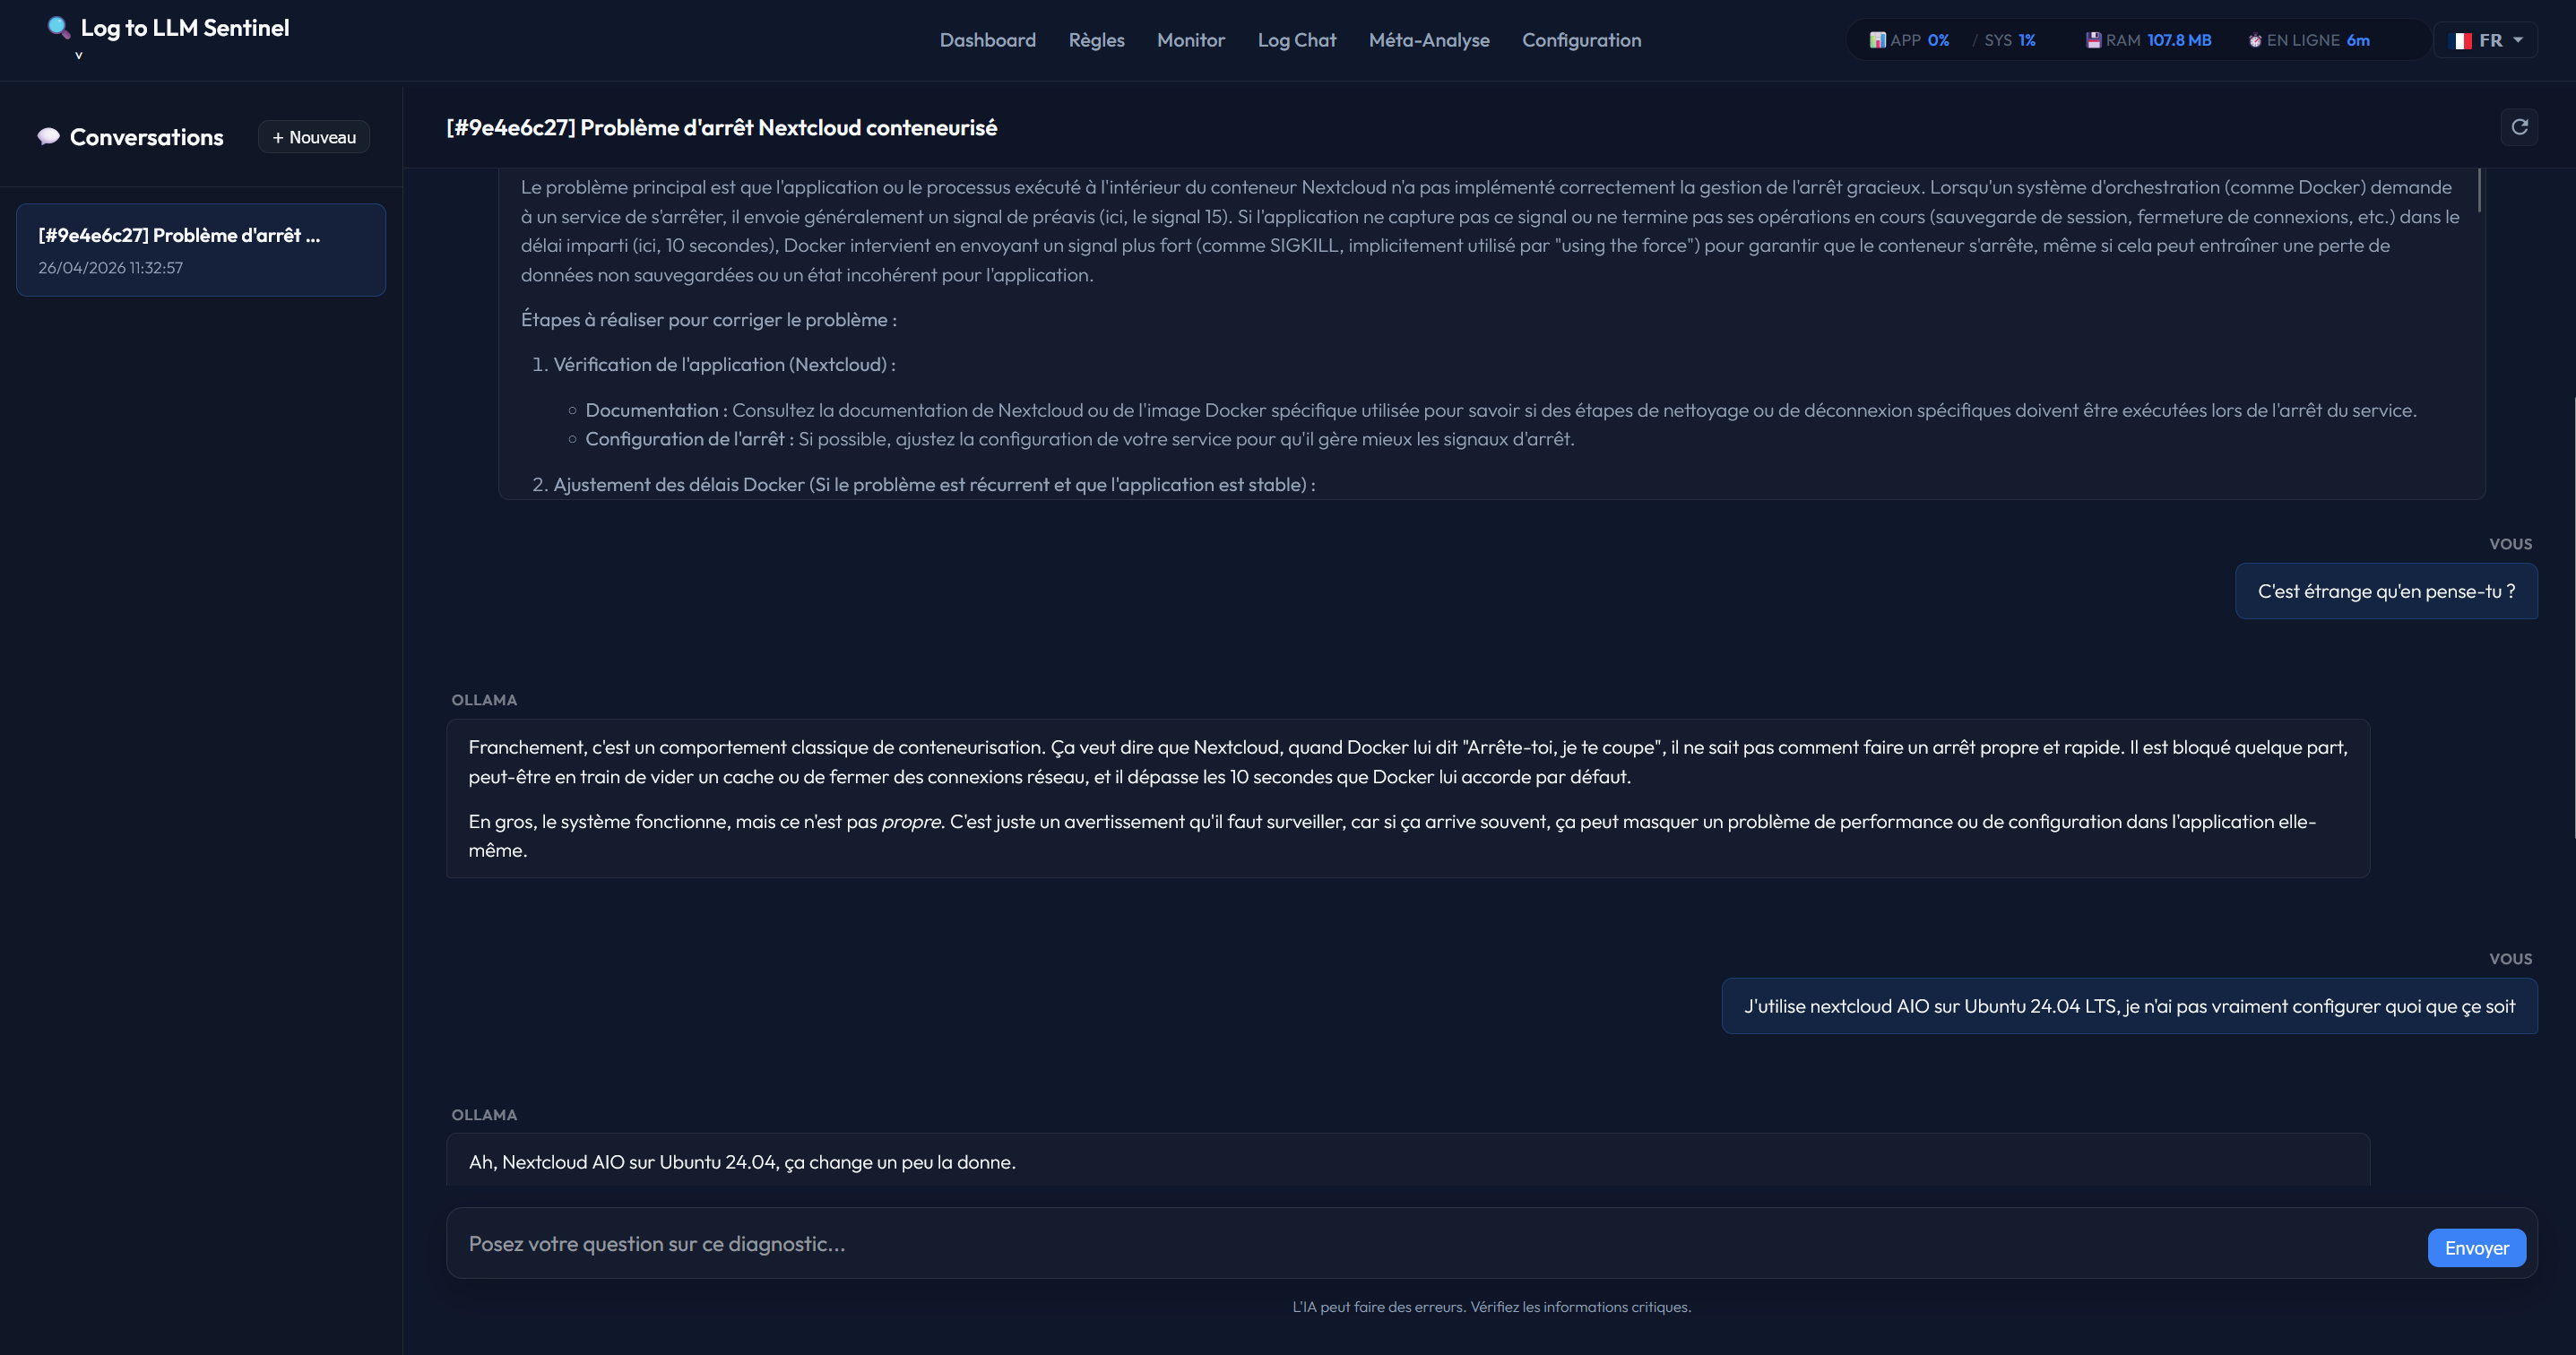
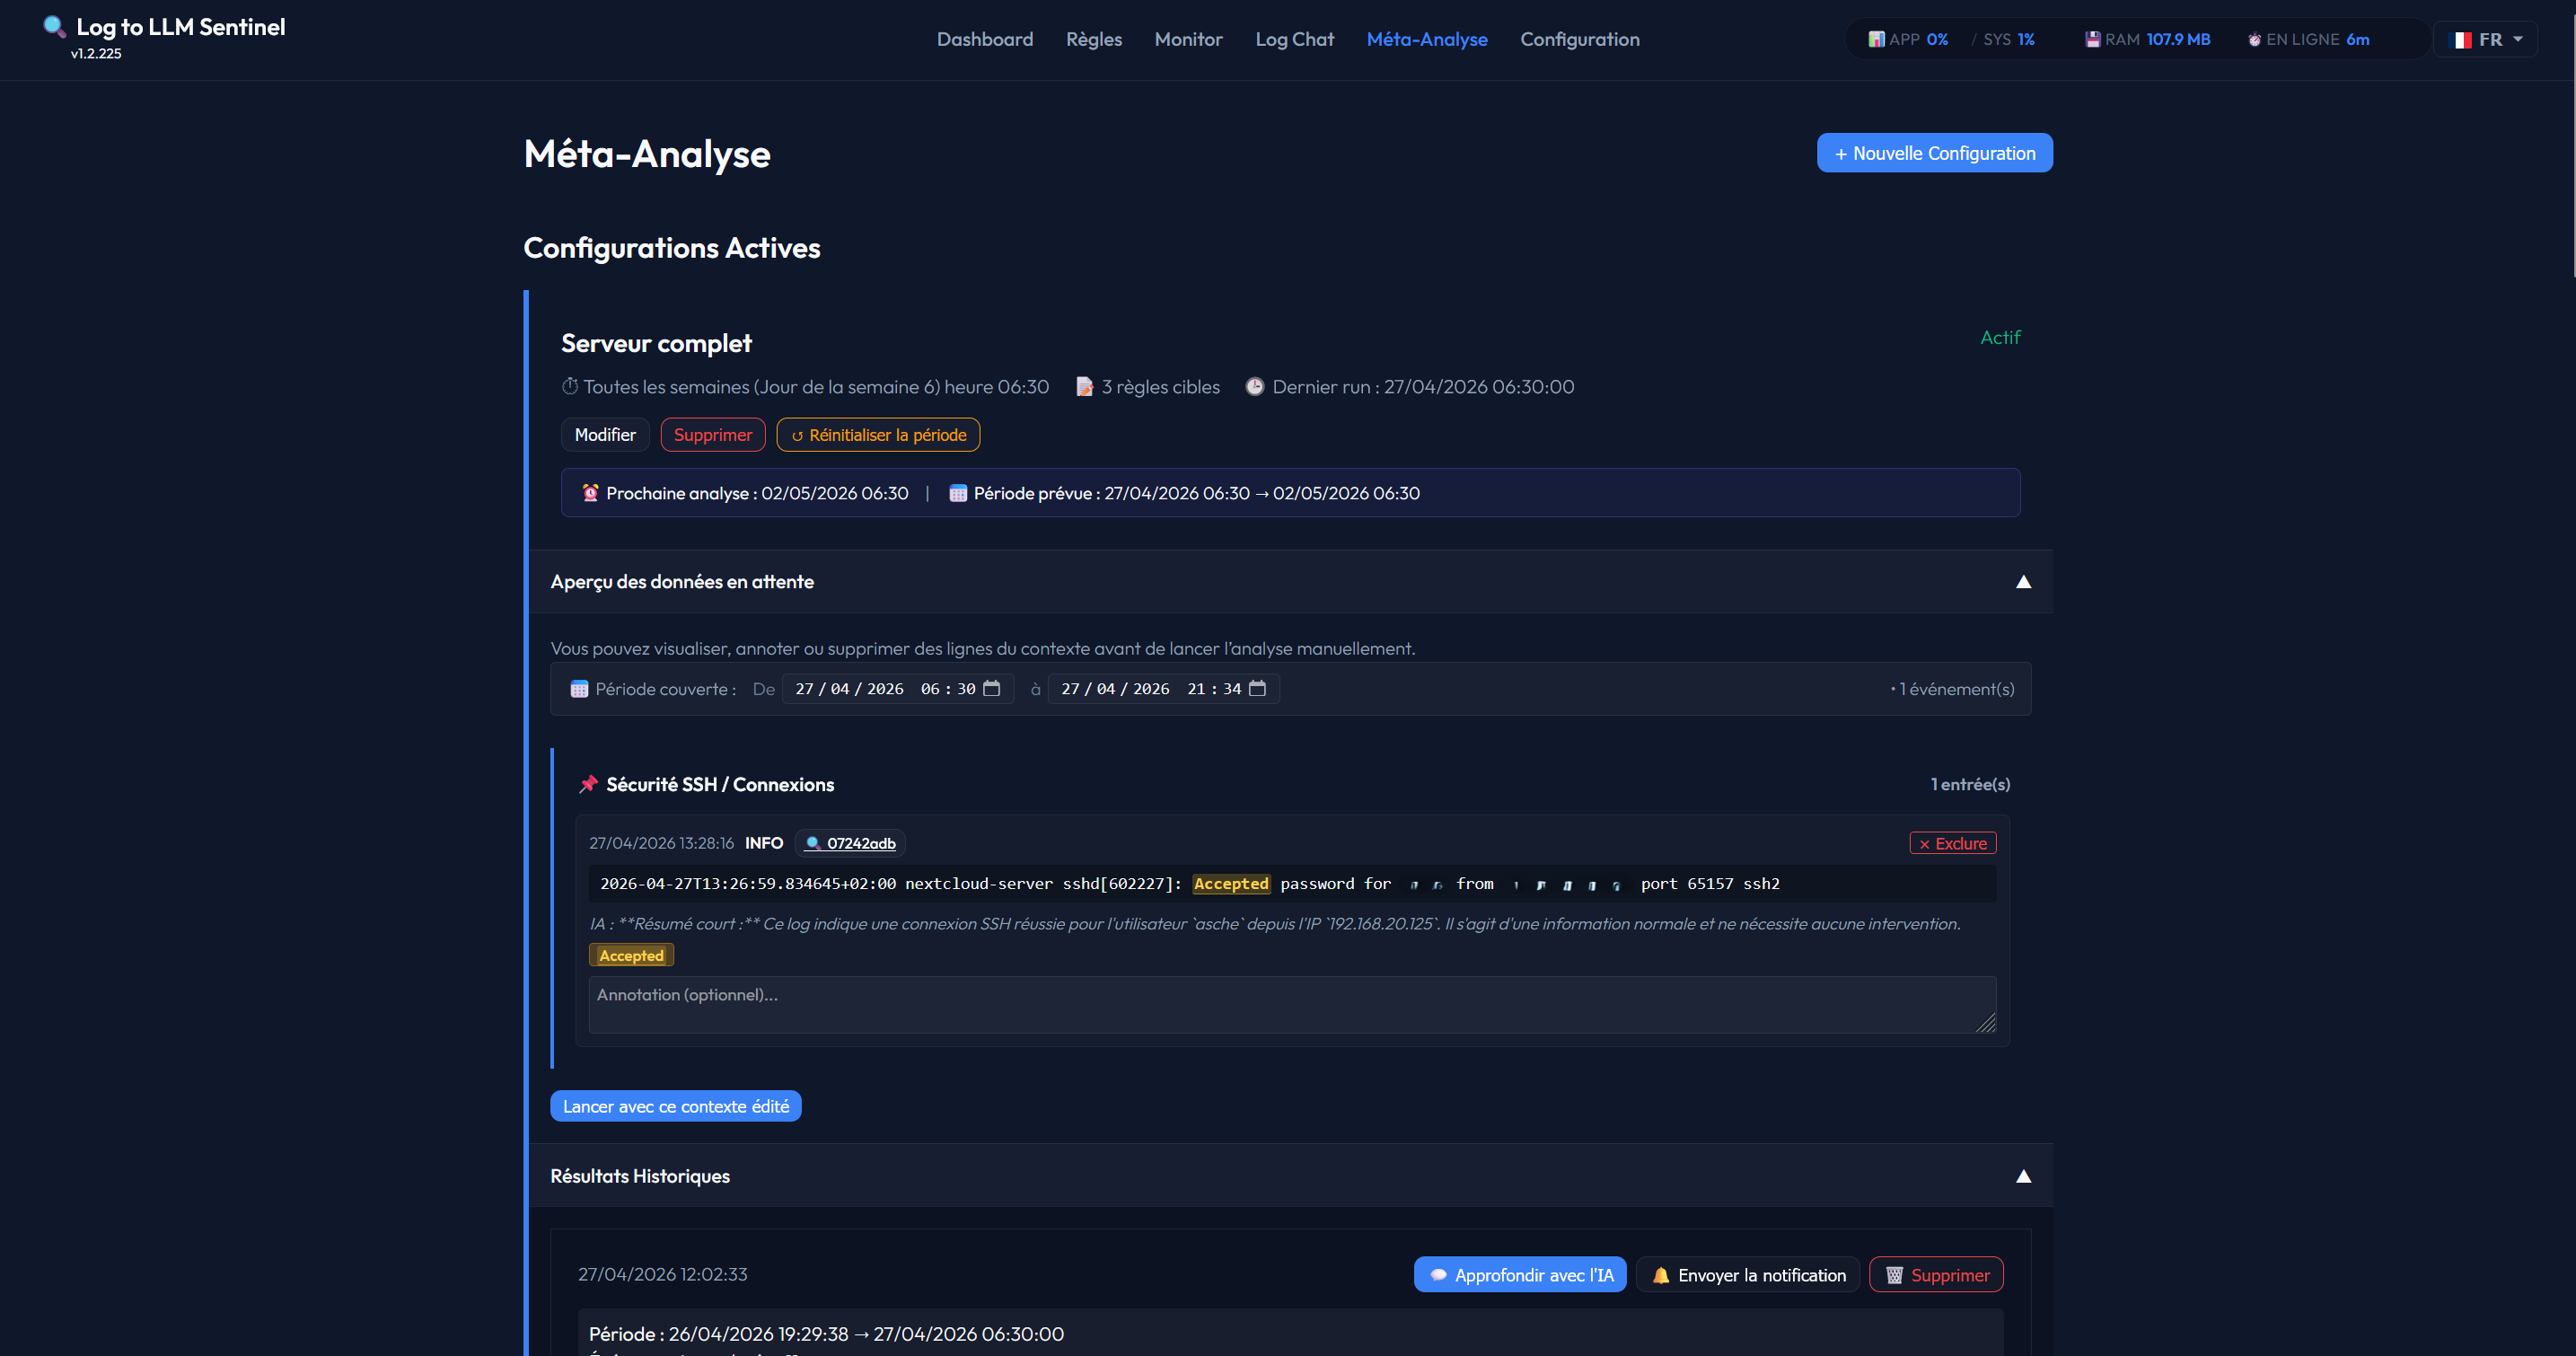
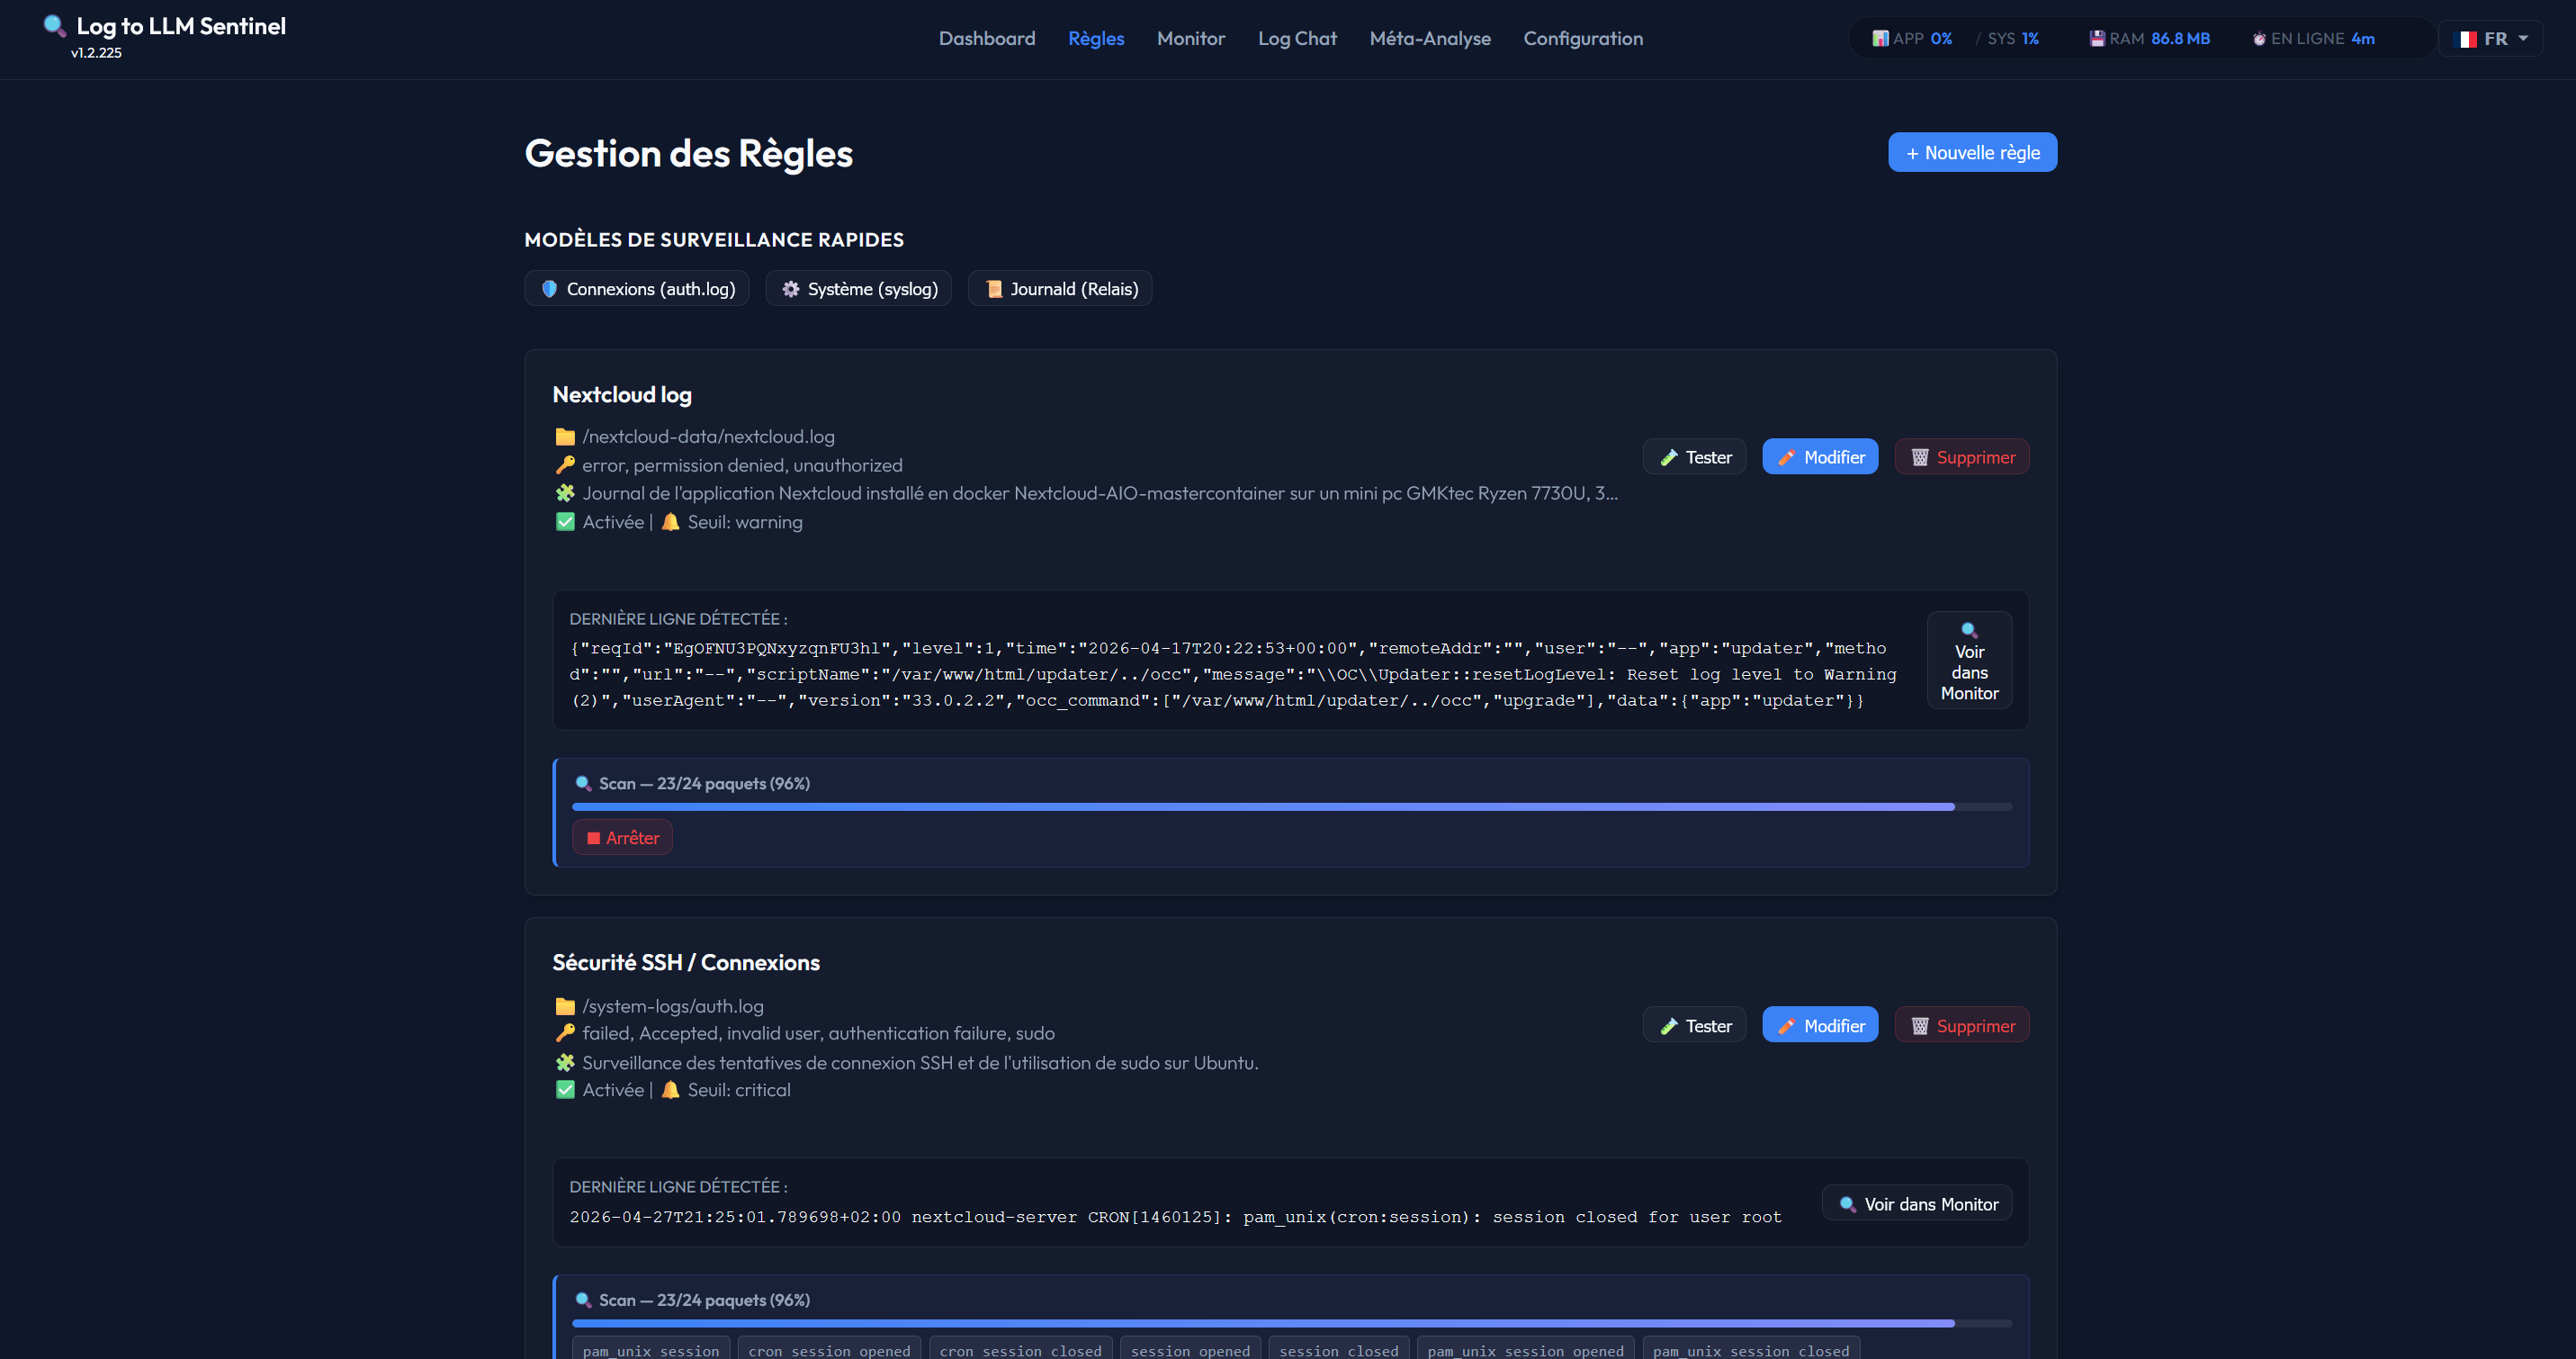
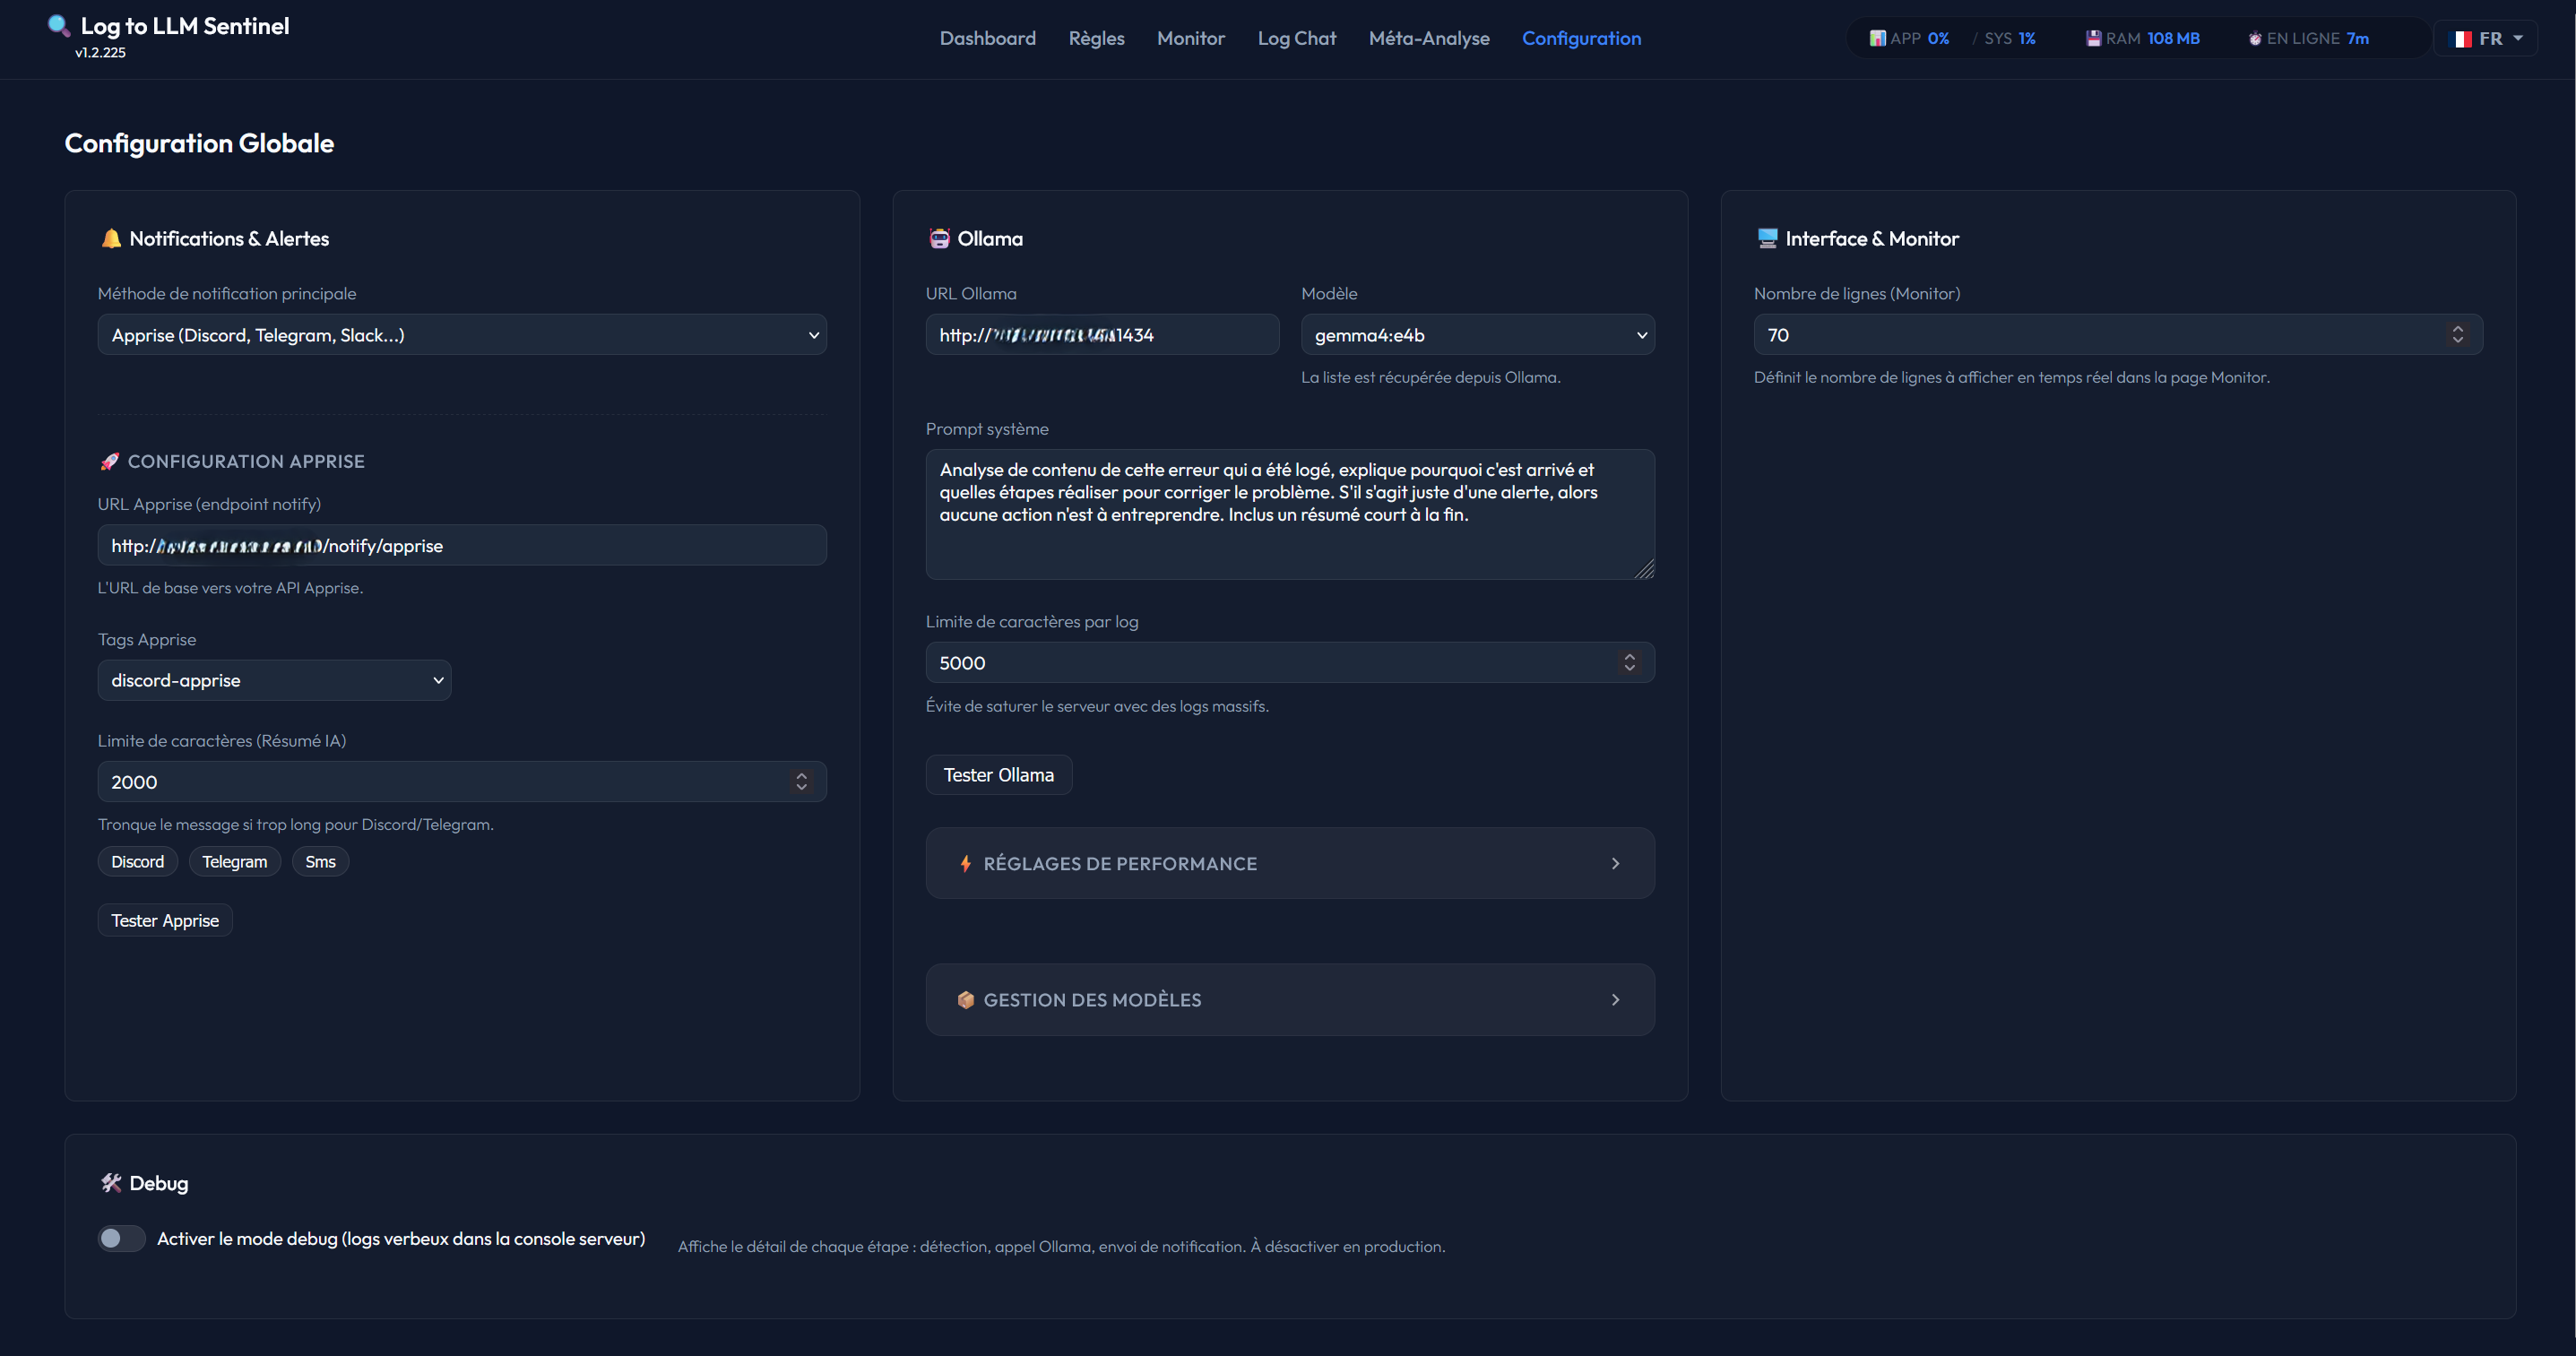
✨ Key Features
🧠 Smart AI Analysis: Don't just get alerted; get an explanation. Sentinel uses Ollama to analyze log context and provide a human-readable diagnosis.
💬 Interactive AI Chat: Deepen any diagnosis by starting a conversation with the AI. The dedicated chat interface allows you to ask follow-up questions and brainstorm solutions in real-time.
📊 AI Meta-Analysis: Get the big picture. Schedule daily, weekly, or monthly reports that aggregate multiple detections into a high-level summary of your system's health and trends.
🤖 Keyword Auto-Learning: Not sure what to look for? Let the AI scan your historical logs. It will automatically suggest and validate the most important keywords to monitor.
📨 Syslog Server & Relay: Turn Sentinel into a remote syslog UDP server (listening on port 10514 UDP on host). Ingest remote logs (e.g., from Unraid) and optionally forward them to a secondary syslog server as a relay.
🔗 Home Assistant Ready: Use Webhooks to stream logs from your smart home directly to Sentinel.
🔔 Smart Notifications: Integrated with SMTP and Apprise (Discord, Telegram, Slack). Sentinel intelligently adapts to character limits by asking the local AI to generate concise summaries when needed, ensuring critical alerts always fit your favorite messaging platform.
🌍 Fully Multilingual: Beautiful interface available in English and French.
🔒 100% Private: Everything runs locally on your machine. No data ever leaves your network.
🚀 Quick Start (For Non-Experts)
The easiest way to run Sentinel is using Docker. This ensures all components (Database, Web Server, and AI) work together perfectly.
Unraid (Community Applications)
If you are using Unraid, Log-to-LLM Sentinel is available directly from the Community Applications (CA) store!
- Go to the Apps tab in your Unraid dashboard.
- Search for
Log-to-LLM Sentinel. - Click Install and configure your paths.
- Note for Custom Logs: By default, the template maps Unraid's Docker logs (
/var/lib/docker/containers) and system logs (/var/log). If you want to monitor other specific logs (e.g., from a specific appdata folder), add a new Path mapping in the template settings, and then append the container path to theSENTINEL_BROWSE_ROOTSvariable (e.g.,/logs,/app/data,/docker-logs,/system-logs,/custom-app-logs).
- Note for Custom Logs: By default, the template maps Unraid's Docker logs (
Docker & Docker Compose
1. Prerequisites
- Install Docker Desktop (Windows/Mac) or Docker Compose (Linux).
- (Optional) Install Ollama locally to use your GPU.
2. Get the files
Either Clone this repository or Download the project as a ZIP and extract it on your computer.
git clone https://github.com/Aschefr/log-to-llm-sentinel
cd log-to-llm-sentinel
3. Generate your Configuration
Download the file by right clicking docker-setup.html and select "Save link as")
We provide a visual tool to help you create your docker-compose.yml file:
- Open it with your favorite web browser (Chrome, Firefox, Edge...).
- Select your options (Port, Log folders, AI mode).
- Copy the generated YAML code.
- Open the existing
docker-compose.ymlfile in your project folder, delete its content, and paste your custom code.
4. Launch the Sentinel
Open a terminal in your project folder and run:
docker-compose up -d
5. Access the Interface
Once the containers are started, open your browser and go to the port you chose (default is 10911): 👉 http://localhost:10911
🤖 AI Configuration Note
- Internal Ollama: If you chose the "Internal" mode in the configurator, Sentinel is already pre-configured to talk to its own AI engine.
- External Ollama: If you use an existing Ollama install, you will need to enter its address (e.g.,
http://192.168.x.x:11434) in the Configuration page of the Sentinel UI. - Important: This project is designed for Local AI only. It currently does not support external cloud APIs like ChatGPT, Claude, or Gemini.
📖 How it Works
- Define a Rule: Point Sentinel to a log file or a Webhook token.
- Set Keywords: Choose which words should trigger an alert (e.g.,
error,failed,critical). - AI Kick-in: When a match is found, Sentinel grabs the surrounding lines and sends them to your local AI.
- Get Notified: You receive a notification with a summary of the situation and the AI's diagnosis.
💡 The "Auto-Learning" Magic
Setting up keywords can be tedious. Use the Auto-Learning Wizard:
- Select a time period (e.g., "The next 24 hours").
- Sentinel will "read" your logs in chunks.
- It identifies recurring errors and asks the AI to refine a list of "Actionable Keywords."
- Result: A perfectly tuned monitoring rule.
📊 Meta-Analysis: The Big Picture
For long-term monitoring, use Meta-Analysis:
- Define a schedule (Daily, Weekly, Monthly).
- Select which rules to include.
- Sentinel will collect all relevant analyses and generate a global synthesis.
- Perfect for identifying silent trends that don't trigger individual critical alerts but are recurring.
🔌 Integrations
🏠 Home Assistant Integration
Sentinel can monitor your Home Assistant logs in real-time. Follow these steps to set up the integration:
1. Create a Webhook Rule in Sentinel
- Go to the Rules page in Sentinel.
- Click Create New Rule.
- In the Source of Logs tab, select Webhook.
- Give it a name (e.g., "Home Assistant") and click Create.
- Sentinel will generate a unique URL for you. Copy this URL.
2. Add the automation to Home Assistant
The best way to integrate this is by using Packages, which keeps your configuration clean and modular.
- Install File Editor: Go to Settings -> Add-ons and install the File Editor add-on (and start it).
- Create the
packagesfolder:- Open the File Editor UI.
- Click the Folder icon in the top left corner.
- If you don't see a
packagesfolder, click the New Folder icon (the folder with a plus sign) and name itpackages.
- Enable Packages in Home Assistant:
- In File Editor, open your
configuration.yamlfile (usually in/config/). - Add the following lines at the top level (ensure
homeassistant:is only defined once):homeassistant: packages: !include_dir_named packages
- In File Editor, open your
- Create the Sentinel Package:
- In File Editor, go into the
packagesfolder and create a new file namedlog-to-llm-sentinel.yaml. - Paste the following code into it (replace
LOG-TO-LLM-SENTINEL-IPwith the IP address of your Docker host (same as in yourdocker-compose.yml) andYOUR-TOKENwith the token from the URL copied from the Sentinel UI (format=xxxxxxxx-xxxx-xxxx-xxxx-xxxxxxxxxxxx)):
- In File Editor, go into the
rest_command:
  sentinel_log_webhook:
    url: "http://LOG-TO-LLM-SENTINEL-IP:10911/api/webhook/logs/YOUR-TOKEN"
    method: POST
    headers:
      Content-Type: "application/json"
    payload: >-
      {"lines": ["{{ level }} [{{ name }}] {{ message[0] if message is list else message | string | truncate(800, True, '...') }}{% if exception %} | EXCEPTION: {{ exception | string | truncate(500, True, '...') }}{% endif %}"]}
    timeout: 10

system_log:
  fire_event: true

automation:
  - id: sentinel_forward_ha_logs_realtime
    alias: "Sentinel - Forward HA logs (realtime)"
    description: >
      Envoie chaque entree du journal HA vers Log Sentinel
      en temps reel via system_log_event.
    mode: queued
    max: 20
    trigger:
      - platform: event
        event_type: system_log_event

    condition:
      - condition: template
        value_template: >-
          {{ trigger.event.data.name not in
             ['homeassistant.components.rest_command',
              'homeassistant.util.logging',
              'homeassistant.components.automation.sentinel_forward_ha_logs_realtime',
              'homeassistant.helpers.template'] }}

    action:
      - service: rest_command.sentinel_log_webhook
        data:
          level: "{{ trigger.event.data.level }}"
          name: "{{ trigger.event.data.name }}"
          message: "{{ trigger.event.data.message[0] if trigger.event.data.message is list else trigger.event.data.message | string | truncate(800, True, '...') }}"
          exception: "{{ trigger.event.data.exception | default('') | string }}"
- Restart Home Assistant or reload your automations and REST commands.
- Sentinel will now receive and analyze your smart home logs in real-time!
☁️ Nextcloud Integration
Find the active nextcloud.log in Docker volumes:
sudo find /var/lib/docker/volumes/ -name "nextcloud.log" -exec ls -lh {} +
🛠️ Configuration
Sentinel is highly customizable via the Configuration page:
- AI Model: Choose your favorite model from Ollama (Gemma, Llama 3, Mistral...).
- Performance: Adjust "Eco" or "GPU" profiles depending on your hardware.
- Privacy: Fine-tune anti-spam delays and sensitivity thresholds.
💻 Local Development
If you want to run Log to LLM Sentinel locally for development without Docker:
1. Prerequisites
- Python: Version 3.10 or higher.
- Ollama: Installed and running locally (for the AI analysis).
2. Setup
- Clone the repository and navigate to it:
git clone https://github.com/Aschefr/log-to-llm-sentinel cd log-to-llm-sentinel - Create and activate a Python virtual environment:
python -m venv .venv # On Windows (PowerShell) .\.venv\Scripts\Activate.ps1 # On Linux/macOS source .venv/bin/activate - Install the dependencies:
pip install -r requirements.txt - Copy the environment configuration template:
cp .env.example .env
3. Run the Server
Launch the FastAPI development server:
uvicorn app.main:app --reload
The application will be accessible at: 👉 http://localhost:8000
📄 License
This project is licensed under the MIT License - see the LICENSE file for details.
🤝 Support & Contribution
If you encounter an issue or have a suggestion, feel free to open an issue on the repository.
Log to LLM Sentinel — Because logs are meant to be understood, not just stored.
Media gallery
1 / 3Categories
Download Statistics
Related apps
Explore more like this
Explore allDetails
aschefr/log-to-llm-sentinel:latestRuntime arguments
- Web UI
http://[IP]:[PORT:10911]/- Network
bridge- Shell
bash- Privileged
- false
Template configuration
Web interface port
- Target
- 10911
- Default
- 10911
- Value
- 10911
UDP Syslog receiver port
- Target
- 514
- Default
- 10514
- Value
- 10514
Database and application settings
- Target
- /app/data
- Default
- /mnt/user/appdata/log-to-llm-sentinel/data
- Value
- /mnt/user/appdata/log-to-llm-sentinel/data
Shared logs folder for temp files
- Target
- /logs
- Default
- /mnt/user/appdata/log-to-llm-sentinel/logs
- Value
- /mnt/user/appdata/log-to-llm-sentinel/logs
Read-only access to Unraid Docker logs
- Target
- /docker-logs
- Default
- /var/lib/docker/containers
- Value
- /var/lib/docker/containers
Read-only access to Unraid system logs
- Target
- /system-logs
- Default
- /var/log
- Value
- /var/log
Directories the UI file browser is allowed to explore
- Target
- SENTINEL_BROWSE_ROOTS
- Default
- /logs,/app/data,/docker-logs,/system-logs
- Value
- /logs,/app/data,/docker-logs,/system-logs
Host IP for the Syslog relay / UI display (optional)
- Target
- SENTINEL_HOST_IP