
All apps · 0 apps
IT-Vault
Docker app from Sha The IT Guy's Repository
Overview
Readme
View on GitHubIT-Vault




A self-hosted IT asset & helpdesk manager: track assets, employees, checkouts, maintenance history, support tickets (with a public portal + a live wallboard monitor), uptime monitoring with alerting, audit logging, LDAP/AD sync, network scanning, and full theming — built as a Flask backend with a single-file vanilla-JS frontend and MariaDB for storage.
Android app
A native Android companion app — assets, tickets, contracts and the directory on your phone, with offline-first editing that syncs when you're back online, QR / barcode scanning, and built-in updates (the app checks for new versions itself, no store required). It also picks up your server's own name and logo after login, so it wears your branding rather than the defaults.
Android will warn that the app is from an unknown developer — that's expected for any app installed outside the Play Store. Tap More details → Install anyway. Once installed, the app updates itself from Settings → Check for updates.
Screenshots
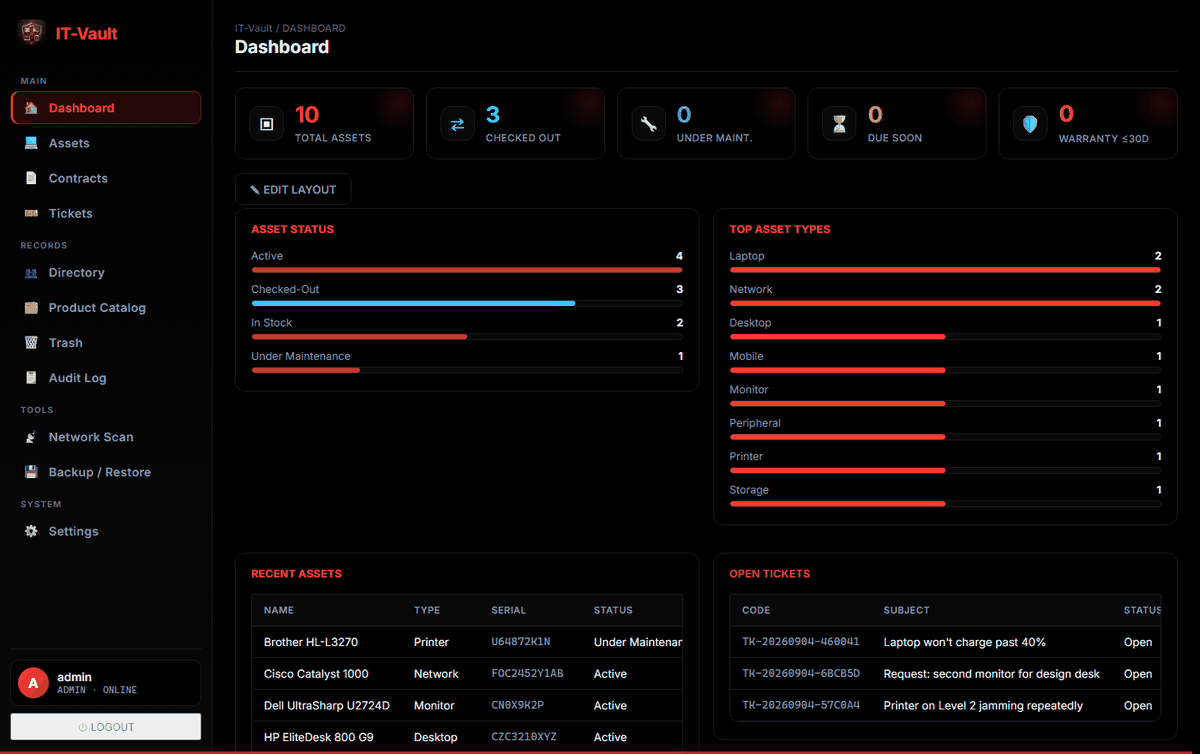
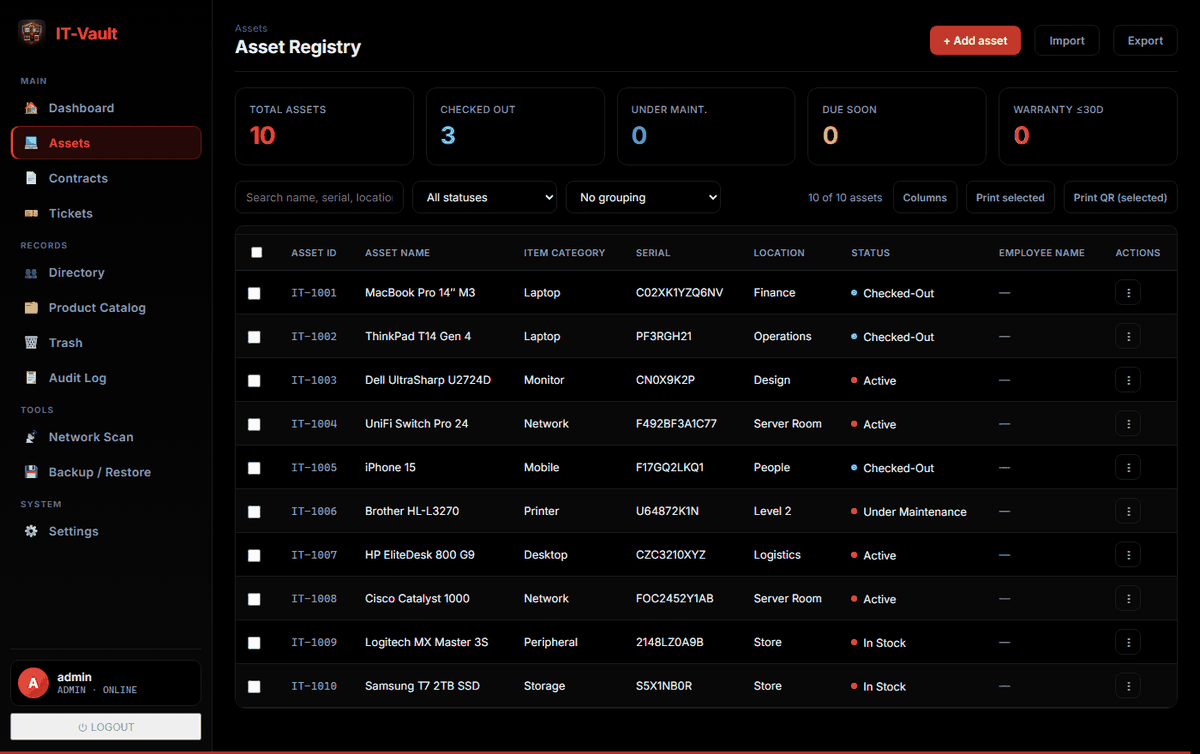
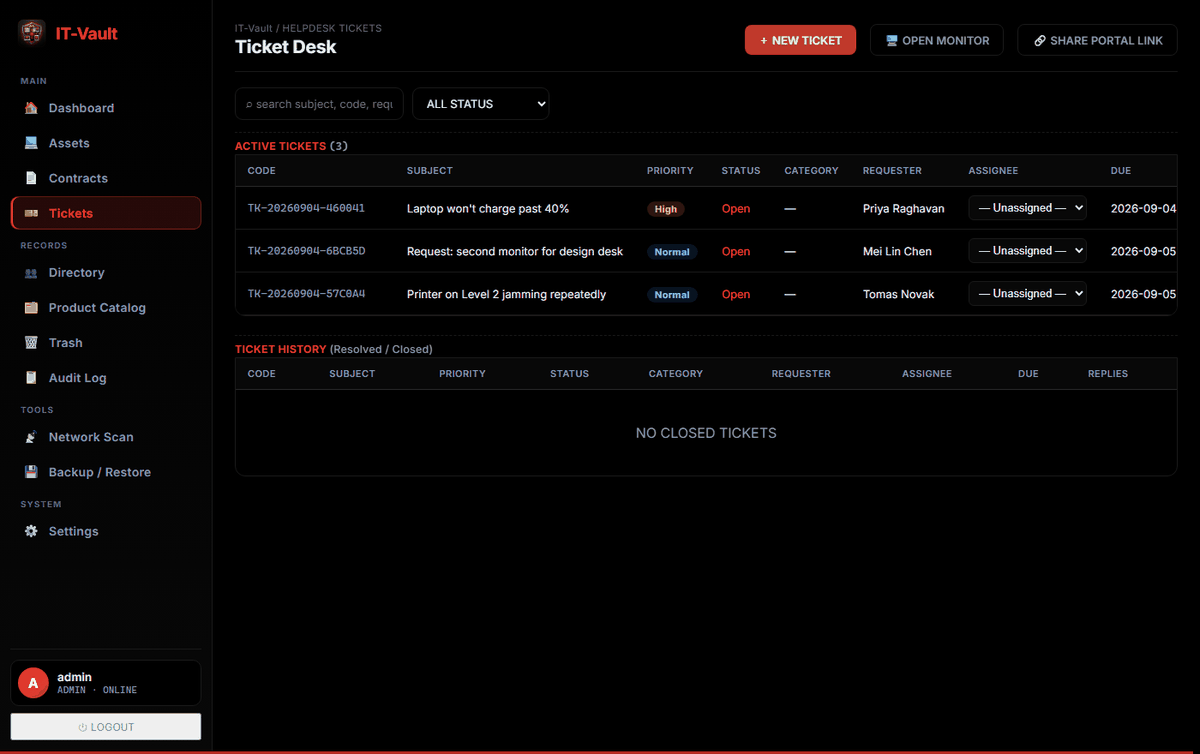
| The register | Tickets |
|---|---|
 |
 |
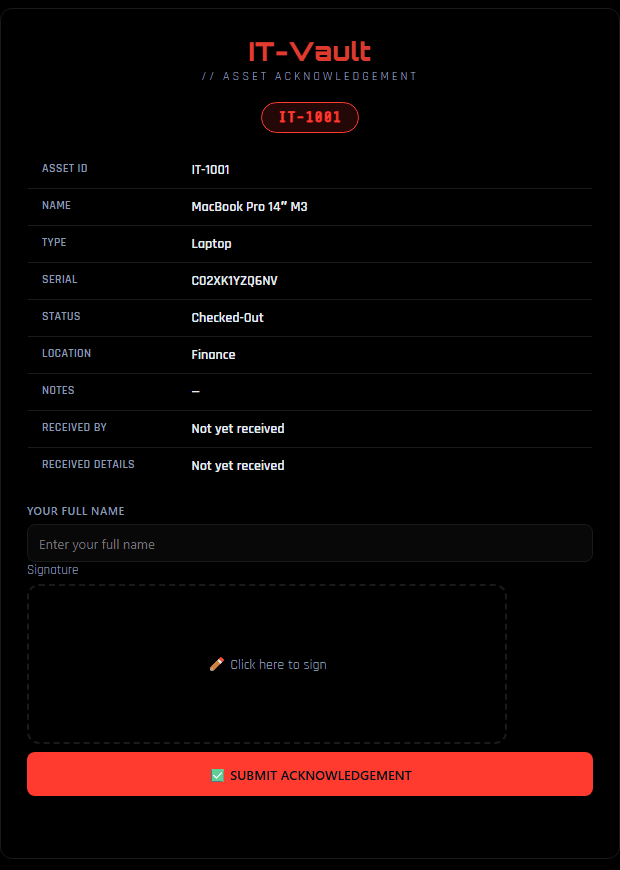 |
What the employee gets. Assign an asset and they receive one button by
email — no account, no login. The link opens this page on their phone: they
check the details, type their name, sign with a finger. On submit a signed
PDF goes to them and to every admin with an address on file, the asset
flips to |
A factory-new install — the theme, layout and branding above are what you get on first run. Every asset, name and serial is invented.
Heartbeat — uptime monitoring
IT-Vault watches your network itself. Tools → Network Scan → Heartbeat.
Each monitor is checked on its own interval, around the clock, for as long as IT-Vault is running. Five kinds of check:
| Check | What it answers |
|---|---|
| Ping (ICMP) | Is the device reachable at all — switches, APs, printers, cameras |
| HTTP(S) | Is the web service answering, with the status codes you accept |
| HTTP keyword | Does the page actually say the right thing — catches a server that returns 200 while the app behind it is broken |
| TCP port | Is the service listening — SQL on 3306, RDP on 3389, SMTP on 25 |
| DNS | Does the name still resolve |
Alerts arrive once, not forty times. A monitor has to fail its retry count before it counts as down, and the alert goes out on the transition — once on the way down, once on the way back up. A flapping access point cannot fill your inbox overnight. If you want nagging, set a reminder every N further failures; by default there is nothing in between.
Alerts go to email, a webhook, Slack or Telegram — set them up under the Alerts button, and test each one before an outage has to rely on it. With no channel configured they fall back to the notification address in Settings → Notifications.
History is kept indefinitely. Uptime over 24 hours, 7 days, 30 days or a
year; a response-time chart; and an event log of every state change with the
reason. An hourly roll-up is written as checks land and never pruned, so a long
window stays fast — raw per-check rows are only discarded if you ask, with
ITVAULT_HB_RETAIN_DAYS.
Each row draws a live ECG trace: one heartbeat per recorded check, oldest on the left. A check that answered draws a QRS complex whose height follows its response time; a failed check draws a flatline. An outage is visible at a glance, and so is when it started.
Per monitor you can also set a timeout, a shorter re-check interval while it is down, upside-down mode (alert if it does respond — for a port that should be closed), the HTTP method, certificate-expiry tracking, a tag, and a linked asset. Pause one while you work on it without losing its history.
Two IT-Vault instances pointed at the same database will not both report the same outage — a monitor is claimed before it is probed.
It is a separate permission (tools.heartbeat), so a role can have the network
scan without it, or the other way round.
Install IT-Vault and a database, in one step
On Linux, macOS, and Windows this is the whole thing -- every installer offers to set up MariaDB and wire it up, so nothing dead-ends at a blank setup form:
curl -fsSL https://raw.githubusercontent.com/shatheitguy/it-vault/main/install.sh | sh
irm https://raw.githubusercontent.com/shatheitguy/it-vault/main/install.ps1 | iex
It asks whether to install MariaDB alongside IT-Vault, then asks for three things and does the rest:
Database

  IT-Vault needs MariaDB or MySQL. It can install one here as a container
  and wire itself up, or you can point it at a server you already run.

Install MariaDB here and connect IT-Vault to it? [y/N] y

  Database name     [itvault]: itvault
  Database username [itvault]: itvault
  Database password [Enter = generate one]:
  confirm:

    database  itvault
    username  itvault
    password  set
From those answers it creates the itvault-net network and the itvault_db
volume, starts MariaDB on that network, waits for it to finish initialising,
and starts IT-Vault already connected with the credentials in place — so
there is no setup wizard to fill in, no CREATE USER, no GRANT, and none
of the 1045 Access denied that a missed step produces. Press Enter at the
password prompt and it generates a strong one; MariaDB's own root password
is always generated separately and is never the one the application uses.
Open http://localhost:5000 and create the admin account. That's it.
Say no to the database question and IT-Vault starts on its own, with the first-run wizard in the browser asking for a MariaDB/MySQL you already run. Either way the database is yours — IT-Vault never upgrades or deletes it, so your version, backups and retention policy stay your decision.
No Docker? The same offer follows you to --no-docker / ITVAULT_NO_DOCKER
too — on Linux/macOS it installs MariaDB with whatever package manager is on
the host (apt-get, dnf, yum, pacman, or brew) instead of a
container; on Windows it uses winget. Either way you get a start.sh /
start.ps1 in the install directory that starts IT-Vault already connected,
so there's still nothing for the setup wizard to ask.
To skip the questions entirely — for a scripted or unattended install:
curl -fsSL https://raw.githubusercontent.com/shatheitguy/it-vault/main/install.sh | sh -s -- \
  --db-name itvault --db-user itvault --db-pass 'choose-something-long'
Or --with-db --yes to accept every default with a generated password, and
--no-db to skip the question and use the browser wizard.
What it creates
Nothing hidden — the same four objects you would create by hand:
network itvault-net |
lets IT-Vault reach the database by container name, so port 3306 is never published to your LAN |
volume itvault_db |
MariaDB's data directory |
container itvault-db |
mariadb:latest, on that network, with a healthcheck. Override with --db-image (e.g. mariadb:12, mysql:8) |
container itvault |
IT-Vault, on that network, with DB_HOST=itvault-db already set |
--dry-run prints all of it and changes nothing, on a machine with no Docker
at all:
curl -fsSLO https://raw.githubusercontent.com/shatheitguy/it-vault/main/install.sh
less install.sh && sh install.sh --dry-run
Install in one line
curl -fsSL https://raw.githubusercontent.com/shatheitguy/it-vault/main/install.sh | sh
Windows PowerShell:
irm https://raw.githubusercontent.com/shatheitguy/it-vault/main/install.ps1 | iex
From cmd.exe, wrap it — irm and iex are PowerShell, not cmd:
powershell -NoProfile -c "irm https://raw.githubusercontent.com/shatheitguy/it-vault/main/install.ps1 | iex"
That pulls the image, creates the volumes, starts IT-Vault on
http://localhost:5000 and waits until it actually answers before telling
you it worked. No Docker? It offers to install it — Docker's own script on
Linux, Homebrew on macOS, winget on Windows — and waits for the engine to come
up before carrying on. It asks first unless you pass --yes.
Don't want Docker? Say no when it offers to install it and it will offer to
install IT-Vault directly on the machine instead (Python + waitress in a
virtualenv) -- or skip straight there with --no-docker.
It offers to install MariaDB either way — see Install IT-Vault and a database, in one step above. Decline and the database stays yours to point at, and the installer finishes by printing the MariaDB one-liner if you haven't got one. An existing IT-Vault container is started if stopped, and otherwise left alone — it owns your data volumes.
Options, as environment variables or flags:
--port 8080 / $env:ITVAULT_PORT |
host port, default 5000 |
--tag 1.7.0 / $env:ITVAULT_TAG |
image tag, default latest |
--name myvault / $env:ITVAULT_NAME |
container name, default itvault |
--yes / $env:ITVAULT_YES |
don't ask before installing Docker or MariaDB |
--dry-run / $env:ITVAULT_DRY |
print the plan, change nothing |
--with-db / $env:ITVAULT_WITH_DB |
install MariaDB without being asked, wire it up and skip the setup wizard |
--no-db / $env:ITVAULT_NO_DB |
don't ask about MariaDB; use the browser wizard |
--db-name / --db-user / --db-pass (install.sh) or $env:ITVAULT_DB_NAME / _DB_USER / _DB_PASS (both) |
answer the database questions up front, implies --with-db |
--db-image / $env:ITVAULT_DB_IMAGE |
Docker only: database image, default mariadb:latest; pin it (mariadb:12) to stay on one major |
--no-docker / $env:ITVAULT_NO_DOCKER |
skip Docker and install IT-Vault straight on the host (Python + waitress) |
--dir / $env:ITVAULT_DIR |
where a no-Docker install lands, default ~/it-vault |
Piping a script from the internet into a shell is worth being fussy about. To read it first:
curl -fsSLO https://raw.githubusercontent.com/shatheitguy/it-vault/main/install.sh
less install.sh && sh install.sh --dry-run && sh install.sh
--dry-run works on a machine with no Docker at all, so you can see exactly
what would happen before anything does.
Uninstalling
curl -fsSL https://raw.githubusercontent.com/shatheitguy/it-vault/main/uninstall.sh | sh
irm https://raw.githubusercontent.com/shatheitguy/it-vault/main/uninstall.ps1 | iex
It lists what it found, asks once, then removes the container and the image. Your data is not touched by default — the volumes and your database survive, so reinstalling picks up where you left off. It prints exactly what it kept and the command to remove each thing later.
To go further:
--purge / $env:ITVAULT_PURGE |
also delete the volumes: invoices, backups, session key. Permanent. |
--purge-db / $env:ITVAULT_PURGE_DB |
also delete the itvault-db container and its volume, if you created one from this project's suggested command. That is your whole database. |
--dry-run / $env:ITVAULT_DRY |
print the plan, change nothing |
Docker itself is never removed — use your package manager or Docker Desktop's own uninstaller.
Prefer to do it yourself? The rest of this README is the manual route.
Signed handovers, without the paperwork
Handing someone a laptop is normally a form, a signature, a scan, and a folder nobody can find a year later. IT-Vault does it in one email:
- Assign the asset to an employee.
- They get an email with a single button — no account, no login, nothing to install.
- They sign on their phone: the link opens the asset's details, they type their name and sign with a finger.
- Copies go out by themselves. A signed PDF is emailed to the employee and to every admin account with an address on file.
- It's on the record. The asset flips to
Checked-Out, and the signature, signer name and date stay attached to it — viewable and printable later.
The sign page only claims "sent to your inbox" when a copy really went, which needs SMTP configured under Settings → Notifications and an email address on the employee's record.
Other things that run without being asked:
| Contract expiry alerts | renewal dates watched on a schedule and emailed before they lapse |
| Scheduled backups | archives on a timer, by scope, on their own volume |
| LDAP / AD sync | your directory pulled in on a schedule rather than by hand |
| Warranty watch | anything inside 30 days surfaces on the dashboard on its own |
| Update checks | the app spots a new release and installs it in one click |
| Audit trail | every change recorded with who and when, with no opt-in |
Step 1 — get a database
IT-Vault ships without one, so it never dictates your database's version, backups or retention. Any MariaDB 10.6+ (or MySQL 8+) works. Pick whichever of these suits you.
Option A — MariaDB as a Docker container
Quickest if you already run Docker:
docker volume create itvault_db

docker run -d --name itvault-db --restart unless-stopped \
  -e MARIADB_ROOT_PASSWORD='<a-strong-root-password>' \
  -e MARIADB_DATABASE=itvault \
  -e MARIADB_USER=itvault \
  -e MARIADB_PASSWORD='<a-strong-password>' \
  -v itvault_db:/var/lib/mysql \
  mariadb:latest
That creates the database and user for you, so you can skip the SQL below. Keep the volume — it is your data. Don't publish port 3306 unless you genuinely need outside access; IT-Vault reaches it over the Docker network.
A note on mariadb:latest, because it is not the same call as for IT-Vault's
own image. A fresh install is fine: the volume is created in the same breath
as the container, so whatever latest is that day initialises it and the two
agree. What you must not do is point a newer major at a data directory an
older one wrote — MariaDB rewrites the directory in place, one way, with no
prompt. So if you keep the volume and recreate the container later, pin the
version that wrote it (mariadb:12, say) rather than taking whatever latest
has become. install.sh checks that for you and stops rather than letting you
find out afterwards; by hand it is on you.
To let the two containers talk, put them on one network:
docker network create itvault-net
docker network connect itvault-net itvault-db
…then attach IT-Vault to itvault-net too, and use itvault-db as the
database host.
Option B — MariaDB on a server or your own machine
Better if you already run a database server, or want it outside Docker.
# Debian / Ubuntu
sudo apt install mariadb-server

# RHEL / Rocky / Fedora
sudo dnf install mariadb-server && sudo systemctl enable --now mariadb

# macOS
brew install mariadb && brew services start mariadb
On Windows, use the installer from mariadb.org/download and let it install as a service so it starts at boot — otherwise it dies with the session that started it.
Then run sudo mariadb-secure-installation (set a root password, remove the
anonymous users) and create the database:
CREATE DATABASE itvault CHARACTER SET utf8mb4;
CREATE USER 'itvault'@'%' IDENTIFIED BY '<a-strong-password>';
GRANT ALL PRIVILEGES ON itvault.* TO 'itvault'@'%';
FLUSH PRIVILEGES;
Restrict the host if you can: 'itvault'@'localhost' for a database on the
same machine, or 'itvault'@'172.17.%' for the Docker bridge, instead of
'%' which allows connections from anywhere.
Which host does IT-Vault use?
This is the one thing people get wrong. From inside the IT-Vault container,
127.0.0.1 means the container itself, not your machine:
| Where the database runs | DB_HOST |
|---|---|
| Docker container on the same network | that container's name, e.g. itvault-db |
| Same machine, outside Docker | host.docker.internal |
| Another server | its hostname or IP |
| IT-Vault also running outside Docker | 127.0.0.1 |
Step 2 — run IT-Vault
git clone https://github.com/shatheitguy/it-vault.git
cd it-vault
cp .env.example .env    # optional: fill in the DB_* values
docker compose up -d
Open http://localhost:5000. A fresh install lands on the first-run setup wizard: enter your database connection (it's tested before anything is saved), then create your own administrator account. There is no default password to change afterwards — nothing can sign in until you make that account. The schema builds itself, and migrates itself on upgrade.
Running the published image directly
Every release publishes to GitHub Container Registry, so you don't need a source checkout at all:
docker run -d --name itvault -p 5000:5000 \
  -v itvault_data:/app/data \
  -v invoices_data:/app/invoices \
  -v backups_data:/app/backups \
  -e ITVAULT_DATA_DIR=/app/data \
  ghcr.io/shatheitguy/it-vault:latest
Then open the setup wizard and enter your database details. latest follows
main, so a pull always brings down the current build; pin a version tag
instead if you want to stay on a fixed one.
Keep /app/data on a volume: it holds the generated session-signing key and
the saved database pointer, so an image update doesn't sign everyone out.
Updating
Settings → General → Check for Updates compares your running version against the latest published release. When there's a newer one, the panel shows what's available, a link to the release notes, and an UPDATE NOW button.
On a source checkout, that button works out of the box: it pulls the new code, installs any new requirements and restarts, then the page reloads itself into the new version.
Containers need one extra piece — see below. Until it's set up, the same panel gives you the command to run yourself, with a one-click copy:
docker compose pull && docker compose up -d
Either way your database is untouched (it isn't ours to touch), invoices, backups and the session key live on volumes that survive the swap, and the schema migrates itself on start.
Updating a plain docker run install
Without compose, one thing first: docker restart does not update
anything. Restarting reuses the image the container was created from, so it
comes back on exactly the version it was already running. Updating means
pulling the new image and recreating the container:
docker pull ghcr.io/shatheitguy/it-vault:latest

docker rm -f itvault
docker run -d --name itvault --restart unless-stopped \
  -p 5000:5000 \
  -e ITVAULT_DATA_DIR=/app/data \
  -v itvault_data:/app/data \
  -v invoices_data:/app/invoices \
  -v backups_data:/app/backups \
  ghcr.io/shatheitguy/it-vault:latest
Removing the container is safe. Removing its volumes is not:
itvault_data holds the saved database pointer and the generated session key,
so keep all three -v flags exactly as they were, or you will come back to
the setup wizard with everyone signed out.
Add back any other flags your install uses — --network, a different
--port, ITVAULT_WATCHTOWER_TOKEN. If you can't remember them, read them
off the running container before you remove it:
docker inspect itvault --format '{{range .Config.Env}}{{println .}}{{end}}'
Then check the new version is actually live:
docker exec itvault cat VERSION
One-click and automatic updates for containers
IT-Vault deliberately cannot replace its own container. Doing that from the inside means mounting the host's Docker socket into the app — root-equivalent control of the machine, handed to the process that also handles uploads, LDAP and SMTP. So instead it asks Watchtower to do it: the socket stays with a small single-purpose container, and IT-Vault just sends it a request.
Pick a long random token, put it in .env:
ITVAULT_WATCHTOWER_TOKEN=<a-long-random-string>
uncomment the watchtower service at the bottom of docker-compose.yml,
and bring it up:
docker compose up -d
UPDATE NOW now works, and Watchtower also checks once a day on its own,
so releases land even if nobody opens Settings. Drop the --interval from
its command to only ever update when you click.
Running the image without compose? Same idea:
docker run -d --name watchtower --restart unless-stopped \
  -v /var/run/docker.sock:/var/run/docker.sock \
  -e WATCHTOWER_HTTP_API_UPDATE=true \
  -e WATCHTOWER_HTTP_API_TOKEN=<the-same-token> \
  containrrr/watchtower --cleanup --interval 86400 itvault
…then start IT-Vault with -e ITVAULT_WATCHTOWER_TOKEN=<the-same-token> on
the same Docker network.
That last part matters: ITVAULT_WATCHTOWER_URL defaults to
http://watchtower:8080, and that name only resolves on a user-defined Docker
network, so both containers have to share one. If IT-Vault runs with
--network host — which the network scanner needs in order to see your LAN —
the name won't resolve at all. Publish Watchtower's port with -p 8080:8080
and point IT-Vault at it instead:
ITVAULT_WATCHTOWER_URL=http://127.0.0.1:8080
If you'd rather stay deliberate about upgrades, skip Watchtower entirely:
pin a version in .env (ITVAULT_TAG=1.6.1) and bump it when you choose.
On a NAS
Unraid — in Community Applications, search for IT-Vault. The template
lives in
shatheitguy/unraid-templates;
the copy in unraid/ here is the source it is made
from, checked against the code by the test suite. It is a separate repository
because CA scans a whole repository for templates, and this one is full of XML
that belongs to the Android app.
TrueNAS — Apps → Discover Apps → Custom App → Install via YAML, and paste
truenas/docker-compose.yaml. That one brings
MariaDB with it; the Unraid template expects you to install MariaDB
separately, which is the usual way round on each platform. The catalogue
version — for appearing in Discover Apps rather than being pasted — is in
truenas/catalog/, ready to submit to
truenas/apps.
Let an agent run it — MCP
IT-Vault ships an MCP server so an AI agent can work the register the way a person does: find a device, see who has it, assign it, take it back, raise and answer tickets, chase expiring contracts, handle the reports that arrive when somebody scans a lost asset's tag.
cd mcp && pip install -e .
ITVAULT_URL=http://itvault.lan:5000 ITVAULT_API_KEY=your-key itvault-mcp --selftest
It runs on the agent's side and talks to this server over the same HTTP API the apps use, with an API key — so the agent has exactly the permissions of the user that key belongs to, and no more. Give a watching agent a key from a read-only user and nothing can persuade it to change anything. Deleting is behind a second switch of its own, off by default.
Wiring for Hermes, OpenClaw, ZeroClaw, Claude Desktop, Claude Code and ChatGPT — and the reasons behind the design — is in mcp/README.md. Clients that dial in over the network rather than spawning a process (Claude's custom connectors, ChatGPT) get an HTTP transport that refuses to bind anywhere but loopback without a bearer token, because the API key lives in that process.
Configuration
Everything is optional (see .env.example). DB_HOST / DB_PORT /
DB_NAME / DB_USER / DB_PASS set the database connection, but you can
leave them blank and enter it in the setup wizard instead — either way it's
saved to /app/data and reconfigurable later in Settings → Database.
ITVAULT_ADMIN / ITVAULT_ADMIN_PASS create the first admin without the
wizard, for unattended installs; unset, the wizard asks. ITVAULT_SECRET
overrides the session-signing key, which is otherwise generated and kept in
/app/data — leave it unset unless you're running several replicas that
must share one key.
Runtime settings that change inside the app — branding, theme colors, SMTP, LDAP, ticket SLAs, roles — live in the database via Settings → * in the UI, not in environment variables.
If branding won't save, or the database pointer keeps resetting
Symptoms: uploading a letterhead returns Permission denied, an uploaded
logo never appears, or the setup wizard asks for the database again after
every update.
All three are the same cause. Docker seeds a new named volume from the
directory it shadows — ownership included — but if that directory isn't in
the image it creates the volume empty and owned by root. IT-Vault runs as
uid 1000, so nothing can be written into /app/data. Images from this commit
onward ship the directory, so new installs are fine; a volume created by an
older image keeps its root ownership and needs fixing once:
docker run --rm -v itvault_data:/data alpine chown -R 1000:1000 /data
Then restart IT-Vault. Nothing is lost either way — branding and settings are
stored in the database, and /app/data is only a cache for them — but the
session key and the saved database pointer do need a writable volume. The
startup log prints this same command if the directory isn't writable.
Database
- You own it. IT-Vault connects to whatever MariaDB/MySQL you give it —
bare metal, another container, or a managed instance. It never provisions,
upgrades or deletes the server, so your backup and retention policy stays
yours. Change where it points any time in Settings → Database, or via the
DB_*variables. - Schema: created on first start and migrated on every start, so an upgrade needs no manual SQL.
- Backups: Settings → Backup / Restore exports and restores archives by scope (everything, config only, or assets only). An "everything" archive includes the uploaded logo and letterhead, which are stored in the database (with a copy on disk as a cache). Restoring clears each table before repopulating it, so it reverts to that point in time rather than merging.
- What's on volumes:
/app/data(session key, saved DB pointer, and a cache of the uploaded branding),/app/invoices(uploaded invoices) and/app/backups(generated archives). These survivedocker compose down; onlydown -vdestroys them. Your database lives wherever you installed it and is untouched by any of that.
Development (without Docker)
pip install -r requirements.txt
python serve.py   # expects a MariaDB reachable via the DB_* env vars
License
GNU Affero General Public License v3.0 or later — see LICENSE.
In plain terms: run it, anywhere, for anything, including commercially, for free. Modify it all you like. The one condition is reciprocity — if you modify IT-Vault and let other people use it, whether you ship them a copy or just host it for them over a network, you have to make your modified source available to them under the same licence.
That last part is the difference between the AGPL and the ordinary GPL, and it's deliberate: IT-Vault is a web app, so "hosting it" is how it's used.
Copyright (C) 2026 Sharqan Ahamed (Sha The IT Guy)
Author
Sharqan Ahamed — Sha The IT Guy
- 🌐 Website: shatheitguy.in
- 💻 More projects: github.com/shatheitguy
Built and maintained with 💻 and ☕. If IT-Vault is useful to you, a ⭐ on the repo is appreciated.
Install IT-Vault on Unraid in a few clicks.
Find IT-Vault in Community Apps on your Unraid server, review the template, and click Install. Unraid handles the Docker app or plugin setup from the published template.
Related apps
Explore more like this
Explore allLinks
Details
ghcr.io/shatheitguy/it-vaultRuntime arguments
- Web UI
http://[IP]:[PORT:5000]/- Network
bridge- Shell
sh- Privileged
- false
Template configuration
The port you will open IT-Vault on.
- Target
- 5000
- Default
- 5000
- Value
- 5000
Session key and the saved database pointer. Keep this: losing it signs everyone out and forgets which database to use.
- Target
- /app/data
- Default
- /mnt/user/appdata/it-vault/data
- Value
- /mnt/user/appdata/it-vault/data
Invoices and proof-of-purchase files attached to assets.
- Target
- /app/invoices
- Default
- /mnt/user/appdata/it-vault/invoices
- Value
- /mnt/user/appdata/it-vault/invoices
Where scheduled backups are written. Put this on a share you actually back up.
- Target
- /app/backups
- Default
- /mnt/user/appdata/it-vault/backups
- Value
- /mnt/user/appdata/it-vault/backups
Your MariaDB/MySQL server. For a MariaDB container on this Unraid box, use the server's LAN IP (bridge networking cannot reach it by container name). Leave empty to be asked by the setup wizard instead.
- Target
- DB_HOST
3306 unless you changed it.
- Target
- DB_PORT
- Default
- 3306
- Value
- 3306
The empty database you created for IT-Vault.
- Target
- DB_NAME
- Default
- itvault
- Value
- itvault
A user with rights on that database -- not root.
- Target
- DB_USER
That user's password.
- Target
- DB_PASS
The address people reach this on from outside, e.g. https://itvault.example.com. Used for the links in acknowledgement and portal emails, which are useless if they point at a LAN address. Leave empty if you only use it on the LAN.
- Target
- ITVAULT_PUBLIC_URL
Set to 1 to insist the session cookie is only ever sent over HTTPS. Leave empty and it is decided per request, which is right if you reach it both ways.
- Target
- ITVAULT_COOKIE_SECURE
Leave empty. IT-Vault generates a strong one on first start and keeps it in the data path above, which beats any value typed into a template -- a known secret lets anyone forge an admin session. Set it only to share one key across several instances.
- Target
- ITVAULT_SECRET