
All apps · 0 apps
hass-unraid
Docker app from Selfhosters
Overview
Readme
View on GitHub
⚠️ Breaking changes
UnRAID 7.2.0 introduced a GraphQL API. While this is fantastic news, it also comes with breaking changes. I’ve tried to make this integration as backwards-compatible as possible.
- If you are still on UnRAID 7.0–7.1, use the latest
1.x.xDocker image.- Users of UnRAID 7.2.0+ can use any
2.x.ximage or simply:latest(which always points to the newest release).- 2.x.x releases now require an Unraid GraphQL API Key (Viewer role). Create one in Unraid (Settings → Management Access → API Keys) and set it as
api_keyin yourconfig.yaml. See the instructions in the README: Important: Requirements and version support.- For 2.x.x, you will need to update the Lovelace button-card templates. Copy the updated files from
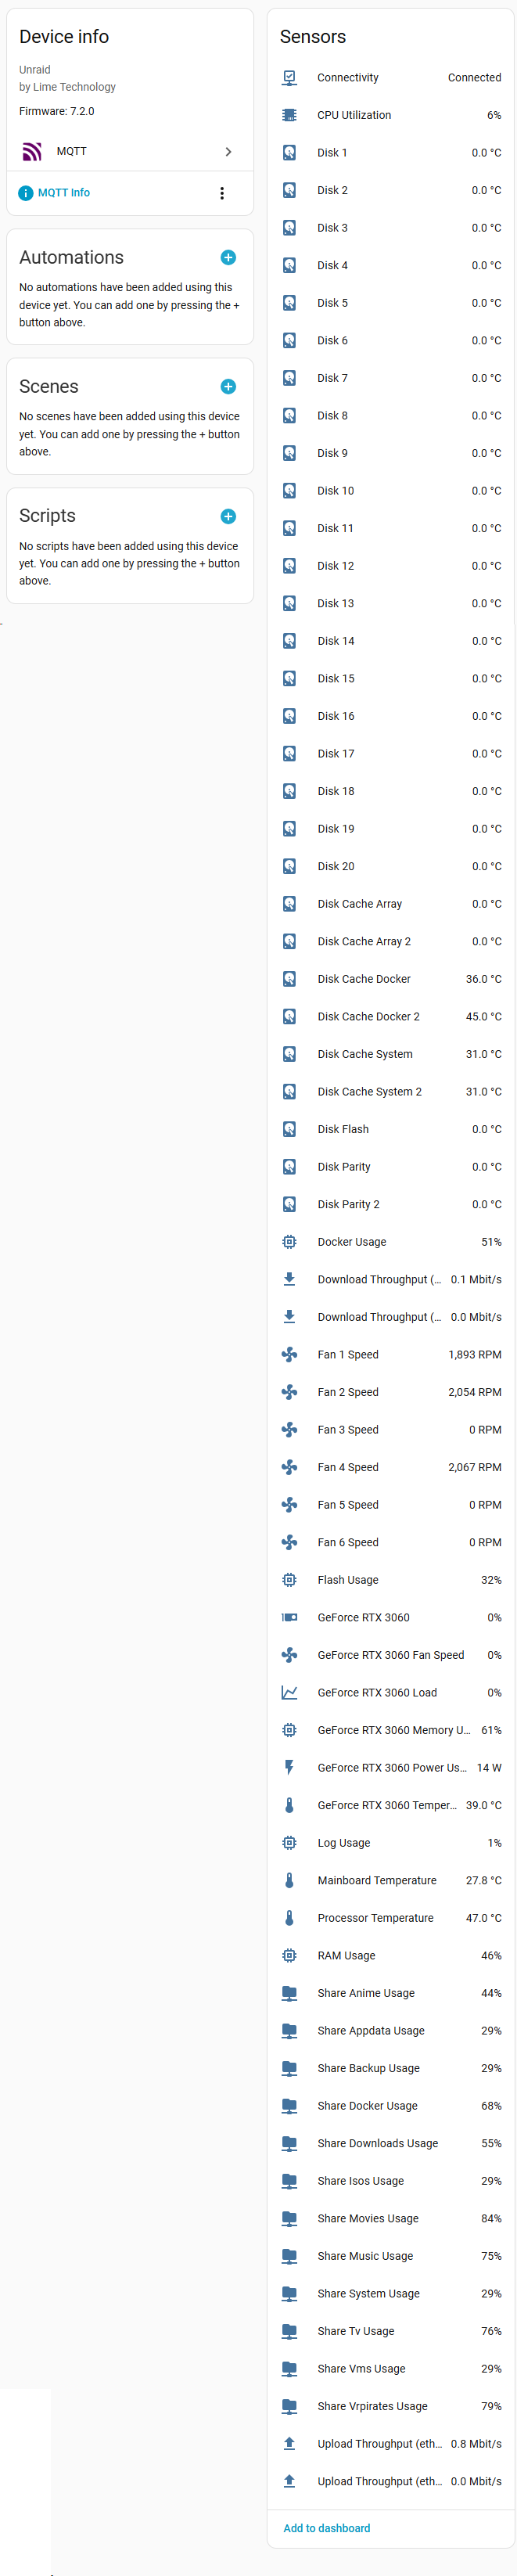
/lovelace/templates/in this repo into your Home Assistant config (e.g.,/config/lovelace/templates/button_card/), then reload resources or restart Home Assistant.Recommended: delete the MQTT device this integration created and reboot the container once after updating to clear out old sensors and avoid duplicate/renamed entities.
In Home Assistant, go to Settings → Devices & Services → MQTT, find your server’s device, and delete it using the three-dots menu (or the “MQTT info” link on the device page), then restart the container.
Unraid to Home Assistant
This Docker container integrates with your Unraid server by leveraging both the GraphQL API and legacy WebSocket/HTTP endpoints to gather relevant data. It then forwards this information to Home Assistant via MQTT so you can build dashboards that provide a better overview than Unraid’s native UI.
Features
- Historical data is crucial! Monitor CPU, RAM, network, disk temperatures, and more over time — including how often and when disks spin up.
- Enable Unraid automations via Home Assistant. Get alerts for low disk space, fan failures, and more.
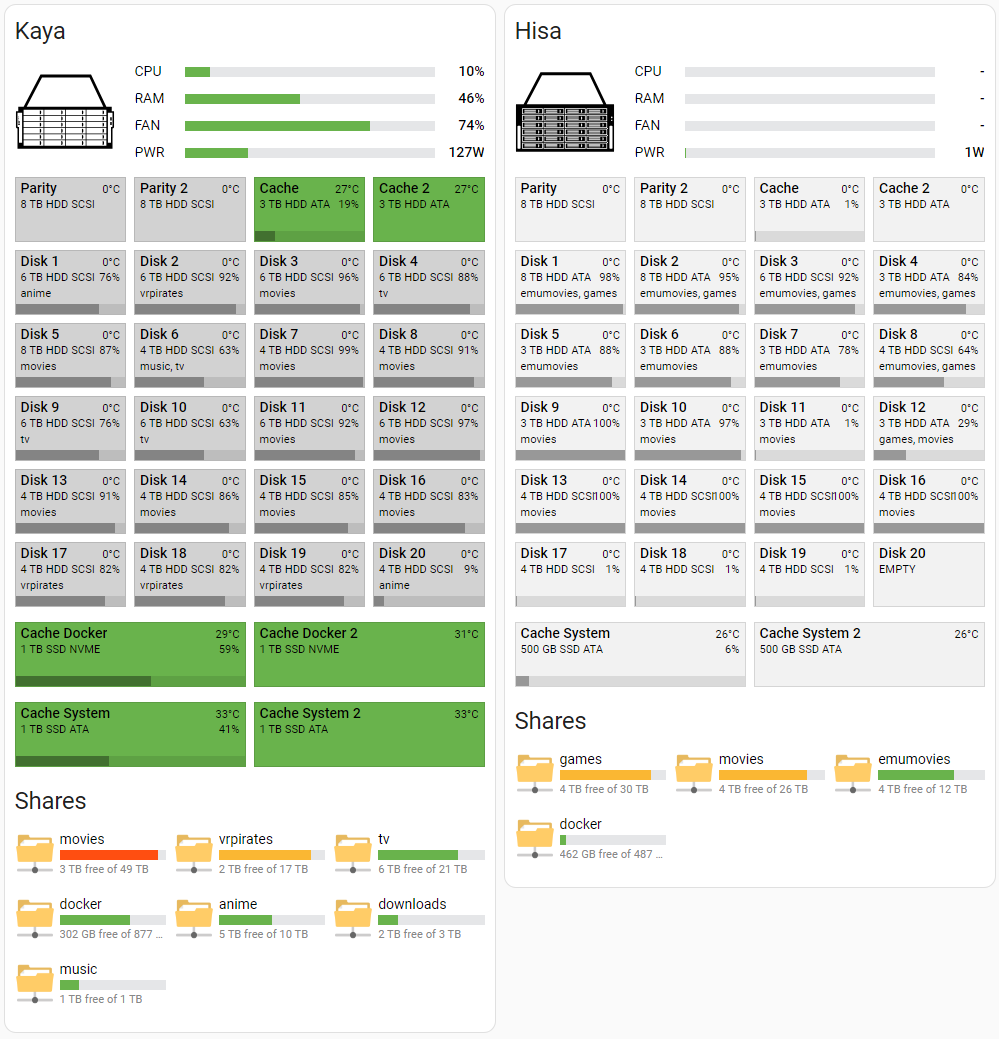
- A custom view that makes it easier to locate disks in the array. Disks change color from grey (spun down) to yellow/red if overheating, with warnings for problem disks. Includes a parity/scrub running indicator.
- Instantly see which shares are on which disks and how full each disk is.
- A “network-share” view in Home Assistant that’s more intuitive than Unraid’s Shares tab.
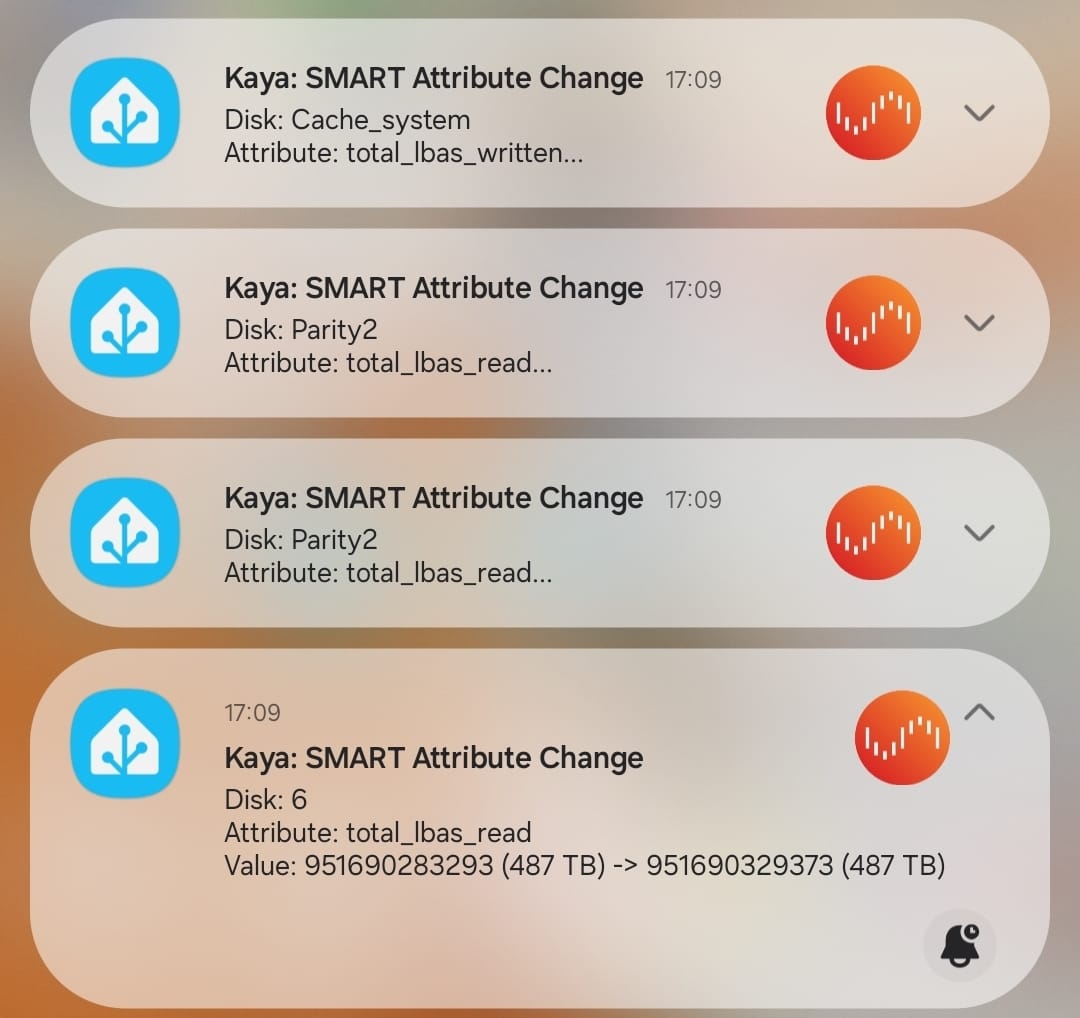
- SMART alerts for critical attribute changes — including SAS drives, which Unraid doesn’t natively notify about.
Important: Requirements and version support
- Unraid 7 or later is required.
- API Key is required for GraphQL access:
- In Unraid, go to Settings → Management Access → API Keys → Create API Key → Create New.
- Give it a name (e.g., “Home Assistant”) and select the “Viewer” role, then create.
- Username and password are still required because not all data sources are available via GraphQL yet (e.g., some legacy channels, SMART enrichment, share details, GPU plugin stats).
- Docker image tags:
- Unraid 7.0–7.1: use the latest
1.x.ximage tag. - Unraid 7.2.0 or later: use any
2.x.ximage tag or simply:latest. - The
:latesttag will always point to the newest release.
- Unraid 7.0–7.1: use the latest
Prerequisites
- Home Assistant and an MQTT broker set up and working.
- Unraid 7+ with a Viewer-role API Key created (see steps above).
- Unraid username/password for legacy endpoints.
Getting started
Create a data folder and place a config.yaml inside. Example with two servers (“Kaya” and “Hisa”); adjust MQTT accordingly:
unraid:
  - name: Kaya
    host: 192.168.1.10
    port: 80
    ssl: false
    username: root
    password: PASSWORD
    api_key: VIEWER_ROLE_API_KEY
    scan_interval: 30

    # Note: Advanced users and debugging only
    # Disable certain collectors
    # Available: disks, shares, gpu_plugin, smart_data, cpu, apcups, parity, temperature, update1, update3, dashboard_ping
    # disabled_collectors:
    #   - shares
    #   - gpu_plugin

  - name: Hisa
    host: 192.168.1.20
    port: 80
    ssl: true
    ssl_verify: false
    username: root
    password: PASSWORD
    api_key: VIEWER_ROLE_API_KEY
    scan_interval: 30

mqtt:
  host: 192.168.1.100
  port: 1883
  username: USERNAME
  password: PASSWORD
Now we can run our container either using docker run or docker-compose.
Docker run
docker run -d \
  --name hass-unraid \
  --network bridge \
  --restart always \
  -e TZ=Europe/Oslo \
  -v $(pwd)/data:/data \
  ghcr.io/idmedia/hass-unraid:latest
Docker-compose
services:
  hass-unraid:
    container_name: hass-unraid
    network_mode: bridge
    restart: always
    environment:
      - TZ=Europe/Oslo
    volumes:
      - './data:/data'
    image: ghcr.io/idmedia/hass-unraid:latest
Notes
- If you’re on Unraid 7.0–7.1, replace the image tag with your chosen
1.x.xrelease (e.g.,ghcr.io/idmedia/hass-unraid:1.x.x). - On Unraid 7.2.0+, you can use
:latestor pin a specific2.x.xtag. - On first run, a device should appear in Home Assistant under Settings → Devices & Services → MQTT.
If nothing shows up, check the container logs:docker logs hass-unraid. - Advanced: You can disable individual data collectors per server using
disabled_collectorsin yourconfig.yaml. This is intended for advanced users and debugging. See the config example above for available collector names.
Updating
It’s recommended to delete the MQTT device this integration creates before updating, as some entities may have been renamed or removed between versions. Then restart the container once.
Steps:
- In Home Assistant, go to Settings → Devices & Services → MQTT.
- Find your Unraid server’s MQTT device in the list.
- Delete it using either:
- The three-dots menu on the overview page, or
- The “MQTT info” text link on the device page, then use the delete option there.
- Restart the
hass-unraidcontainer.
Lovelace
See the lovelace folder for two button-card templates and an example setup for “Kaya” like in the screenshot.
This example uses:
Copy the button-card templates from /lovelace/templates/ into /config/lovelace/templates/button_card/:
network_share.yaml
simple_bar.yaml
unraid_disk.yaml
Ensure button-card finds the templates by adding this to the top of your ui-lovelace.yaml:
button_card_templates: !include_dir_merge_named lovelace/templates/button_card
Packages
If you want fan speed sensors or SMART attribute notifications, see the packages folder.
“UnRaid Smart Data” caches SMART attributes for all disks, and “Notify on SMART Attribute Change” sends a notification if any defined attribute changes state — helpful for SAS drives where Unraid doesn’t notify on SMART attributes.
Contribute
Issues, PRs, and suggestions are welcome. If you find this useful, please consider starring the repo!

Requirements
Categories
Related apps
Explore more like this
Explore allDetails
ghcr.io/idmedia/hass-unraid:latestRuntime arguments
- Network
bridge- Privileged
- false
Template configuration
- Target
- /data
- Default
- /mnt/user/appdata/hass-unraid
- Value
- /mnt/user/appdata/hass-unraid