
All apps · 0 apps

GitHub-Release-Monitor
Docker app from LubricantJam's Repository
Overview
Readme
View on GitHubGitHub Release Monitor
A powerful, self-hostable application to automatically monitor GitHub, GitLab, Codeberg, and self-hosted Forgejo repository releases and receive instant email or Apprise notifications. Keep track of your favorite projects without manually checking for updates.
✨ Key Features
- Automated Release Monitoring: Add public GitHub, GitLab, Codeberg, and self-hosted Forgejo repositories and let the app automatically check for new releases in the background.
- Flexible Notifications:
- Email: Configure SMTP settings to receive detailed email notifications.
- Apprise: Integrate with Apprise to send notifications to over 70 services like Discord, Telegram, Slack, and more.
- Per-check Digests: Choose per channel whether each detected release is sent separately or two or more compatible releases from one check are grouped into a single notification. Singleton groups keep the existing per-release layout. Queue throughput and delivery concurrency are configurable in Settings.
- Flexible Release Filtering:
- Global Settings: Define application-wide rules for which release types (stable, pre-release, draft) to monitor.
- Per-Repository Overrides: Customize filtering rules for individual repositories.
- Regex-Powered Precision: Use "Include" and "Exclude" regular expression patterns for fine-grained control over release tags. The "Include" pattern overrides the standard channel filters, giving you ultimate control.
- Pre-release Granularity: Select specific pre-release tags to watch (e.g.,
alpha,beta,rc).
- Modern & Responsive UI:
- Clean, intuitive interface built with ShadCN UI and Tailwind CSS.
- Full dark mode support.
- Responsive design for both desktop and mobile use.
- Internationalization (i18n): Supports English, German, French, Spanish, Brazilian Portuguese, Indonesian, Hindi, Simplified Chinese, Japanese, Korean, Turkish, Vietnamese, Italian, Polish, Ukrainian, Dutch, Russian, Hebrew, and Arabic out of the box, including right-to-left layout.
- Data Management: Easily import or export your list of monitored repositories via JSON.
- System Diagnostics: A built-in test page to verify GitHub API connectivity and notification service (SMTP, Apprise) configuration.
- Secure Authentication: Protects the application with Better Auth, SQLite-backed users/sessions, and one-time bootstrap setup.
🛠️ Tech Stack
- Framework: Next.js (App Router)
- UI: React, TypeScript, Tailwind CSS, ShadCN UI
- Internationalization: next-intl
- Authentication: Better Auth
- Notifications: Nodemailer, Apprise
❤️ Sponsors
Thanks to the people and organizations supporting this project.
Horizify GmbH supports the ongoing development of this project.
Horizify provides managed Linux server operations from Germany for business-critical websites and applications, including monitoring, security updates, backups, migrations, and direct technical support.
One-time donation:
📜 License
This project is licensed under the AGPL-3.0-only License.
🐳 Docker Compose Setup (Recommended)
The example/ directory contains a complete Docker Compose setup for a robust, production-ready deployment. This setup includes:
- Traefik: A modern reverse proxy that automatically handles SSL certificates from Let's Encrypt.
- SMTP-Relay: A local SMTP server for sending email notifications.
- GitHub Release Monitor: The main application itself.
1. Prerequisites
- Docker and Docker Compose installed on your server.
- A domain name (e.g.,
github-releases.your-domain.test) pointing to your server's public IP address.
2. Configuration
Navigate to the example/ directory. You will need to configure the environment files for each service.
a) GitHub Release Monitor (Main App)
Go to
example/github-release-monitor.Edit the existing
.envfile. Below are the key variables to configure.Authentication (Required)
# Basic: internal login required for the app.
# AllowUnauthenticated: public read-only home; login required for changes, settings, and test page.
# External: disables internal auth gates for deployments protected by Authelia, Authentik, TinyAuth, NGINX Basic auth, etc.
AUTHENTICATION_METHOD=Basic

# Optional login rate-limit/lockout protection (values in seconds)
# Lockout duration once the threshold is reached.
AUTH_LOGIN_LOCKOUT_SECONDS=900
# Time window to count failed attempts.
AUTH_LOGIN_WINDOW_SECONDS=900
# Maximum failed login attempts before lockout starts.
AUTH_MAX_LOGIN_ATTEMPTS=5
# Trust client IP headers only when a known reverse proxy overwrites them.
AUTH_TRUST_PROXY_HEADERS=true
# Number of trusted proxy entries at the right side of X-Forwarded-For.
AUTH_TRUSTED_PROXY_HOPS=1

# Better Auth secret (at least 32 chars). Generate: openssl rand -base64 32
BETTER_AUTH_SECRET=your_super_secret_better_auth_key_here
# Base URL of the app (required by Better Auth for cookie/session handling)
BETTER_AUTH_URL=https://github-releases.your-domain.test
# One-time token for initial admin setup (recommended 32+ chars)
AUTH_SETUP_TOKEN=your_one_time_setup_token_here
# Keep self-service signup disabled by default (recommended for single-user)
AUTH_ENABLE_SIGNUP=false
# Enable passkeys (WebAuthn) for passwordless login
AUTH_ENABLE_PASSKEY=true
# Password reset link lifetime in seconds (60-86400)
AUTH_PASSWORD_RESET_TOKEN_TTL_SECONDS=900
# Optional social login providers
AUTH_GITHUB_CLIENT_ID=
AUTH_GITHUB_CLIENT_SECRET=
AUTH_GOOGLE_CLIENT_ID=
AUTH_GOOGLE_CLIENT_SECRET=
# Trust configured social providers for automatic account linking by email
AUTH_TRUST_SOCIAL_LINKING=true
# Optional fallback for older setups:
# You can generate one using: openssl rand -base64 32
AUTH_SECRET=your_super_secret_better_auth_key_here
For backward compatibility, version 2.x continues to trust proxy client-address headers for logging and login limits when
AUTH_TRUST_PROXY_HEADERSis unset. Password-reset IP limits are stricter: they useX-Forwarded-FororX-Real-IPonly when this option is explicitly set totrue. Otherwise, password-reset requests are limited by a hashed account identifier without storing the submitted username or email address. Set the value explicitly: usetrueonly when a trusted reverse proxy overwrites these headers, andfalsewhen the app is exposed directly. The general compatibility default will change tofalsein the next major release.Protocol (HTTP/HTTPS) By default, the application runs in secure (HTTPS) mode. If you are not using a reverse proxy and need to run the app on plain HTTP, you must set this variable.
# Set to 'false' only if running without SSL/TLS (e.g., direct HTTP access).
# This makes session cookies insecure. Recommended to leave as 'true' for production.
HTTPS=true
GitHub API (Recommended) To avoid being rate-limited, it is highly recommended to create a Personal Access Token with no scopes (public repository access is sufficient and more secure).
# Your GitHub Personal Access Token to increase the API rate limit from 60 to 5000 requests/hour.
# Create a token with no scopes (public repo access) for better security.
GITHUB_ACCESS_TOKEN=your_github_pat_here
GitLab API (Optional) If you want to monitor private GitLab repositories (including self-hosted instances), configure allowed hosts and host-based tokens:
- Access token option:
GITLAB_ACCESS_TOKENSwith scopesread_apiandread_repository. - Deploy token option:
GITLAB_DEPLOY_TOKENSwith scoperead_repository. - For private repositories, ensure the token has at least project role
Reporter(or higher).
# Optional additional GitLab instances besides gitlab.com (comma-separated).
GITLAB_ADDITIONAL_HOSTS=gitlab.example.test,gitlab.internal.test

# Optional host-based GitLab tokens as comma-separated host=token pairs.
# Example: gitlab.com=glpat_xxx,gitlab.example.test=glpat_yyy
GITLAB_ACCESS_TOKENS=

# Optional host-based GitLab deploy tokens as comma-separated host=username:token pairs.
# Example: gitlab.example.test=gitlab+deploy-token-123:gl-dpt-xyz
GITLAB_DEPLOY_TOKENS=
Codeberg API (Optional) Codeberg runs on Gitea/Forgejo and exposes a Gitea-compatible REST API. If you want to monitor private repos, set a token:
- For private repositories, the token typically needs
read:repository. read:useris only needed for diagnostics (e.g. showing the authenticated username on the test page).- API limit: 2000 requests per 5 minutes (applies with or without a token).
CODEBERG_ACCESS_TOKEN=your_codeberg_token_hereSelf-hosted Forgejo API (Optional) Configure every Forgejo instance that repository URLs may target. Full base URLs support HTTPS, HTTP, ports, and subpath installations. Redirects are followed only while they remain within the configured origin and base path; using the final directly reachable base URL is recommended.
- Public repositories work without a token.
- Private repositories typically require
read:repository. read:useris only needed to show account details on the diagnostics page.
FORGEJO_ADDITIONAL_BASE_URLS=https://forgejo.example.test,http://forgejo.internal.test:3000,https://scm.example.test/code
FORGEJO_ACCESS_TOKENS=https://forgejo.example.test=token1,http://forgejo.internal.test:3000=token2
Localization Set the server timezone used by schedules, logs, emails, and background notifications. Interactive UI timestamps use each viewer's browser timezone.
# The timezone for the container (e.g., `Europe/Berlin`).
TZ=Europe/Berlin
Logging Control the verbosity of server-side logs. Timestamps always use the server timezone (
TZ).# One of: error, warn, info, debug, silent # Defaults: development=debug, production=warn (if unset) # Failed logins and active lockouts are logged at WARN. # Successful logins and lockout expiry (access unblocked) are logged at INFO. LOG_LEVEL=infoEmail (SMTP) Configuration The example compose setup uses a local SMTP relay. The default values are already set for this. You only need to change
MAIL_FROM_ADDRESSandMAIL_TO_ADDRESS.# The "from" and "to" addresses for notifications. MAIL_FROM_ADDRESS=notifications@your-domain.test MAIL_FROM_NAME=GitHub Release Monitor MAIL_TO_ADDRESS=your-personal-email@example.testImportant: For this Docker setup,
MAIL_HOSTis correctly set tosmtpandMAIL_PORTto25. You do not need aMAIL_USERNAMEorMAIL_PASSWORDfor the local relay.Apprise Configuration (Optional) Connect to an Apprise service for multi-platform notifications.
# This URL points to your Apprise service's notification endpoint. # # Case 1: For stateless notifications via `APPRISE_STATELESS_URLS` in Apprise, # use the general notify endpoint. # APPRISE_URL=http://apprise:8000/notify # # Case 2: For notifications configured via the Apprise web UI, include the # specific configuration key in the path. # APPRISE_URL=http://apprise:8000/notify/your_key # # IMPORTANT: The configuration of the actual notification services (e.g., Telegram bots, # Discord webhooks) is done within the Apprise application itself, either via environment # variables or its web UI. APPRISE_URL=- Access token option:
Edit
compose.yaml.Update the Traefik router rule to use your domain name:
# ... labels: # ... # HTTP Router - "traefik.http.routers.github-release-monitor.rule=Host(`github-releases.your-domain.test`)" # HTTPS Router - "traefik.http.routers.github-release-monitor-secured.rule=Host(`github-releases.your-domain.test`)" # ...
b) Traefik (Reverse Proxy)
- Go to
example/traefik. - Edit
compose.yaml. - Change the email address for Let's Encrypt certificate registration:
# ... command: # ... - "--certificatesresolvers.letsencrypt.acme.email=your-email@your-domain.test" # ...
c) SMTP Relay (Optional, for Email Functionality)
For improved email deliverability and to avoid being marked as spam, it's recommended to configure the SMTP relay with your domain.
- Go to
example/smtp. - Edit
compose.yaml. - Update
POSTFIX_myhostnameandOPENDKIM_DOMAINSto match the domain from which you are sending emails. This should typically be the domain you are using for theMAIL_FROM_ADDRESSin the main app's.envfile.# ... environment: - "POSTFIX_myhostname=your-domain.test" - "OPENDKIM_DOMAINS=your-domain.test=example-mail" # ...
For further customization of the SMTP relay, please refer to the official documentation of the wader/postfix-relay image.
3. Prepare Data Directory
The application stores its configuration and data in a ./data directory. For Docker, this directory on your host machine must have the correct permissions so that the application process inside the container can write to it.
This is required for both repository/settings data and Better Auth state: the container writes /app/data/auth.db for users/sessions and /app/data/auth-setup.lock after the initial account has been created. If /app/data is not mounted or is not writable by UID/GID 1001, the container can fail during startup.
Create the directory and set the appropriate ownership before starting the containers:
# Navigate to the correct folder
cd example/github-release-monitor
# Create the data directory
mkdir -p data
# Set ownership to user/group 1001 (the standard non-root user in many Node.js images)
sudo chown -R 1001:1001 data
4. Launch the Stack
Start each service using Docker Compose. It's recommended to start them in the following order from the root of the project:
# 1. Start Traefik (creates the shared network)
docker compose -f example/traefik/compose.yaml up -d
# 2. Start the SMTP Relay
docker compose -f example/smtp/compose.yaml up -d
# 3. Start the GitHub Release Monitor
docker compose -f example/github-release-monitor/compose.yaml up -d
After a few moments, your application should be accessible at https://github-releases.your-domain.test with a valid SSL certificate.
🐳 Docker Run Setup
If you prefer not to use Docker Compose, you can run the application using a single Docker command.
1. Configure Environment
Before running the container, you must create a .env file in the same directory where you will run the docker run command. The container will read its configuration from this file.
Copy the required variables from the manual setup guide's environment configuration section into a new file named .env. For a direct HTTP setup without a proxy, you must add HTTPS=false.
# ... other variables
HTTPS=false
2. Prepare Data Directory and Run Container
Create a host directory for the application data and set the correct permissions.
The bind mount is required because Better Auth stores its SQLite database at /app/data/auth.db. The mounted directory must be writable by UID/GID 1001, which is the non-root user used by the production container.
# Create the data directory
mkdir -p data
# Set ownership to user/group 1001 (common for non-root Node.js containers)
sudo chown -R 1001:1001 data
# Pull the latest image and run the container
docker run -d \
-p 8080:3000 \
-v ./data:/app/data \
--env-file ./.env \
--name github-release-monitor \
ghcr.io/iamspido/github-release-monitor:latest
The application will be accessible on http://localhost:8080. Note that this setup does not include a reverse proxy or automatic SSL, which is recommended for production use.
🛠️ Setup Guide (Manual)
Follow these steps for a manual setup of the GitHub Release Monitor.
1. Clone the Repository
First, clone the project to your local machine:
git clone https://github.com/iamspido/github-release-monitor.git
cd github-release-monitor
2. Install Dependencies
Install the required npm packages.
npm install
3. Create Data Directory and Set Permissions
The application saves its configuration in a data/ directory at the project root. Ensure this directory exists and is writable by the user that will run the Next.js process.
# Create the directory
mkdir -p data
# Ensure the user running the app can write to it (example)
# This might not be necessary if you are the owner.
sudo chown $(whoami) data
4. Configure Environment Variables
The application is configured using a .env file in the root of the project. Create this file by copying the example:
# In your terminal
touch .env
Now, open the .env file and add the following variables.
Authentication (Required)
These variables are essential for securing your application.
# Basic: internal login required for the app.
# AllowUnauthenticated: public read-only home; login required for changes, settings, and test page.
# External: disables internal auth gates for deployments protected by Authelia, Authentik, TinyAuth, NGINX Basic auth, etc.
AUTHENTICATION_METHOD=Basic
# Optional login rate-limit/lockout protection (values in seconds)
# Lockout duration once the threshold is reached.
AUTH_LOGIN_LOCKOUT_SECONDS=900
# Time window to count failed attempts.
AUTH_LOGIN_WINDOW_SECONDS=900
# Maximum failed login attempts before lockout starts.
AUTH_MAX_LOGIN_ATTEMPTS=5
# Enable only when a trusted reverse proxy overwrites client IP headers.
AUTH_TRUST_PROXY_HEADERS=false
# Number of trusted proxy entries at the right side of X-Forwarded-For.
AUTH_TRUSTED_PROXY_HOPS=1
# Better Auth secret (at least 32 chars). Generate: openssl rand -base64 32
BETTER_AUTH_SECRET=your_super_secret_better_auth_key_here
# Base URL of the app
BETTER_AUTH_URL=http://localhost:3000
# One-time token for initial admin setup (recommended 32+ chars)
AUTH_SETUP_TOKEN=your_one_time_setup_token_here
# Keep self-service signup disabled by default
AUTH_ENABLE_SIGNUP=false
# Enable passkeys (WebAuthn) for passwordless login
AUTH_ENABLE_PASSKEY=true
# Password reset link lifetime in seconds (60-86400)
AUTH_PASSWORD_RESET_TOKEN_TTL_SECONDS=900
# Optional social login providers
AUTH_GITHUB_CLIENT_ID=
AUTH_GITHUB_CLIENT_SECRET=
AUTH_GOOGLE_CLIENT_ID=
AUTH_GOOGLE_CLIENT_SECRET=
# Trust configured social providers for automatic account linking by email
AUTH_TRUST_SOCIAL_LINKING=true
# Optional fallback for older setups
AUTH_SECRET=your_super_secret_better_auth_key_here
Version 2.x retains the previous trusted-header behavior for logging and login limits when AUTH_TRUST_PROXY_HEADERS is unset. Password-reset IP limits use proxy client-address headers only when this option is explicitly true; otherwise, they fall back to a hashed account identifier. Configure the option explicitly so a future major upgrade does not change the deployment's general client-address handling unexpectedly.
Protocol (HTTP/HTTPS)
This variable controls whether the application runs in secure (HTTPS) or insecure (HTTP) mode. It affects session cookies and security headers.
# Set to 'false' if running without a reverse proxy or SSL certificate (e.g., direct HTTP).
# Defaults to 'true' for secure HTTPS operation.
HTTPS=true
GitHub API (Recommended)
To avoid being rate-limited by the GitHub API, it is highly recommended to create a Personal Access Token with no scopes (public repository access is sufficient and more secure).
# Your GitHub Personal Access Token to increase the API rate limit from 60 to 5000 requests/hour.
# Create a token with no scopes (public repo access) for better security.
GITHUB_ACCESS_TOKEN=your_github_pat_here
GitLab API (Optional)
If you want to monitor private GitLab repositories (including self-hosted instances), configure allowed hosts and host-based tokens:
- Access token option:
GITLAB_ACCESS_TOKENSwith scopesread_apiandread_repository. - Deploy token option:
GITLAB_DEPLOY_TOKENSwith scoperead_repository. - For private repositories, ensure the token has at least project role
Reporter(or higher).
# Optional additional GitLab instances besides gitlab.com (comma-separated).
GITLAB_ADDITIONAL_HOSTS=gitlab.example.test,gitlab.internal.test
# Optional host-based GitLab tokens as comma-separated host=token pairs.
# Example: gitlab.com=glpat_xxx,gitlab.example.test=glpat_yyy
GITLAB_ACCESS_TOKENS=
# Optional host-based GitLab deploy tokens as comma-separated host=username:token pairs.
# Example: gitlab.example.test=gitlab+deploy-token-123:gl-dpt-xyz
GITLAB_DEPLOY_TOKENS=
Codeberg API (Optional)
Codeberg runs on Gitea/Forgejo and exposes a Gitea-compatible REST API. If you want to monitor private repos, set a token:
- For private repositories, the token typically needs
read:repository. read:useris only needed for diagnostics (e.g. showing the authenticated username on the test page).- API limit: 2000 requests per 5 minutes (applies with or without a token).
CODEBERG_ACCESS_TOKEN=your_codeberg_token_here
Self-hosted Forgejo API (Optional)
Allow each Forgejo base URL explicitly. Base URLs may use HTTPS or HTTP, include a port, and include the instance subpath. Redirects are followed only while every target remains within the configured origin and base path, so credentials cannot be forwarded to another server or installation. Configure the final directly reachable URL whenever possible.
Base URLs must not contain credentials, a query, or a fragment. Encoded slash and backslash characters are rejected because they make the configured path boundary ambiguous. Base paths remain case-sensitive and are de-duplicated by authority plus exact subpath, so HTTP and HTTPS variants of the same instance cannot be configured together. Token entries are used only when their normalized base URL exactly matches an allowed instance.
FORGEJO_ADDITIONAL_BASE_URLS=https://forgejo.example.test,http://forgejo.internal.test:3000,https://scm.example.test/code
FORGEJO_ACCESS_TOKENS=https://forgejo.example.test=token1,http://forgejo.internal.test:3000=token2
Tokens for private repositories typically need read:repository. The optional read:user scope is used only to display account information on the diagnostics page. Support targets Forgejo's v1 REST API and does not imply compatibility with arbitrary Gitea versions. Self-signed TLS certificates are not supported; use a trusted certificate or an explicitly configured internal HTTP base URL.
Localization
Set the server timezone used by schedules, logs, emails, and background notifications. Interactive UI timestamps use each viewer's browser timezone.
# The timezone for the container (e.g., `Europe/Berlin`).
TZ=Europe/Berlin
Email (SMTP) Configuration (Optional)
These variables are required if you want to receive email notifications.
# Your SMTP server details.
MAIL_HOST=smtp.example.test
MAIL_PORT=587
MAIL_USERNAME=your-email@example.test
MAIL_PASSWORD=your_email_password_or_app_token
MAIL_TLS_REJECT_UNAUTHORIZED=true
# The "from" and "to" addresses for notifications.
MAIL_FROM_ADDRESS=notifications@your-domain.test
MAIL_FROM_NAME=GitHub Release Monitor
MAIL_TO_ADDRESS=your-personal-email@example.test
SMTP TLS certificates are verified by default. For a relay signed by an
internal certificate authority, prefer mounting the CA certificate into the
container and setting NODE_EXTRA_CA_CERTS=/path/to/ca.pem. This extends the
trusted CA list while keeping certificate and hostname verification enabled.
As a last resort for a relay in a controlled internal network, set
MAIL_TLS_REJECT_UNAUTHORIZED=false. Only the exact value false disables
verification. This accepts all invalid SMTP TLS certificates, including
self-signed, expired, and hostname-mismatched certificates, and therefore
reduces protection against man-in-the-middle attacks. Restart the application
after changing either environment variable. See the
Nodemailer TLS options and
NODE_EXTRA_CA_CERTS documentation
for details.
Apprise Configuration (Optional)
Connect to an Apprise service for multi-platform notifications.
# This URL points to your Apprise service's notification endpoint.
#
# Case 1: For stateless notifications via `APPRISE_STATELESS_URLS` in Apprise,
# use the general notify endpoint.
# APPRISE_URL=http://localhost:8000/notify
#
# Case 2: For notifications configured via the Apprise web UI, include the
# specific configuration key in the path.
# APPRISE_URL=http://localhost:8000/notify/your_key
#
# IMPORTANT: The configuration of the actual notification services (e.g., Telegram bots,
# Discord webhooks) is done within the Apprise application itself, either via environment
# variables or its web UI.
APPRISE_URL=
5. Running the Application
Once your .env file is configured, you can run the application in one of two modes:
Production Mode
For a production deployment, build and start the application:
# 1. Build the application for production
npm run build

# 2. Start the production server
npm run start
The application will be served on port 3000.
Development Mode
For development purposes, you can start the development server which provides features like hot-reloading:
npm run dev
The application will be available at http://localhost:3000. On first start, create the initial admin account via setup token (AUTH_SETUP_TOKEN), then log in with that account.
🔄 Migration to 2.0.0
Version 2.0.0 replaces the old iron-session username/password login with Better Auth. Existing repository, settings, and notification data in data/ stay untouched, but existing login sessions are invalidated.
- Remove the old
AUTH_USERNAMEandAUTH_PASSWORDvariables from your.env. - Add
BETTER_AUTH_SECRET,BETTER_AUTH_URL, and a one-timeAUTH_SETUP_TOKENwith at least 32 characters. You can keep using the oldAUTH_SECRETvalue as a fallback secret for now, butBETTER_AUTH_SECRETis recommended.AUTH_SECRETwill be removed in 3.0.0. - Keep the existing
data/directory mounted and writable. Better Auth stores its SQLite database indata/auth.dband writesdata/auth-setup.lockafter the first account is created. - Start the updated app and open the login page. The first run shows the setup form; enter
AUTH_SETUP_TOKENand create the initial admin account. The oldAUTH_USERNAME/AUTH_PASSWORDcredentials are not imported automatically. - Optional: configure
AUTH_ENABLE_PASSKEY,AUTH_ENABLE_SIGNUP, or the GitHub/Google OAuth variables after the first account exists.
Admin usernames must be 3-30 characters and may contain letters, numbers, _, and .. Passwords must contain 12-128 characters, include uppercase, lowercase, and a number, and contain no whitespace.
🔑 Password Recovery and User Administration
When SMTP is configured (MAIL_HOST, MAIL_PORT, and MAIL_FROM_ADDRESS),
the login page provides a Forgot password? flow that accepts either the
username or email address. Reset links are single-use, expire after
AUTH_PASSWORD_RESET_TOKEN_TTL_SECONDS (15 minutes by default), and revoke all
existing sessions after a successful reset.
An administrator with access to the installation host can generate the same Better Auth reset link without SMTP. The account can be selected by username or email.
For a Docker deployment:
docker exec -it github-release-monitor \
  node /app/grm-cli.mjs auth reset-password --user admin
For a manual installation, run the CLI from the project root after
npm run build. Node must load the same .env file as the application so the
CLI uses the configured Better Auth secret, public URL, and token lifetime:
node --env-file=.env .next/cli/grm-cli.mjs \
  auth reset-password --user admin
If the application has not been built yet, npm run build:cli is sufficient
to create .next/cli/grm-cli.mjs.
Create another internal account and print a one-time password setup link:
docker exec -it github-release-monitor \
  node /app/grm-cli.mjs auth create-user \
  --username second_admin --email user@example.com --name "Second administrator"
Manual installation equivalent:
node --env-file=.env .next/cli/grm-cli.mjs \
  auth create-user \
  --username second_admin --email user@example.com --name "Second administrator"
Alternatively, set the initial password through a hidden, repeated TTY prompt:
docker exec -it github-release-monitor \
  node /app/grm-cli.mjs auth create-user \
  --username second_admin --email user@example.com --prompt-password
Manual installation equivalent (run it in an interactive terminal):
node --env-file=.env .next/cli/grm-cli.mjs \
  auth create-user \
  --username second_admin --email user@example.com --prompt-password
Permanently delete an internal account by username or email. To reduce the risk of deleting the wrong account, the interactive command displays the resolved account and requires its exact username as confirmation:
docker exec -it github-release-monitor \
  node /app/grm-cli.mjs auth delete-user --user former_admin
Manual installation equivalent:
node --env-file=.env .next/cli/grm-cli.mjs \
  auth delete-user --user former_admin
For deliberate non-interactive automation, --yes skips the confirmation:
docker exec github-release-monitor \
  node /app/grm-cli.mjs auth delete-user --user former_admin --yes
Deletion removes the account and its authentication data, including active sessions and linked login methods, and cannot be undone. The final remaining account cannot be deleted.
Passwords are never accepted as command-line values. All internal accounts
currently have the same full application permissions; create-user does not
implement or imply a separate role model. Treat CLI access as administrative
access because these commands can print credential-recovery links to the terminal.
For manual installations, run the command from the project root as a user with
write access to data/; this ensures it opens the same data/auth.db as the
application.
The CLI uses exit code 2 for invalid input, 3 when an account is not found,
4 for ambiguous identifiers, account conflicts, or last-account protection,
and 5 for database or other runtime failures.
BETTER_AUTH_URL must be the browser-facing canonical URL. CLI-generated links
use that origin and the locale stored in the application settings.
🌐 Adding a Locale
Locales are defined centrally in src/i18n/config.ts. To publish another
language:
- Add its canonical BCP 47 code, native name, text direction, and font profile
to the locale registry. Available profiles are
inter,noto,noto-arabic,noto-devanagari,noto-cjk-jp,noto-cjk-kr,noto-cjk-sc, andnoto-hebrew. - Add a complete
src/messages/<locale>.jsondictionary. The test suite compares every configured dictionary and ICU placeholder with English. - Add translated canonical route slugs in
src/i18n/routing.ts. English slugs are accepted as aliases; keep replaced published slugs as historical aliases. - Verify font coverage and the complete bidirectional layout before publishing
the locale. Prefer logical start/end spacing, use
dir="auto"for user text, and keep URLs, identifiers, versions, email addresses, cron expressions, regular expressions, OTPs, and code explicitly left-to-right.
The locale switcher, settings validation, cookies, authentication redirects,
message loading, document direction, Radix direction, and body font are derived
from the registry. Hebrew (he) and Arabic (ar) are published with Noto Sans
Hebrew and Noto Sans Arabic respectively, together with right-to-left layout
support. Simplified Chinese (zh-CN) is published with
Noto Sans SC, Japanese (ja) uses Noto Sans JP, Korean (ko) uses Noto Sans
KR, Hindi (hi) uses Noto Sans Devanagari, and Turkish (tr) uses Noto Sans
for Latin Extended coverage. Vietnamese (vi) uses Noto Sans for its extended
Latin diacritics, while Ukrainian (uk) and Russian (ru) use it for Cyrillic
coverage.
Italian (it), Indonesian (id), Polish (pl), and Dutch (nl) use the
existing Inter profile.
🔐 Social Login Setup (GitHub + Google)
Use this section to create OAuth credentials for the login buttons and map them to:
AUTH_GITHUB_CLIENT_ID/AUTH_GITHUB_CLIENT_SECRETAUTH_GOOGLE_CLIENT_ID/AUTH_GOOGLE_CLIENT_SECRET
Official documentation:
- Better Auth GitHub provider: https://www.better-auth.com/docs/authentication/github
- Better Auth Google provider: https://www.better-auth.com/docs/authentication/google
- Better Auth social provider concepts: https://www.better-auth.com/docs/concepts/oauth
- Google Identity branding guidelines (button/logo requirements): https://developers.google.com/identity/branding-guidelines
1. Common Requirements
- Set
BETTER_AUTH_URLto your real app URL (for local dev, usuallyhttp://localhost:3000). - After changing OAuth settings, restart the app container.
- With
AUTH_ENABLE_SIGNUP=false, social login is intended for existing users (first-time users should sign in with password and link providers in Settings if needed).
2. GitHub OAuth (OAuth App, not GitHub App)
- Open:
GitHub -> Settings -> Developer settings -> OAuth Apps -> New OAuth App - Fill in:
- Homepage URL: your app URL (e.g.
http://localhost:3000orhttps://your-domain.test) - Authorization callback URL:
- Local:
http://localhost:3000/api/auth/callback/github - Production:
https://your-domain.test/api/auth/callback/github
- Local:
- Homepage URL: your app URL (e.g.
- Create app and copy:
- Client ID ->
AUTH_GITHUB_CLIENT_ID - Client Secret ->
AUTH_GITHUB_CLIENT_SECRET
- Client ID ->
3. Google OAuth (Web application)
- Open Google Cloud Console:
APIs & Services -> OAuth consent screen(complete this first)
- Then:
APIs & Services -> Credentials -> Create Credentials -> OAuth client ID- Choose Web application
- Configure:
- Authorized redirect URIs:
- Local:
http://localhost:3000/api/auth/callback/google - Production:
https://your-domain.test/api/auth/callback/google
- Local:
- Authorized JavaScript origins (optional but recommended):
http://localhost:3000https://your-domain.test
- Authorized redirect URIs:
- Copy:
- Client ID ->
AUTH_GOOGLE_CLIENT_ID - Client Secret ->
AUTH_GOOGLE_CLIENT_SECRET
- Client ID ->
Note: Google OAuth setting changes can take a few minutes (sometimes longer) to propagate.
⚙️ Environment Variables
Here is a complete list of all environment variables used by the application.
| Variable | Description | Required? | Default |
|---|---|---|---|
ALLOWED_DEV_ORIGINS |
Comma-separated list of allowed origins in development; blocks others in middleware. | No (dev only) | - |
APPRISE_URL |
URL of your Apprise service's notification endpoint (e.g., http://host/notify or http://host/notify/key). | No | - |
AUTHENTICATION_METHOD |
Authentication mode: Basic, AllowUnauthenticated, or External. External should only be used behind another auth layer. |
No | Basic |
AUTH_LOGIN_LOCKOUT_SECONDS |
Lockout duration (seconds) after too many failed login attempts. | No | 900 |
AUTH_LOGIN_WINDOW_SECONDS |
Time window (seconds) used to count failed login attempts. | No | 900 |
AUTH_MAX_LOGIN_ATTEMPTS |
Maximum failed login attempts before a temporary lockout is applied. | No | 5 |
AUTH_TRUST_PROXY_HEADERS |
Trusts X-Forwarded-For/X-Real-IP for per-client login limits and, only when explicitly true, password-reset IP limits. Without explicit trust, password resets use a hashed account-identifier limit instead. Set to true only behind a proxy that overwrites these headers; use false for direct exposure. Version 2.x preserves the general trusted-header behavior when unset; the next major will default to false. |
No | true (2.x compatibility; explicit true required for reset IP limits) |
AUTH_TRUSTED_PROXY_HOPS |
Number of trusted proxy entries counted from the right side of X-Forwarded-For (1-10). |
No | 1 |
AUTH_ENABLE_SIGNUP |
Enables self-service signup when set to true. Keep false for single-user mode. |
No | false |
AUTH_ENABLE_PASSKEY |
Enables WebAuthn passkey features when set to true. |
No | true |
AUTH_PASSWORD_RESET_TOKEN_TTL_SECONDS |
Lifetime of single-use password reset links in seconds (60-86400). | No | 900 |
AUTH_TRUST_SOCIAL_LINKING |
Trusts configured social providers for automatic account linking by email (github, google). |
No | true |
AUTH_SETUP_TOKEN |
One-time setup token used to create the first user when no users exist yet. | Recommended | - |
AUTH_SECRET |
Backward-compatible fallback for BETTER_AUTH_SECRET. |
No | - |
AUTH_GITHUB_CLIENT_ID |
OAuth client ID for GitHub social login. | No | - |
AUTH_GITHUB_CLIENT_SECRET |
OAuth client secret for GitHub social login. | No | - |
AUTH_GOOGLE_CLIENT_ID |
OAuth client ID for Google social login. | No | - |
AUTH_GOOGLE_CLIENT_SECRET |
OAuth client secret for Google social login. | No | - |
BETTER_AUTH_SECRET |
Better Auth secret key (minimum 32 characters). | Yes | - |
BETTER_AUTH_URL |
Base URL used by Better Auth (e.g. http://localhost:3000). |
Yes | - |
CODEBERG_ACCESS_TOKEN |
A Codeberg access token (Gitea API) for private repos. Typically needs read:repository; read:user only for diagnostics. |
No | - |
FORGEJO_ADDITIONAL_BASE_URLS |
Allowed self-hosted Forgejo base URLs, comma-separated. Supports HTTP/HTTPS, ports, and subpaths. | No | - |
FORGEJO_ACCESS_TOKENS |
Base-URL-based Forgejo tokens as comma-separated base-url=token pairs for private repos. |
No | - |
GITHUB_ACCESS_TOKEN |
A GitHub Personal Access Token to increase the API rate limit. A token with no scopes is sufficient. | No (but recommended) | - |
GITLAB_ADDITIONAL_HOSTS |
Additional GitLab hosts (without schema/port), comma-separated. gitlab.com is always allowed. |
No | - |
GITLAB_ACCESS_TOKENS |
Host-based GitLab tokens as comma-separated host=token pairs for private repos. |
No | - |
GITLAB_DEPLOY_TOKENS |
Host-based GitLab deploy tokens as comma-separated host=username:token pairs for private repos. |
No | - |
HTTPS |
Set to false to run in HTTP mode. Defaults to true for secure operation. |
No | true |
LOG_LEVEL |
Controls server log verbosity: error, warn, info, debug, silent. |
No | warn (prod), debug (dev) |
MAIL_FROM_ADDRESS |
The email address that notifications will be sent from. | Yes, for email | - |
MAIL_FROM_NAME |
The display name for the "from" address. | No | GitHub Release Monitor |
MAIL_HOST |
The hostname or IP address of your SMTP server. | Yes, for email | - |
MAIL_PASSWORD |
The password or app token for SMTP authentication. | No (depends on server) | - |
MAIL_PORT |
The port for your SMTP server (e.g., 587 or 465). | Yes, for email | - |
MAIL_TLS_REJECT_UNAUTHORIZED |
Verifies SMTP TLS certificates. Only false disables verification for invalid or self-signed certificates. |
No | true |
MAIL_TO_ADDRESS |
The email address that will receive the notifications. | Yes, for email | - |
MAIL_USERNAME |
The username for SMTP authentication. | No (depends on server) | - |
TZ |
Server timezone for schedules, logs, emails, and background notifications. UI timestamps use the browser timezone. | No | System default |
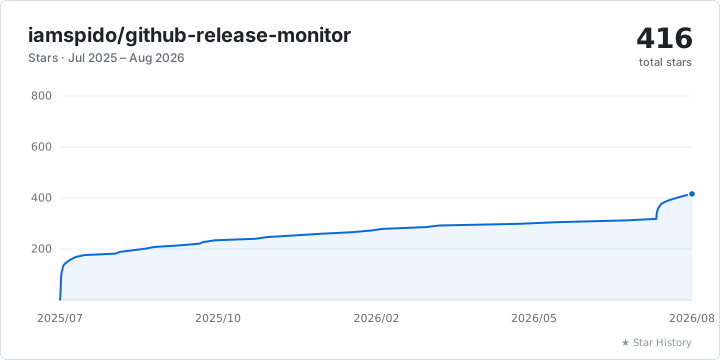
Star History
Categories
Related apps
Explore more like this
Explore allDetails
ghcr.io/iamspido/github-release-monitor:latestRuntime arguments
- Web UI
http://[IP]:[PORT:3000]- Network
host- Shell
bash- Privileged
- false
Template configuration
- Target
- 3000
- Value
- 3000
Specify the path to the data directory.
- Target
- /app/data
- Value
- /mnt/user/appdata/github-release-monitor
A long, random string (at least 32 characters) used to encrypt session cookies. You can generate one using: openssl rand -base64 32
- Target
- AUTH_SECRET
The username for logging into the application.
- Target
- AUTH_USERNAME
The password for logging into the application.
- Target
- AUTH_PASSWORD
A GitHub Personal Access Token to increase the API rate limit. A token with no scopes is sufficient.
- Target
- GITHUB_ACCESS_TOKEN
The timezone for the container (e.g., Europe/London). Affects log timestamps and date formatting.
- Target
- TZ
- Value
- Europe/London
The port for your SMTP server (e.g., 587 or 465).
- Target
- MAIL_PORT
The username for SMTP authentication.
- Target
- MAIL_USERNAME
The password or app token for SMTP authentication.
- Target
- MAIL_PASSWORD
The email address that notifications will be sent from.
- Target
- MAIL_FROM_ADDRESS
The display name for the
- Target
- MAIL_FROM_NAME
The email address that will receive the notifications.
- Target
- MAIL_TO_ADDRESS
The hostname or IP address of your SMTP server.
- Target
- MAIL_HOST