
All apps · 0 apps
dind-swarm-worker
Docker app from Josh.5's Repository
Overview
Configure Unraid as a Docker Swarm worker using Docker-in-Docker.
This container runs a dedicated Docker Engine inside Unraid, allowing you to join a Swarm without modifying the host Docker daemon.
Prerequisites (Unraid + macvlan):
- In Unraid, open Settings - Docker.
- Stop Docker, then set "Docker custom network type" to macvlan.
- Enable a custom network on eth0 (e.g., "br0" or "eth0" depending on your setup).
- Assign a fixed IP in the Unraid Docker template (matches the MyIP field). This IP must be
free on your LAN and outside your DHCP pool. - Start Docker again.
Template configuration notes:
- Privileged: recommended for best compatibility with nested containers and features like
overlay networking. Not strictly required, but some inner containers may fail without it. - Hostname and /etc/hosts: update ExtraParams to set a meaningful hostname and host entry:
--hostname='Tower' --add-host='Tower:127.0.0.1'
Replace "Tower" with your Unraid server name or desired node name. - ExtraParams: you can remove --gpus=1 if you do not want GPU access, or set it to a
specific GPU UUID.
After container start (joining the Swarm):
- On your Swarm manager node, generate a worker join token:
docker swarm join-token worker - Copy the join command that it outputs. It looks like:
docker swarm join --token TOKEN MANAGER_IP:2377 - Enter the container console (or use docker exec) and run the join command inside this
container. - Verify on the manager:
docker node ls
You should see this node listed as a worker.
Optional:
- If you want the inner Docker daemon to persist data, ensure the /var/lib/docker path maps
to a stable storage path as configured in the template. - For TLS client certs or custom daemon config, use the mapped /certs and /etc/docker paths.
- You can set the default runtime by writing /etc/docker/daemon.json in the bound config path
(Path: Docker config). Example:
{
"runtimes": {
"nvidia": {
"args": [],
"path": "nvidia-container-runtime"
}
}
}
Readme
View on GitHub{{% include "swarm-mode.md" %}}
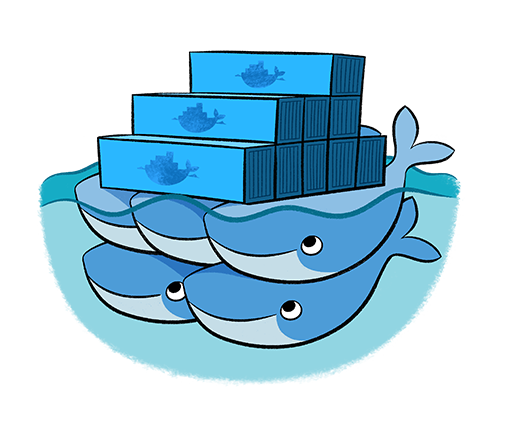
Current versions of Docker include Swarm mode for natively managing a cluster of Docker Engines called a swarm. Use the Docker CLI to create a swarm, deploy application services to a swarm, and manage swarm behavior.
Docker Swarm mode is built into the Docker Engine. Do not confuse Docker Swarm mode with Docker Classic Swarm which is no longer actively developed.
Feature highlights
Cluster management integrated with Docker Engine
Use the Docker Engine CLI to create a swarm of Docker Engines where you can deploy application services. You don't need additional orchestration software to create or manage a swarm.
Decentralized design
Instead of handling differentiation between node roles at deployment time, the Docker Engine handles any specialization at runtime. You can deploy both kinds of nodes, managers and workers, using the Docker Engine. This means you can build an entire swarm from a single disk image.
Declarative service model
Docker Engine uses a declarative approach to let you define the desired state of the various services in your application stack. For example, you might describe an application comprised of a web front end service with message queueing services and a database backend.
Scaling
For each service, you can declare the number of tasks you want to run. When you scale up or down, the swarm manager automatically adapts by adding or removing tasks to maintain the desired state.
Desired state reconciliation
The swarm manager node constantly monitors the cluster state and reconciles any differences between the actual state and your expressed desired state. For example, if you set up a service to run 10 replicas of a container, and a worker machine hosting two of those replicas crashes, the manager creates two new replicas to replace the replicas that crashed. The swarm manager assigns the new replicas to workers that are running and available.
Multi-host networking
You can specify an overlay network for your services. The swarm manager automatically assigns addresses to the containers on the overlay network when it initializes or updates the application.
Service discovery
Swarm manager nodes assign each service in the swarm a unique DNS name and load balance running containers. You can query every container running in the swarm through a DNS server embedded in the swarm.
Load balancing
You can expose the ports for services to an external load balancer. Internally, the swarm lets you specify how to distribute service containers between nodes.
Secure by default
Each node in the swarm enforces TLS mutual authentication and encryption to secure communications between itself and all other nodes. You have the option to use self-signed root certificates or certificates from a custom root CA.
Rolling updates
At rollout time you can apply service updates to nodes incrementally. The swarm manager lets you control the delay between service deployment to different sets of nodes. If anything goes wrong, you can roll back to a previous version of the service.
What's next?
- Learn Swarm mode key concepts.
- Get started with the Swarm mode tutorial.
- Explore Swarm mode CLI commands
Categories
Related apps
Explore more like this
Explore allDetails
ghcr.io/josh5/ubuntu-dind:latestRuntime arguments
- Network
eth0- Shell
bash- Privileged
- true
- Extra Params
--gpus=1 --hostname='Tower' --add-host='Tower:127.0.0.1'
Template configuration
- Target
- /certs
- Default
- /mnt/user/system/dind-swarm-worker/certs
- Value
- /mnt/user/system/dind-swarm-worker/certs
- Target
- /var/lib/docker
- Default
- /mnt/user/system/dind-swarm-worker/var/
- Value
- /var/lib/docker/dind-var/dind-swarm-worker
- Target
- /etc/docker
- Default
- /mnt/user/system/dind-swarm-worker/etc
- Value
- /mnt/user/system/dind-swarm-worker/etc
Expose tcp://0.0.0.0:2375 even when TLS is enabled on 2376.
- Target
- DOCKER_FORCE_INSECURE_TCP
- Default
- false
- Value
- false
Provides direct access to the mounted disks
- Target
- /mnt
- Value
- /mnt
Container timezone.
- Target
- TZ
- Default
- Etc/UTC
- Value
- Etc/UTC
For users with multiple GPUs, add the ID found under the
- Target
- NVIDIA_VISIBLE_DEVICES
- Default
- all
- Value
- all
- Target
- NVIDIA_DRIVER_CAPABILITIES
- Default
- all
- Value
- all