

birddog-play-flasher
Docker app from Stoatworks Labs' Repository
Overview
Readme
View on GitHubAI-assisted project. This codebase was created with Claude (Anthropic), directed and reviewed by a human author. The USB half has met a real BirdDog PLAY and been corrected against it, and the image handling is tested against genuine vendor files. No injected
.fwhas ever been seen to install on first boot. The status note below has the details.
BirdDog PLAY recovery flasher
A static web page that flashes a BirdDog PLAY in Rockchip recovery mode over USB, straight from
the browser, and can also inject a .fw update package into the image so the device
installs it on first boot.
There's no upload, no server and no vendor key. You supply your own factory .img (BirdDog host
them in their PLAY Reimage Process
folder on OneDrive, behind a Microsoft sign-in), and the loader that gets pushed over USB is
extracted from that file in the browser at run time. That's the only reason this repo can be
public. See AGENTS.md §5.
Partly proven on a real PLAY (2026-08-15). The image parsing, the filesystem injection and the partition table are covered by tests against genuine vendor files. The USB half was written from rkdeveloptool's protocol and I've since corrected it against a device: the loader push, the re-enumeration wait after it, and read-back verification all changed because of what the hardware did. The first-boot install of an injected package has never been observed. Nothing has been seen to boot and apply one yet.
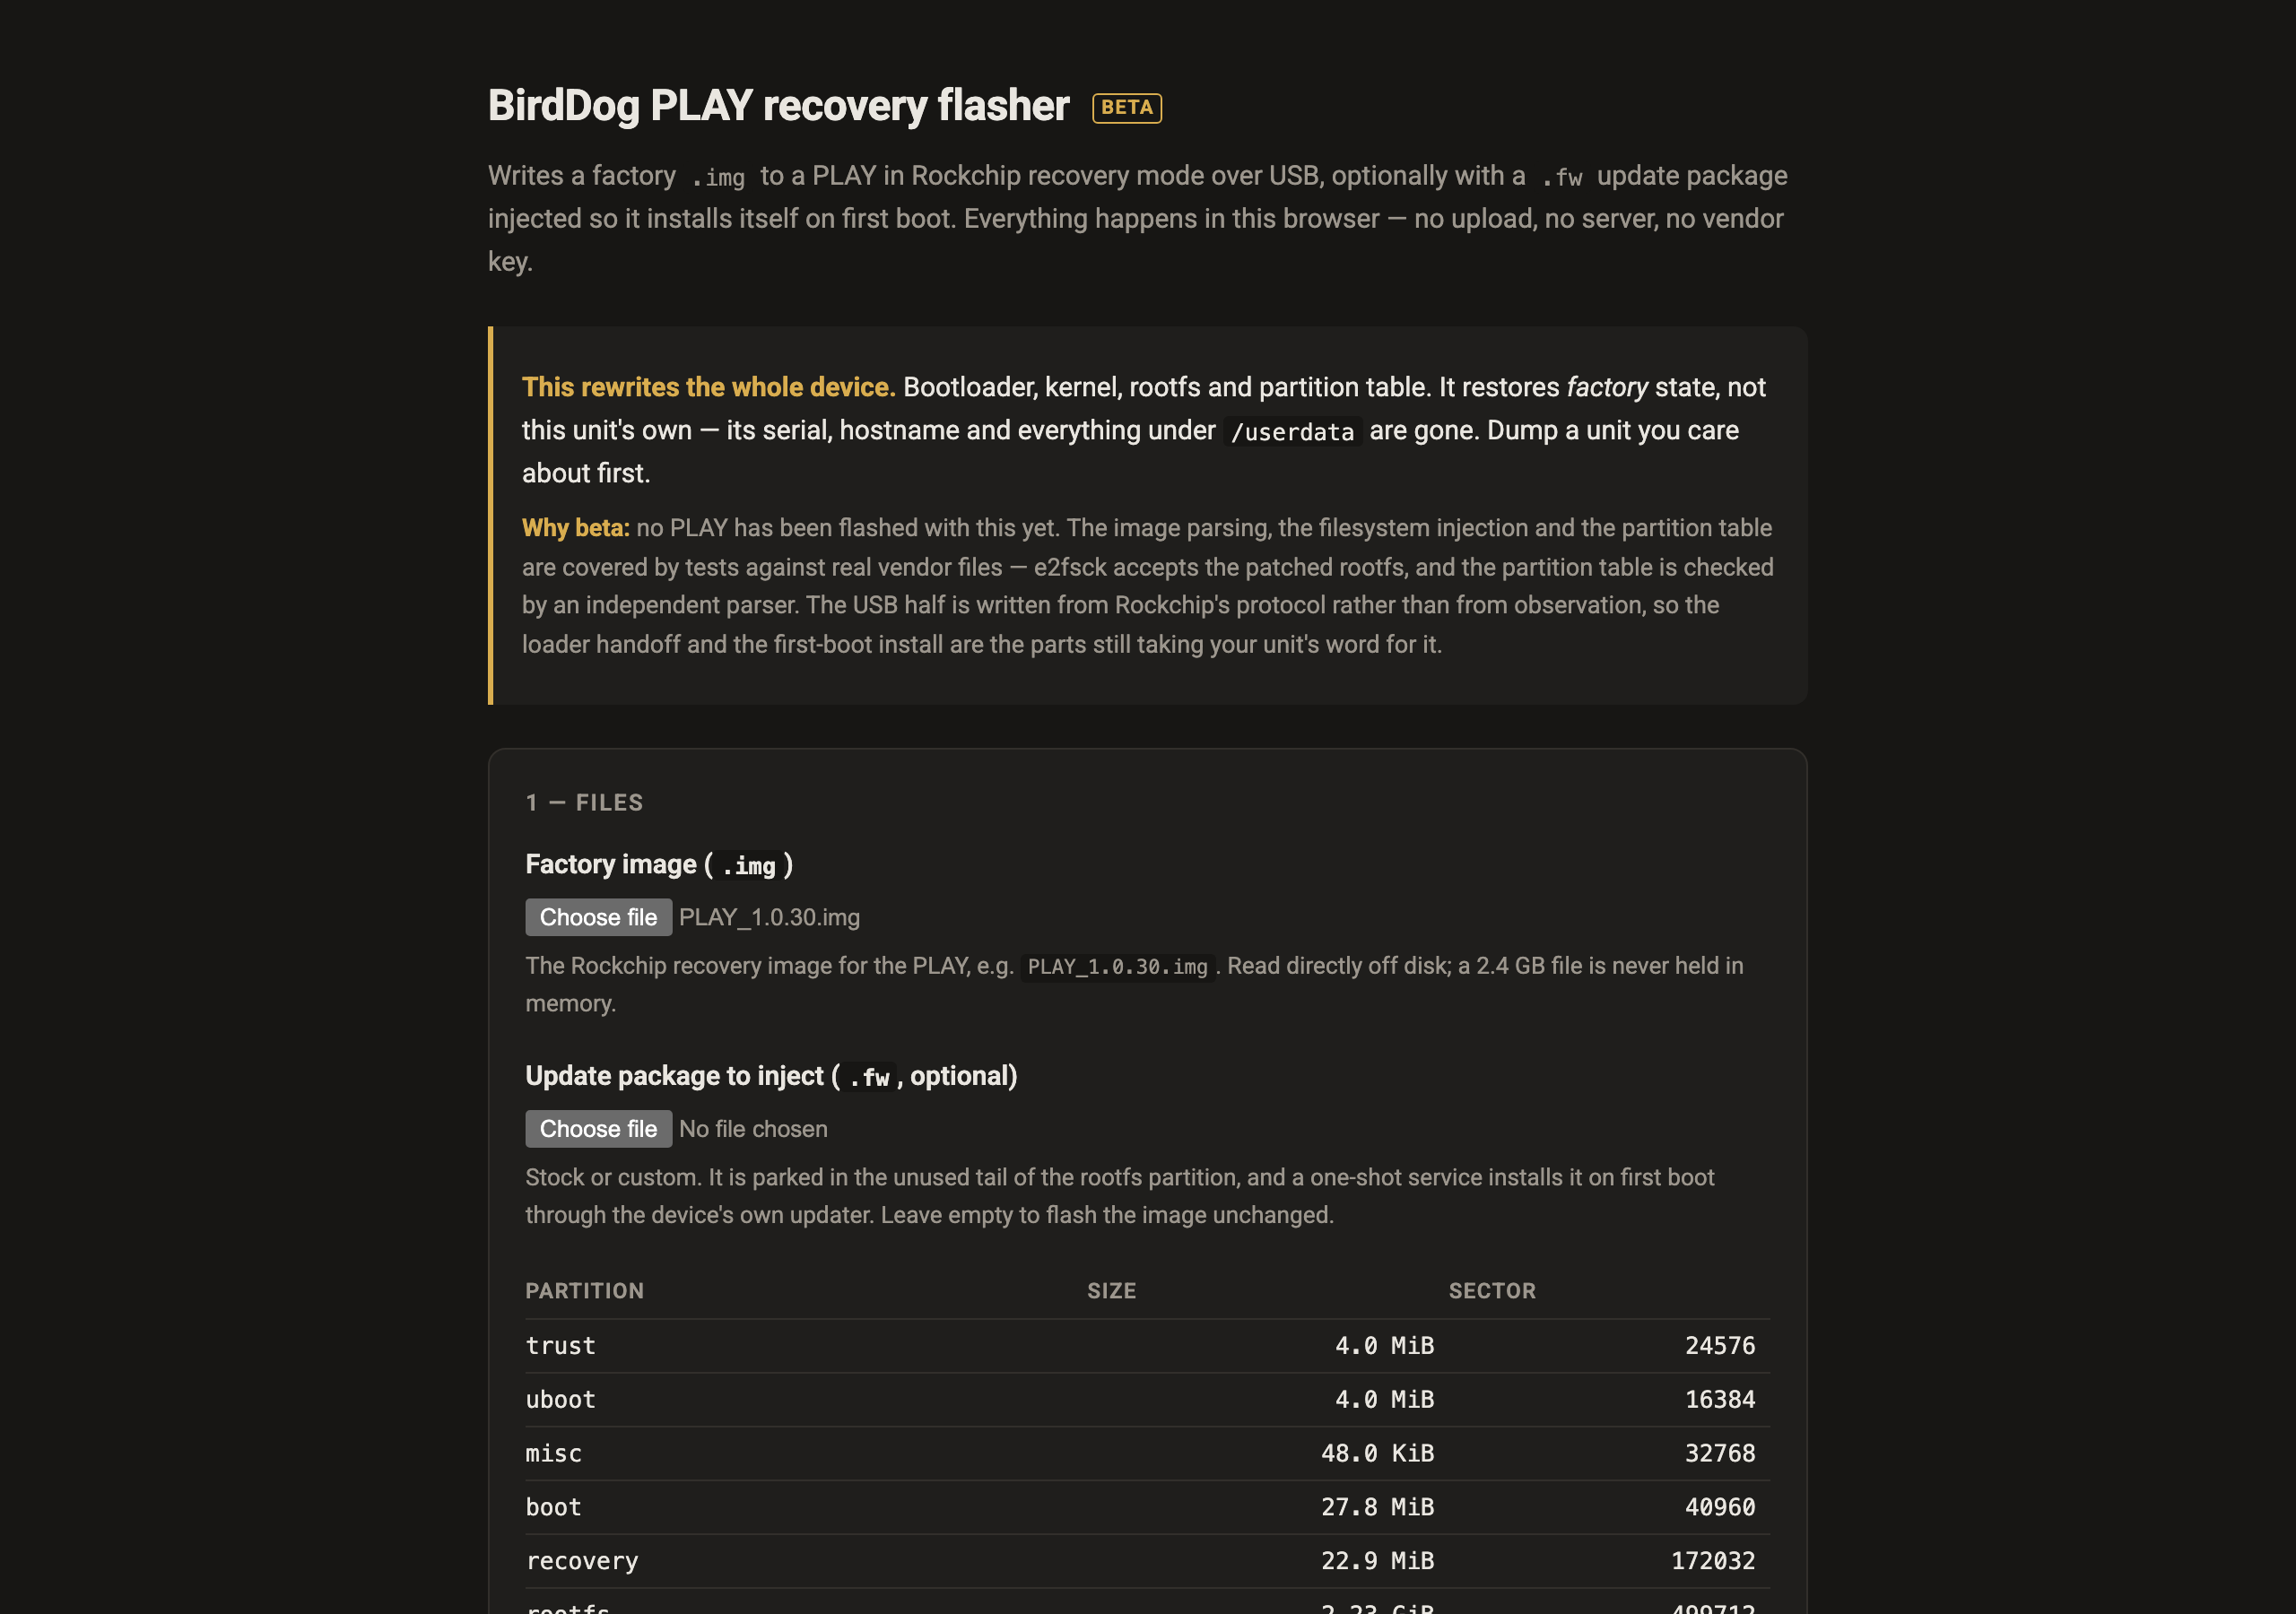
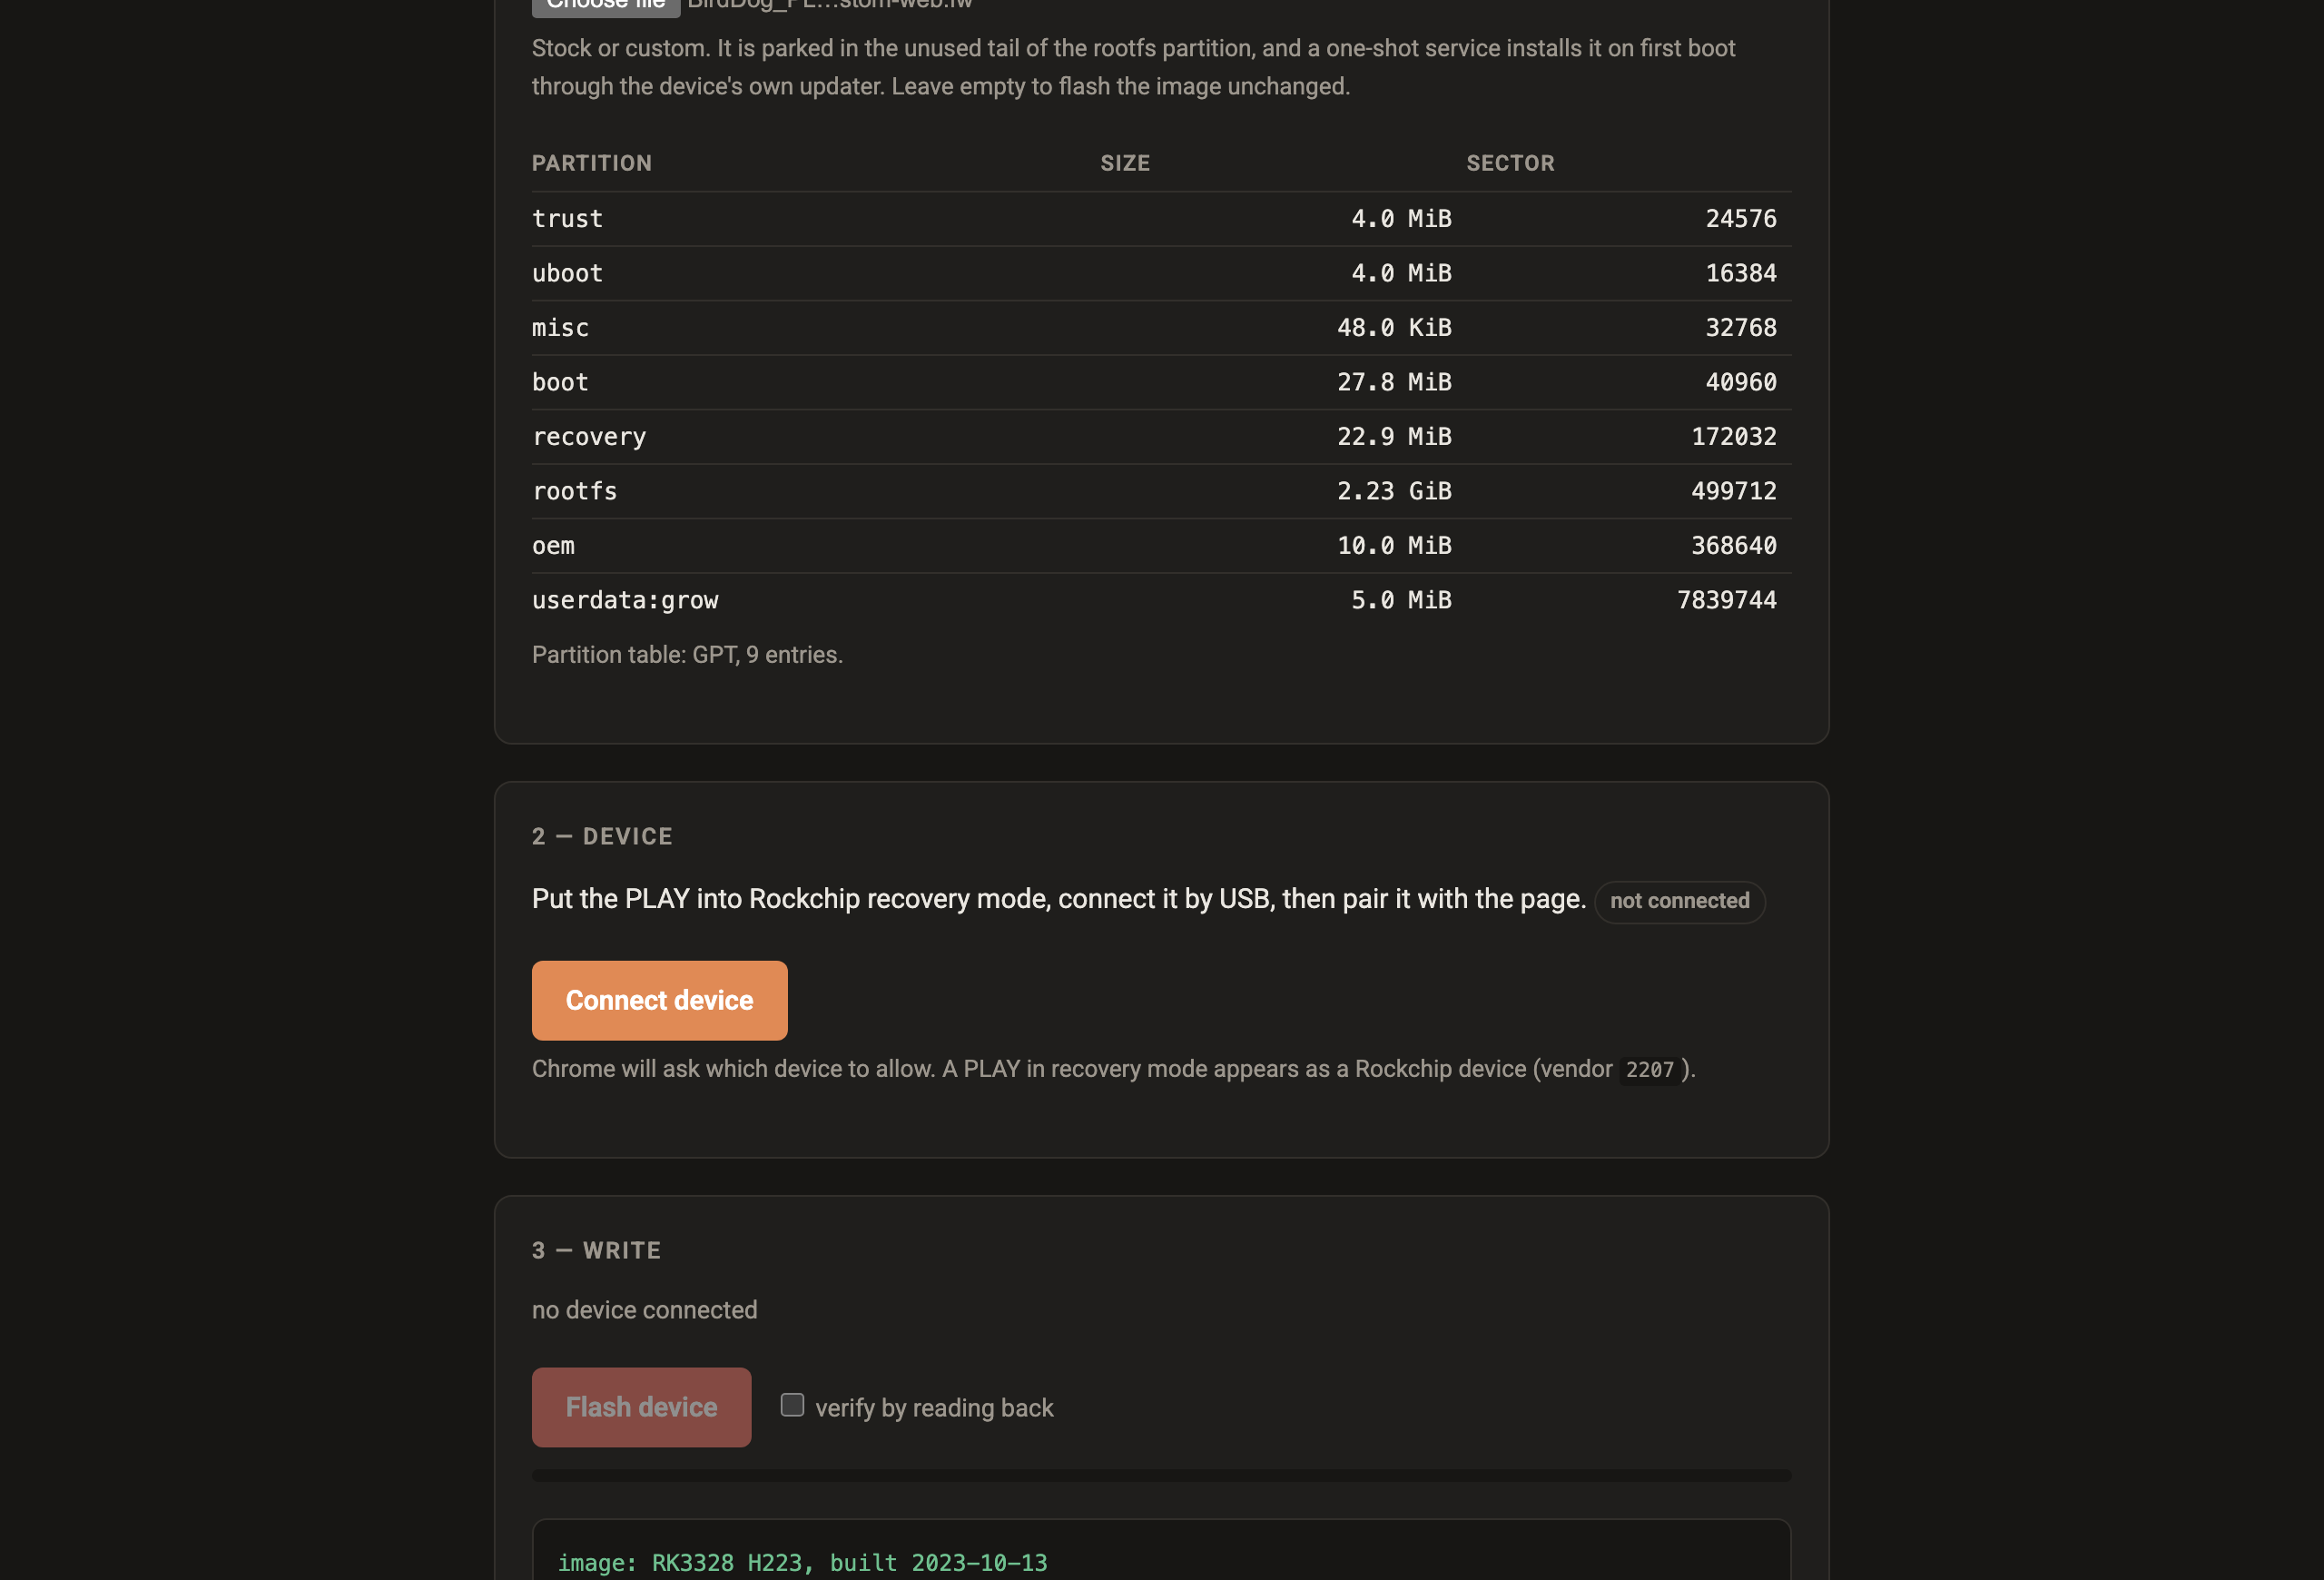
Both files above are real: a 2.3 GB factory .img and a 35 MB .fw. The image is read off
disk in slices and never held in memory, so choosing one costs nothing.
What it does
Flash a factory .img |
Whole device: bootloader, u-boot, trust, kernel, DTB, rootfs, partition table. This is the brick-recovery path. |
Inject a .fw |
Parks the package in the unused tail of the rootfs partition and adds a one-shot service that installs it on first boot via the device's own updater. |
| Write individual partitions | The opposite job: put a replacement OS on a unit, writing only the partitions you name and leaving the rest — including the vendor's recovery partition — untouched. |
| Verify | Optional read-back and compare of everything written. |
Writing individual partitions
Restoring a factory image and installing a replacement OS are different
jobs, and this does the second one. Give it one file per partition (a
boot image and a rootfs filesystem, say) and it writes those and nothing
else.
Two things make it safer than the dd-at-an-offset it replaces:
- It aims using the partition table read off the device, not a sector copied out of a parameter file. A number in a script is right until it meets a unit that's already been reflashed, or isn't a PLAY at all, and that's the very case where a 3.5 GiB write at a plausible offset does real damage. The table is read, the header checksum is verified, partitions are matched by name, and a file too large for its target is refused rather than truncated.
uboot,trustandrecoveryare refused by default. They're what loader mode and the vendor's restore depend on. You can write them, but only by ticking an override on purpose, because getting them wrong is the difference between "flash it again" and "this unit is gone".
It needs the device in loader mode: a maskrom device can't serve the LBA reads used to fetch the partition table until a loader has been pushed into it, and the loader comes out of a factory image.
Everything not listed is left just as it was. That's what keeps the factory recovery path there for you after you've replaced the OS.
Why injection works
A .fw isn't a partition image. It's a gzip'd tar whose ./update runs as root on a booted
device, and in maskrom mode there's no OS to run it, so it can't just be flashed. Two facts
from the factory image make the injection clean:
- The rootfs partition has a 1.26 GiB hole.
parameter.txtgives rootfs 7,340,032 sectors (3.5 GiB) whilerootfs.imgis 2,399,595,520 bytes (2.235 GiB). Nothing ever grows into it: onlyuserdata:growgrows, and that's a different partition. The package lives there as raw bytes, costing no filesystem space. - The rootfs is plain ext2, with
dir_index filetypeand nothing else. No journal, no extents, no metadata checksums. So three small files can be added to it correctly from JavaScript, and e2fsck agrees.
On first boot the injected service dds the package back off the partition, hands it to
BirdDogUpdateRunner the same way the vendor's own network path does, waits for the updater to
finish, and reboots. It marks itself done before installing, so a package that kills the box
can't reinstall itself on every boot.
Getting a PLAY into recovery mode
The recovery button isn't on the outside of the case. It sits inside the 3.5 mm headphone socket, which is a choice somebody made on purpose. Straighten a paperclip or use a SIM-eject tool, push it gently all the way in, and you'll feel the button click.
- Power the unit off.
- Push the pin into the headphone socket and hold the button down.
- Still holding it, apply power, and keep holding for a few seconds after.
- Connect USB, then release. The unit enumerates as vendor
2207, in either maskrom or loader mode, and the page reports which and handles both.
If it boots normally instead, the button wasn't held down far enough or long enough. The socket is deep and the button is right at the bottom.
Windows needs Zadig to rebind the device to WinUSB, because
Rockchip's own driver claims it and WebUSB can't reach it after that. macOS needs nothing. Linux
needs a udev rule for 2207:*.
Installing a .fw on a unit that still boots
You don't need any of this to update a working PLAY, because the device's own web interface does
it. Browse to the unit's IP address, log in, go to the System tab, and upload the .fw there.
The device installs it and reboots.
This tool is for when that isn't an option: a unit that won't boot, won't take a web-UI update,
or needs the whole device put back to a known state. Injecting the .fw here just saves you a
second trip once it's back up.
Tests
npm test
The CI-safe tests build their own ext2 filesystem with mke2fs and check the result with e2fsck,
debugfs and an independent Python GPT parser, with no vendor files involved. The end-to-end
tests need real firmware and are skipped unless you point them at your own copies:
PLAY_IMG=~/Downloads/PLAY_1.0.30.img PLAY_FW=~/fw/BirdDog_PLAY-1.0.34.fw npm test
Deploying
Pushing to main deploys: .github/workflows/deploy.yml runs the tests, uploads public/ with
wrangler and checks the live page is serving the new build. A push that only touches docs doesn't. By hand:
cf-run npx wrangler deploy
It's assets only. There's no Worker, because there's nothing for a server to do. I've kept it off Workers Builds on purpose, so pushing any other branch can't publish to production.
Run your own copy
BirdDog PLAY Flasher is a static page, so hosting it yourself is one container serving the built files — the same files the hosted copy serves, running somewhere that still works when the venue has no internet.
Docker. The image is built by this repo's docker.yml workflow on every
push and published as ghcr.io/stoatworks-labs/birddog-play-flasher:
docker run -d --name birddog-play-flasher --restart unless-stopped -p 8539:80 ghcr.io/stoatworks-labs/birddog-play-flasher:latest
Or docker compose up -d with the docker-compose.yml
in this repo, which maps the same port. Either way it is then at
http://localhost:8539/.
Unraid. Search Community Applications for BirdDog PLAY Flasher — the template is
templates/birddog-play-flasher.xml
in stoatworks-unraid, which is what the CA feed reads.
Stoatworks Burrow lists it under Self-hosted, with the compose file a click away.
The Dockerfile, docker-compose.yml, docker/ and the workflow are
generated from fleet.json in stoatworks-unraid. Change them there and
regenerate rather than editing them here.
Licence
MIT. Not affiliated with, endorsed by, or supported by BirdDog.
Categories
Related apps
Explore more like this
Explore allDetails
ghcr.io/stoatworks-labs/birddog-play-flasher:latestRuntime arguments
- Web UI
http://[IP]:[PORT:80]/- Network
bridge- Shell
sh- Privileged
- false
Template configuration
Host port for the web interface.
- Target
- 80
- Default
- 8539
- Value
- 8539